
ARTFUL EXPERIENCES
The Aviary
Build a towering world of cardboard birds, giant feathers, and flight.
Bookmark
Installations

The Set Up
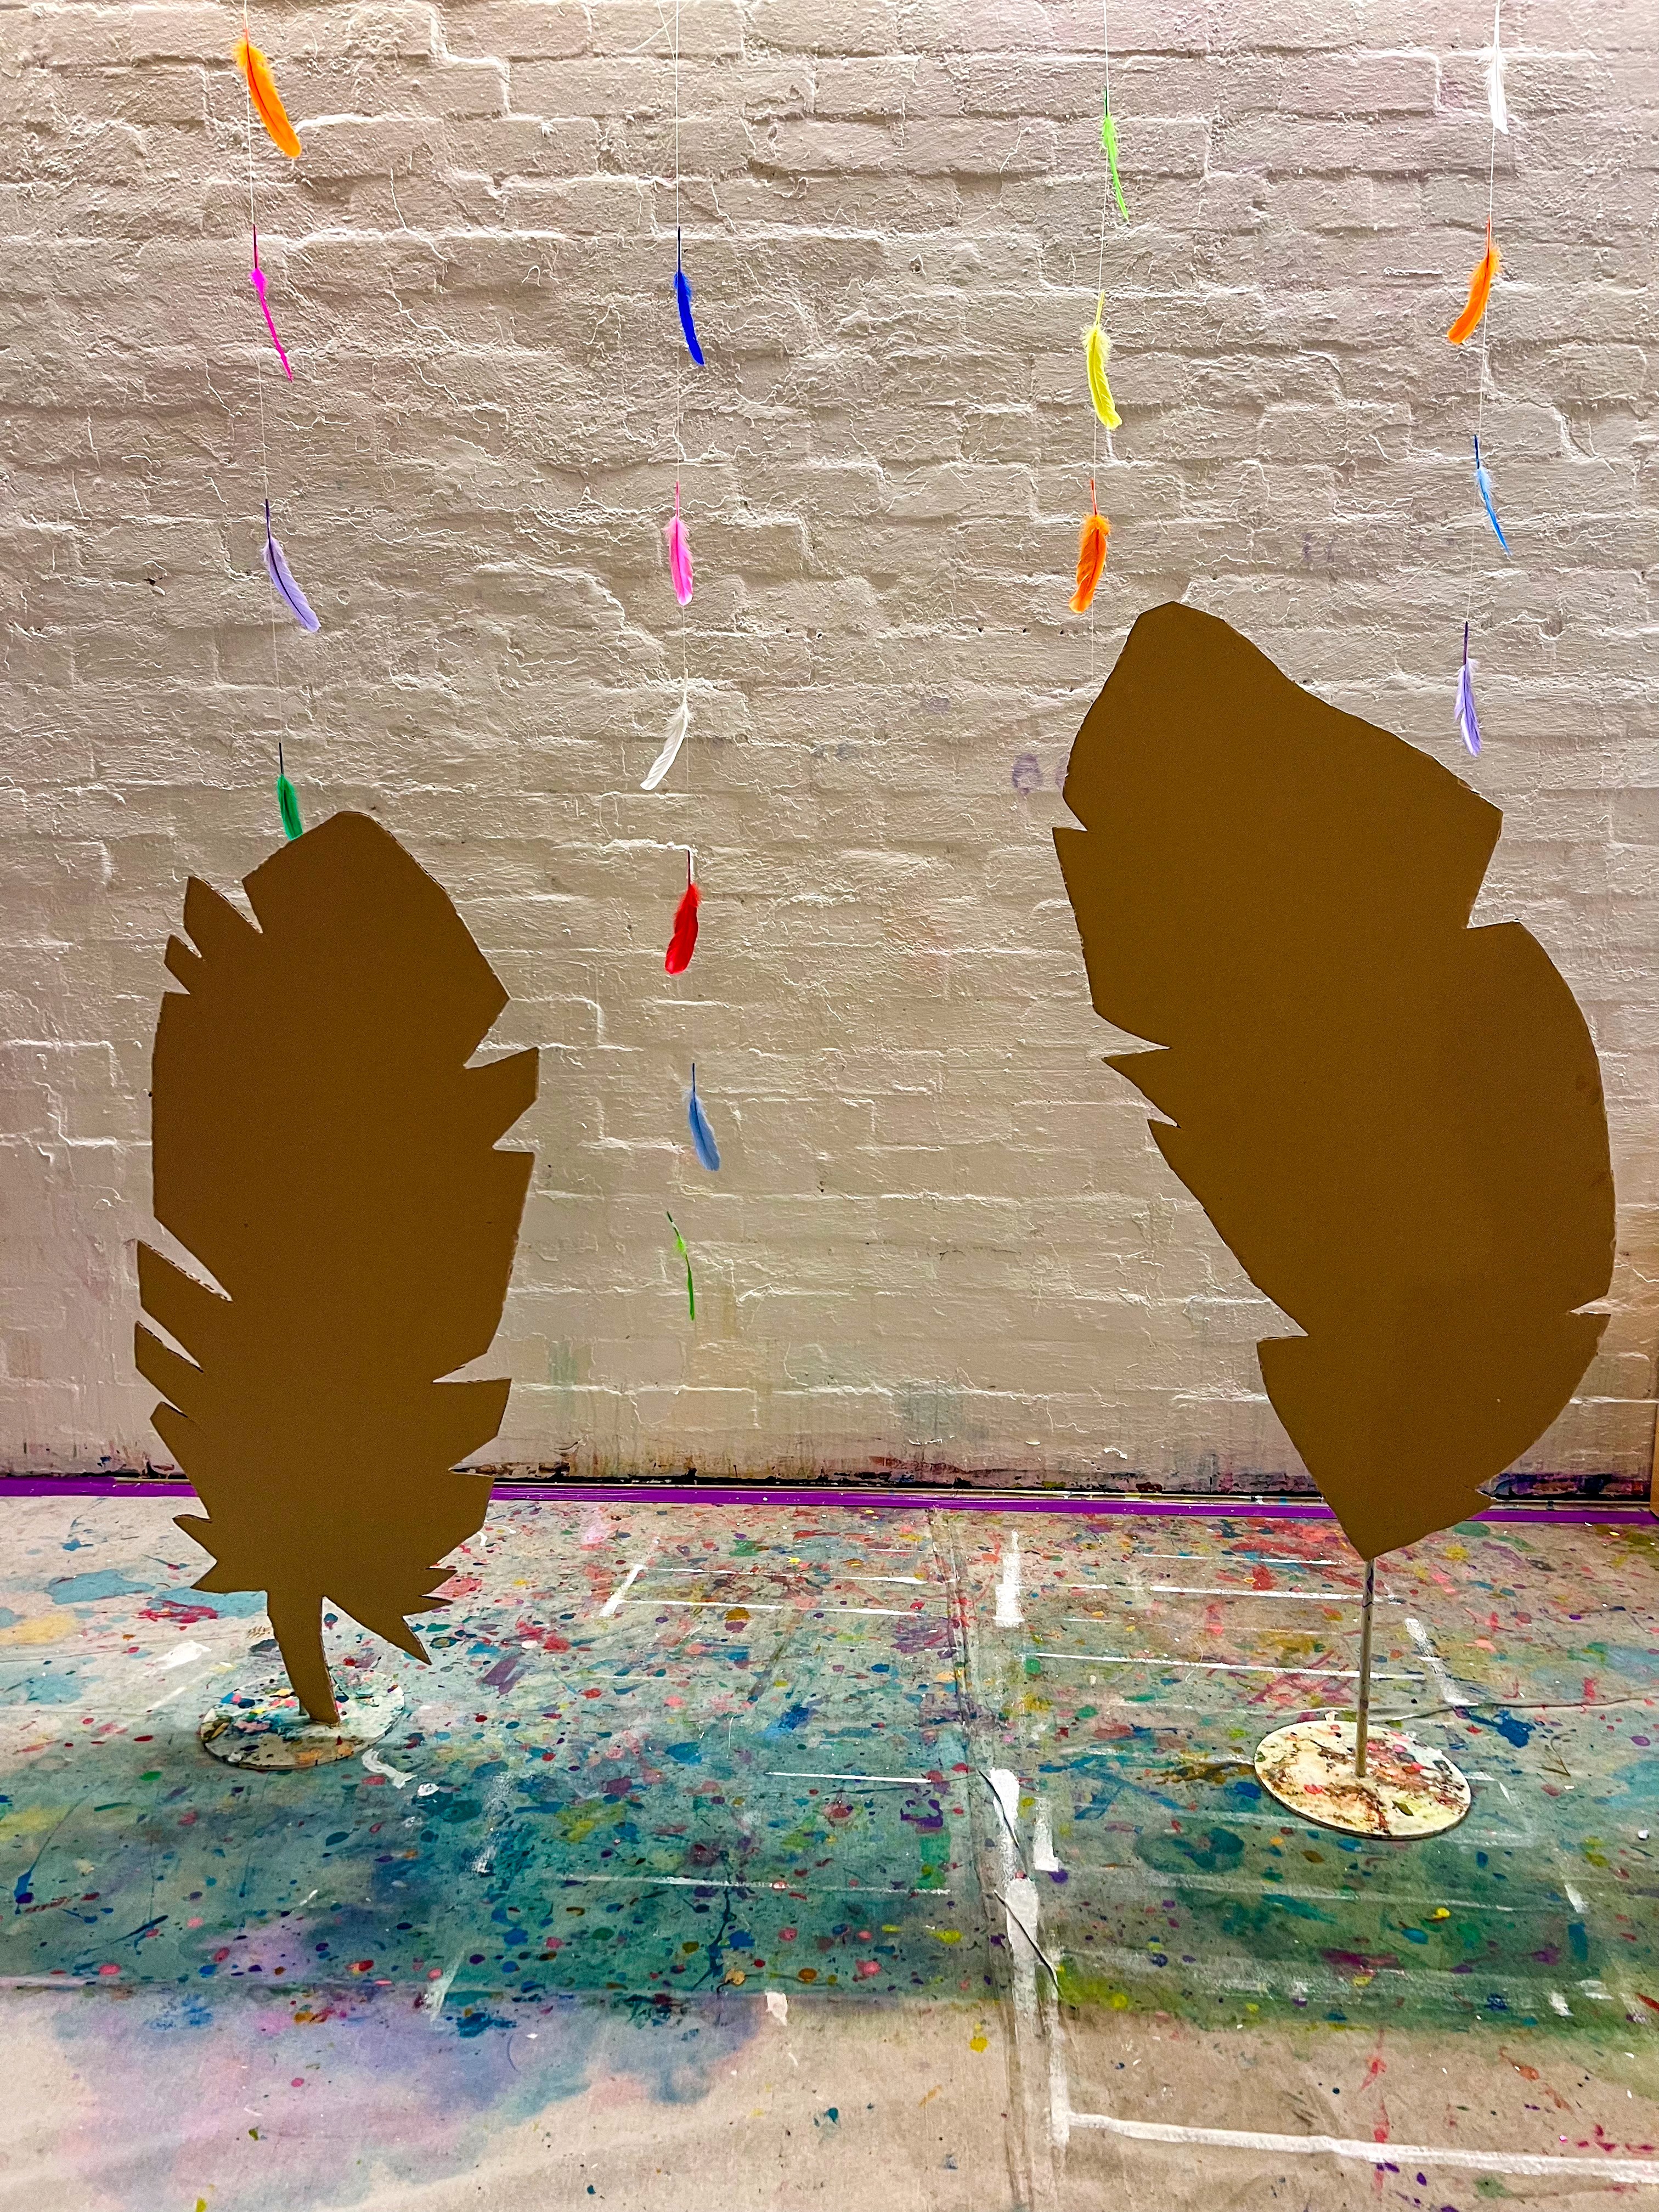
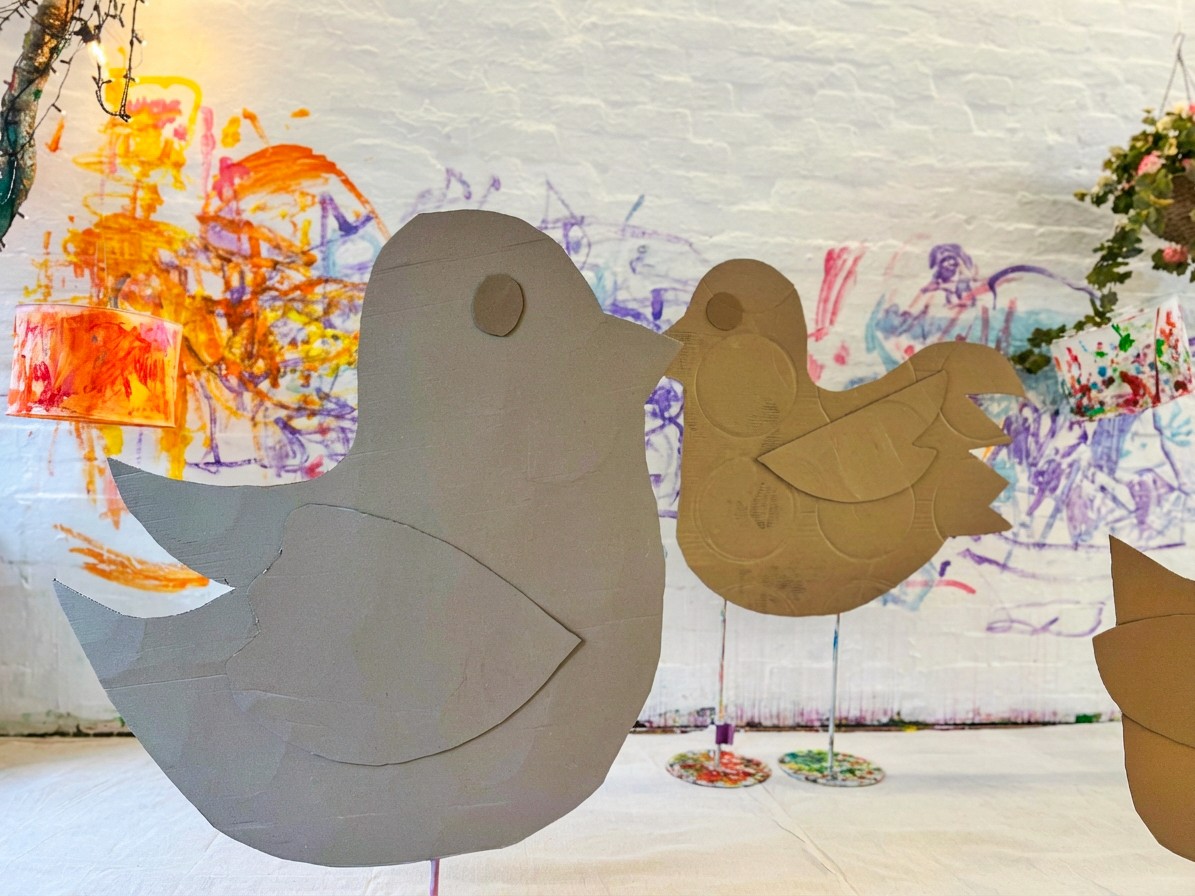
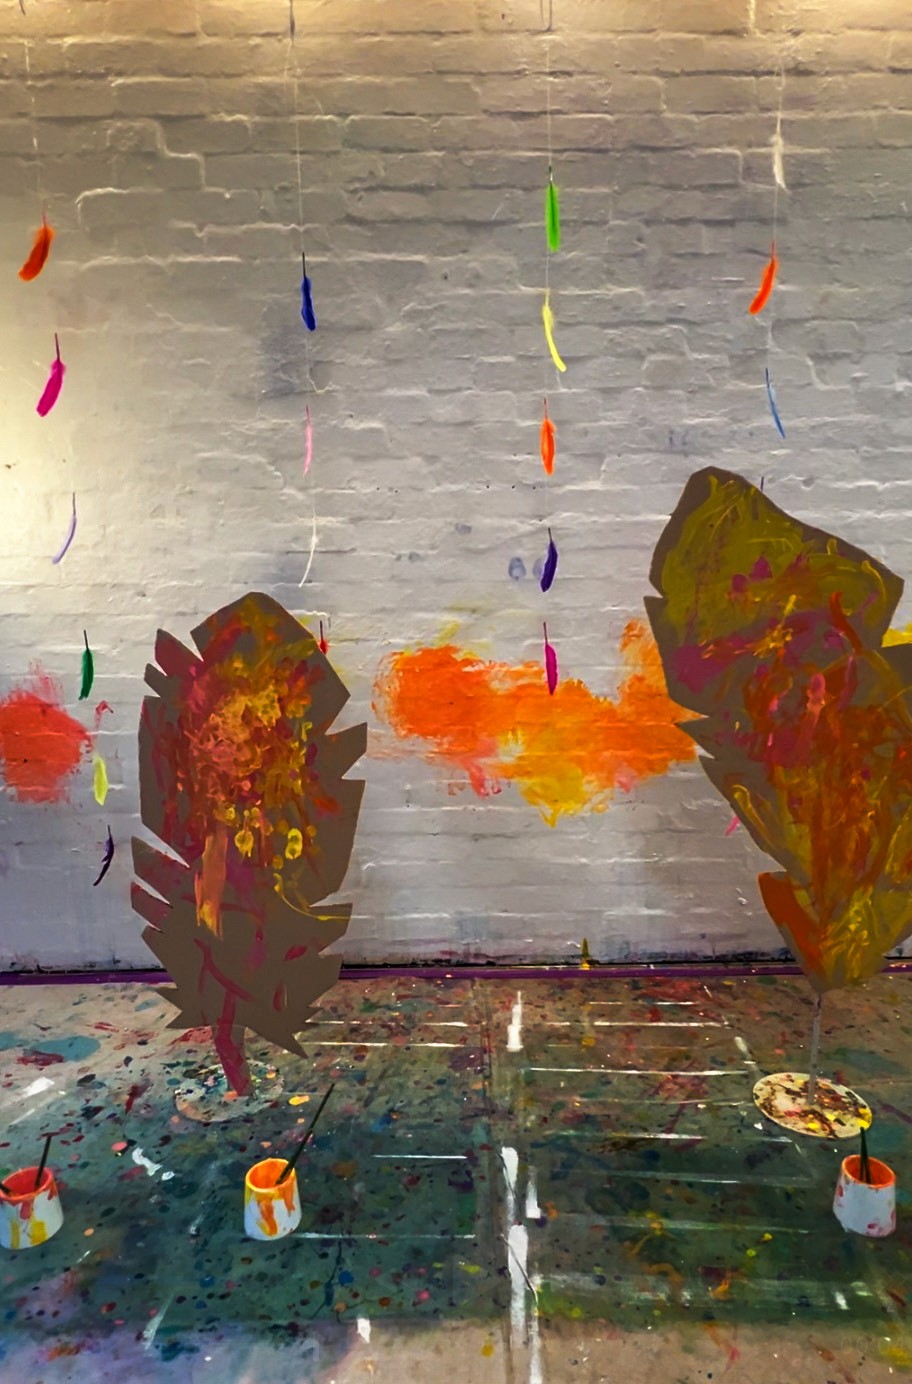
Start by cutting out giant bird shapes from large sheets of cardboard. Don't worry about getting them perfect... wonky wings and oversized beaks are part of the charm. You're building an aviary, and aviaries are meant to be big, layered, and full of life! You'll also want to cut some giant feather shapes to hang alongside the birds. At Smudge, we use metal stands and fishing line to hang the pieces, but you could drape them from a clothesline, tape them to a wall, or string them between two chairs. Whatever works in your space.
For the real feathers, thread about four or five onto a length of fishing line so they hang down in a single line, like a little feathery drop piece. They twist and twirl beautifully. We normally hang four or five of these across the wall and down at different heights, and it creates this gorgeous textured backdrop that really brings the whole installation to life.
The Making
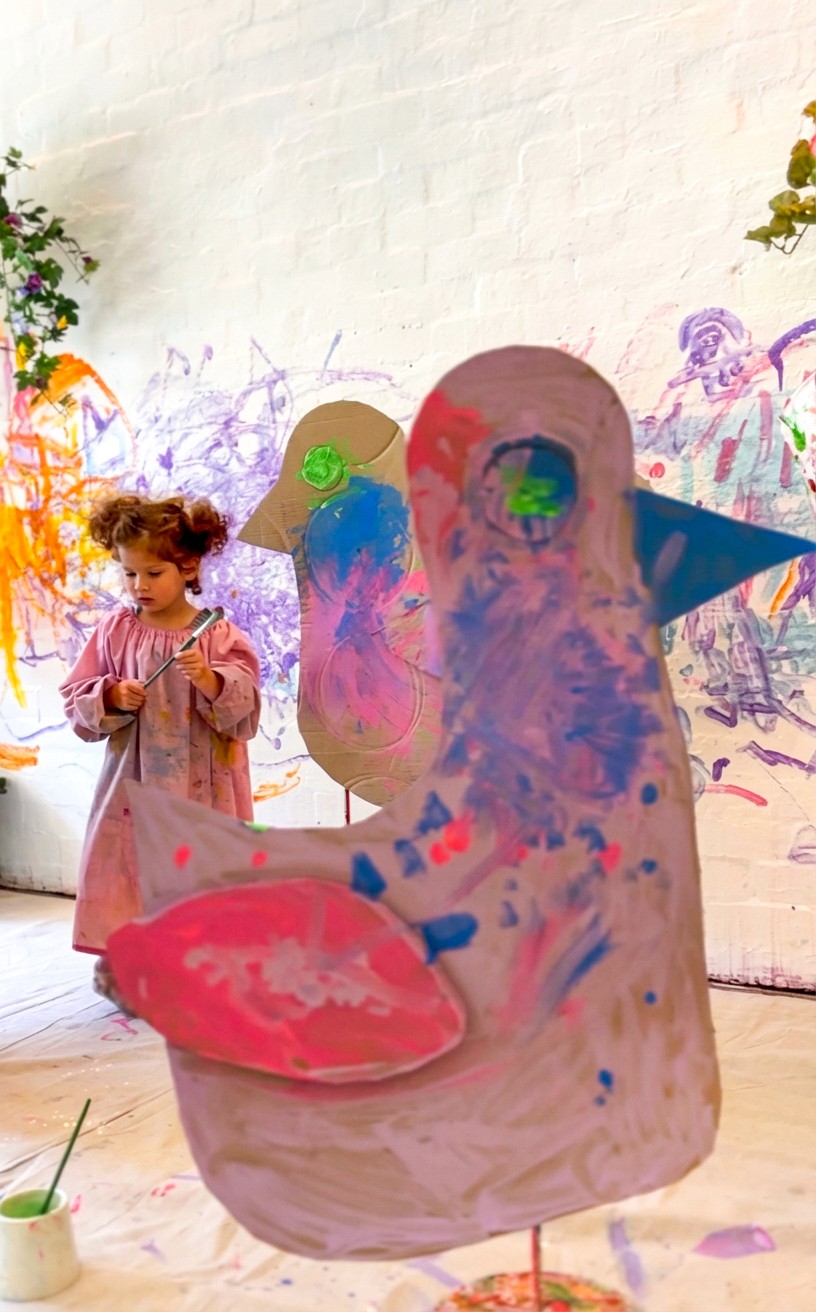
Set out paint, brushes, and collage materials and let artists go to town on their cardboard birds and feathers. Big, bold brush strokes work beautifully because the pieces are large enough to really get into.
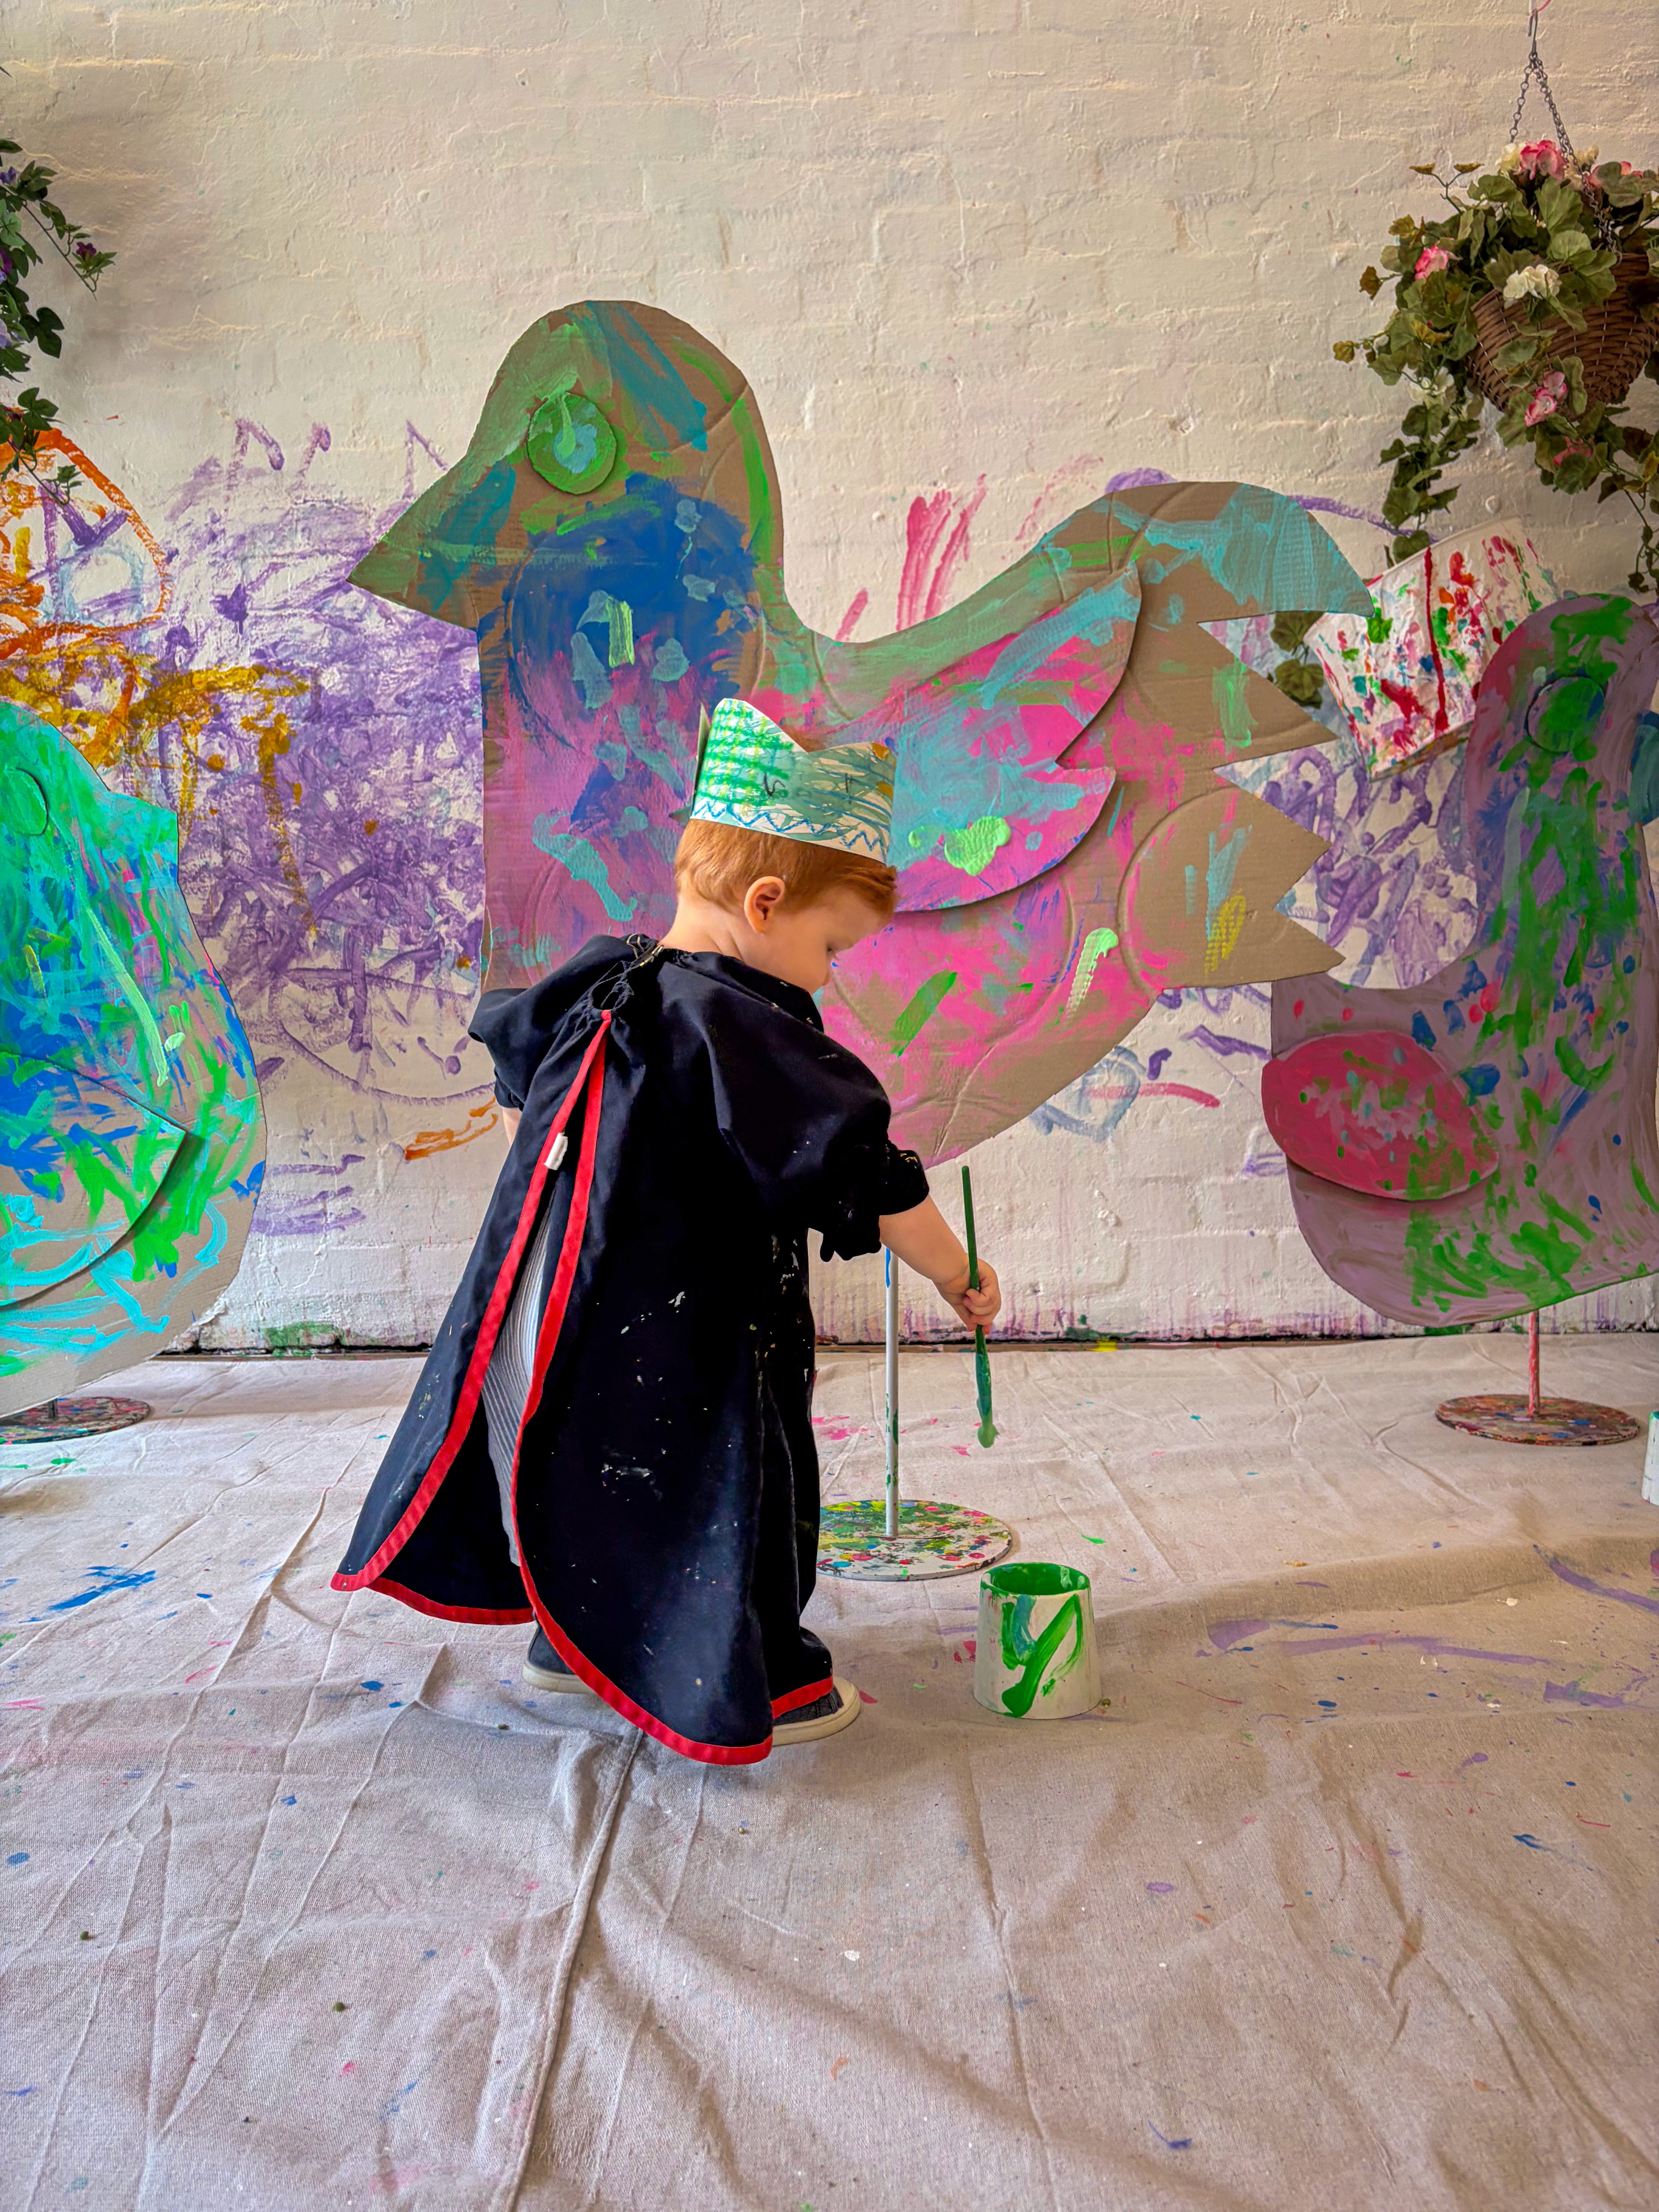
If you're running this over multiple sessions, even better... the aviary will just keep evolving. Hang the cardboard birds and feather drop pieces at varying heights to create a wonderful sense of movement and depth, like walking through a real aviary. You could also pop on some bird call sounds in the background if you want the full experience!

Variations
Scale it down by hanging pieces from a single branch propped in a vase for a tabletop aviary.
You could also make it a collaborative mural on a large wall instead of a hanging installation.

Materials
• Large sheets of cardboard
• Cardboard scissors (Fiskars are our favourite)
• Real feathers, the bigger the better, plus smaller ones for the drop pieces
• Fishing line for threading feather drop pieces and hanging birds
• Metal stands, string, or a clothesline for hanging
• Poster or tempera paints
• Big brushes and sponges
• Collage materials (tissue paper, foil, fabric scraps)
• Tape and glue
• Drop cloth to protect the floor
• Optional: bird call sound effects for atmosphere
Back to Top
The Aviary
Build a towering world of cardboard birds, giant feathers, and flight.
Bookmark
Installations
The Set Up
Start by cutting out giant bird shapes from large sheets of cardboard. Don't worry about getting them perfect... wonky wings and oversized beaks are part of the charm. You're building an aviary, and aviaries are meant to be big, layered, and full of life! You'll also want to cut some giant feather shapes to hang alongside the birds. At Smudge, we use metal stands and fishing line to hang the pieces, but you could drape them from a clothesline, tape them to a wall, or string them between two chairs. Whatever works in your space.
For the real feathers, thread about four or five onto a length of fishing line so they hang down in a single line, like a little feathery drop piece. They twist and twirl beautifully. We normally hang four or five of these across the wall and down at different heights, and it creates this gorgeous textured backdrop that really brings the whole installation to life.
The Making
Set out paint, brushes, and collage materials and let artists go to town on their cardboard birds and feathers. Big, bold brush strokes work beautifully because the pieces are large enough to really get into.
If you're running this over multiple sessions, even better... the aviary will just keep evolving. Hang the cardboard birds and feather drop pieces at varying heights to create a wonderful sense of movement and depth, like walking through a real aviary. You could also pop on some bird call sounds in the background if you want the full experience!
Variations
Scale it down by hanging pieces from a single branch propped in a vase for a tabletop aviary.
You could also make it a collaborative mural on a large wall instead of a hanging installation.
Materials
• Large sheets of cardboard
• Cardboard scissors (Fiskars are our favourite)
• Real feathers, the bigger the better, plus smaller ones for the drop pieces
• Fishing line for threading feather drop pieces and hanging birds
• Metal stands, string, or a clothesline for hanging
• Poster or tempera paints
• Big brushes and sponges
• Collage materials (tissue paper, foil, fabric scraps)
• Tape and glue
• Drop cloth to protect the floor
• Optional: bird call sound effects for atmosphere
Back to Top
Feather Brushes
Craft your own magical painting tools from sticks, wire, and real feathers.
Bookmark
Creative Exploration

The Set Up
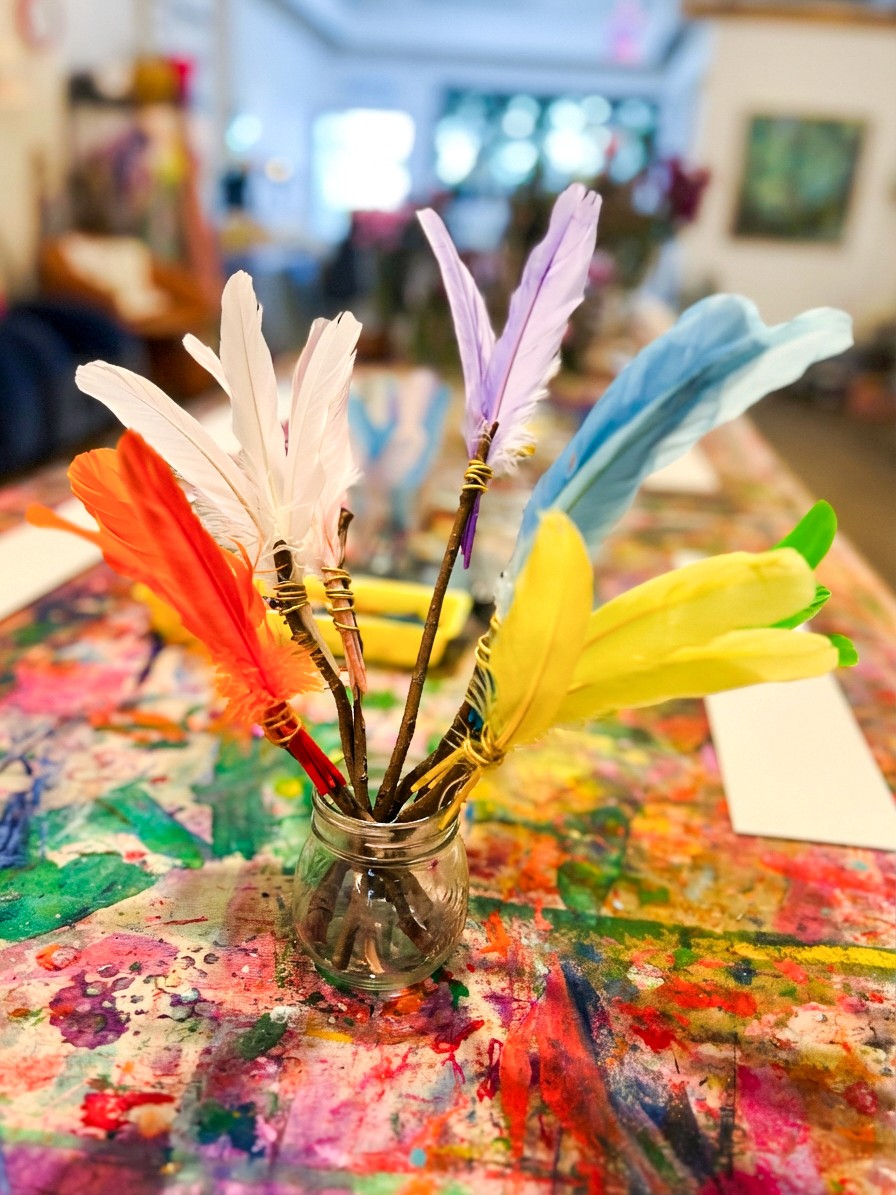
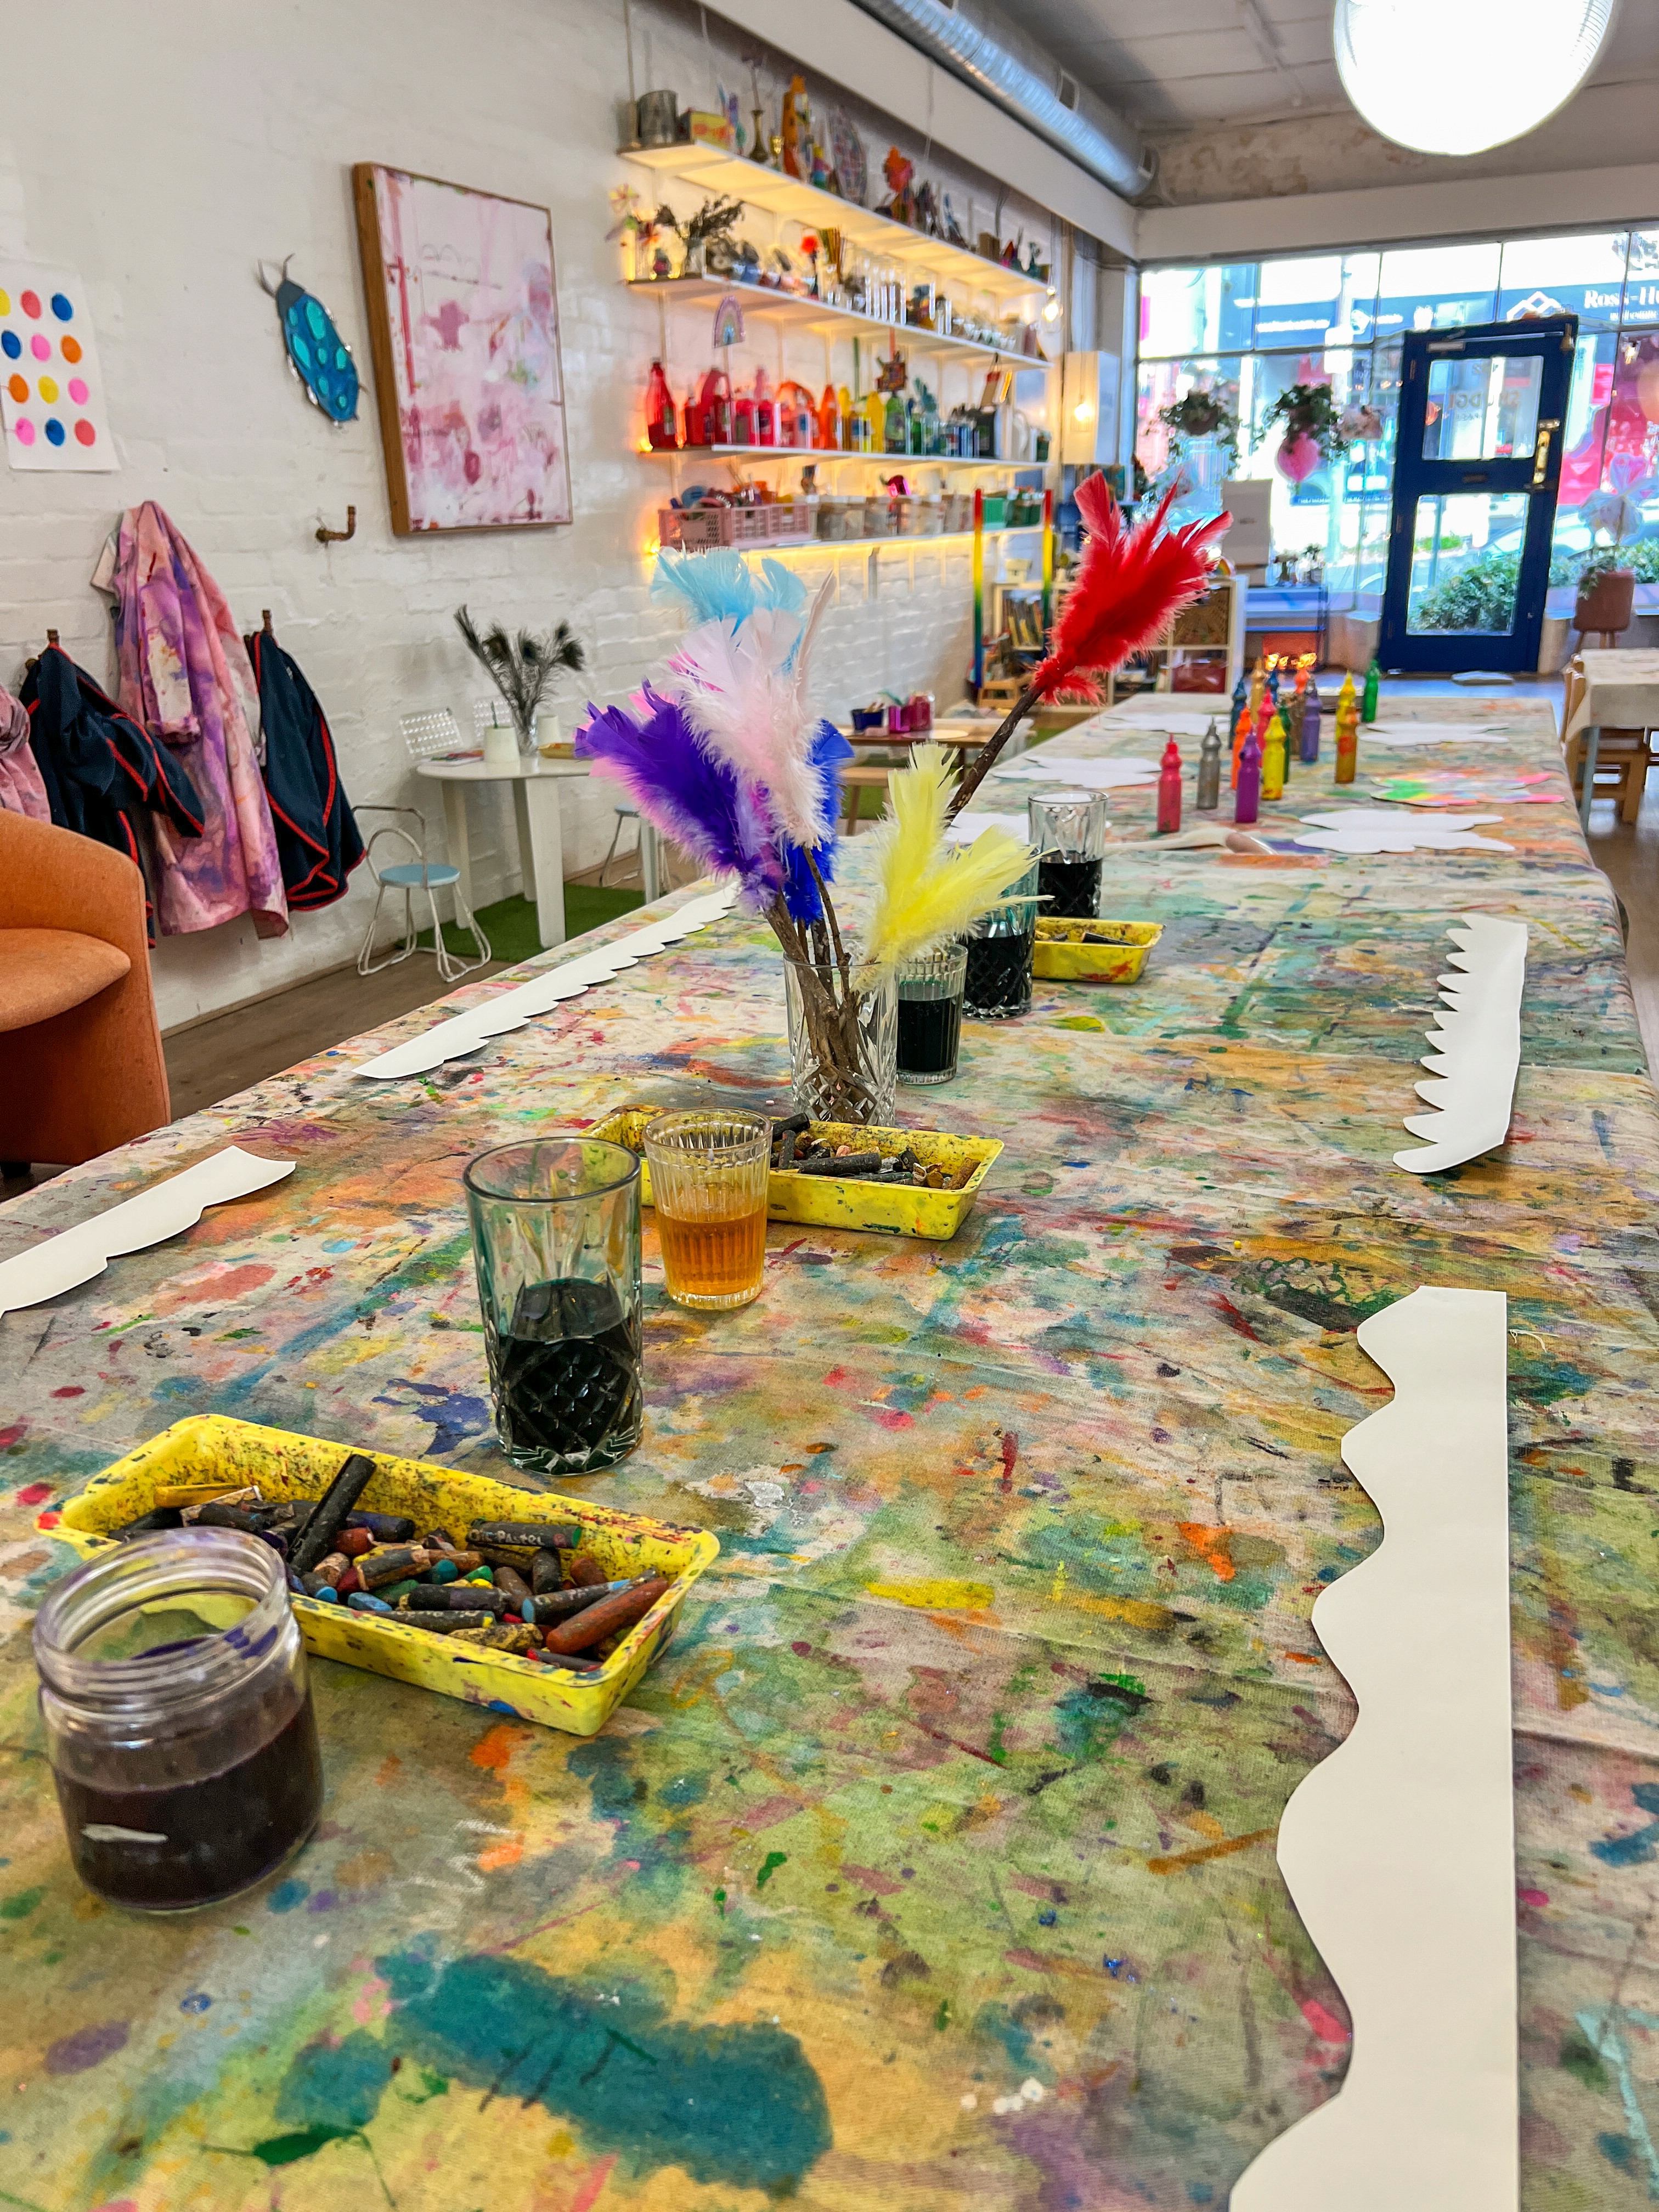
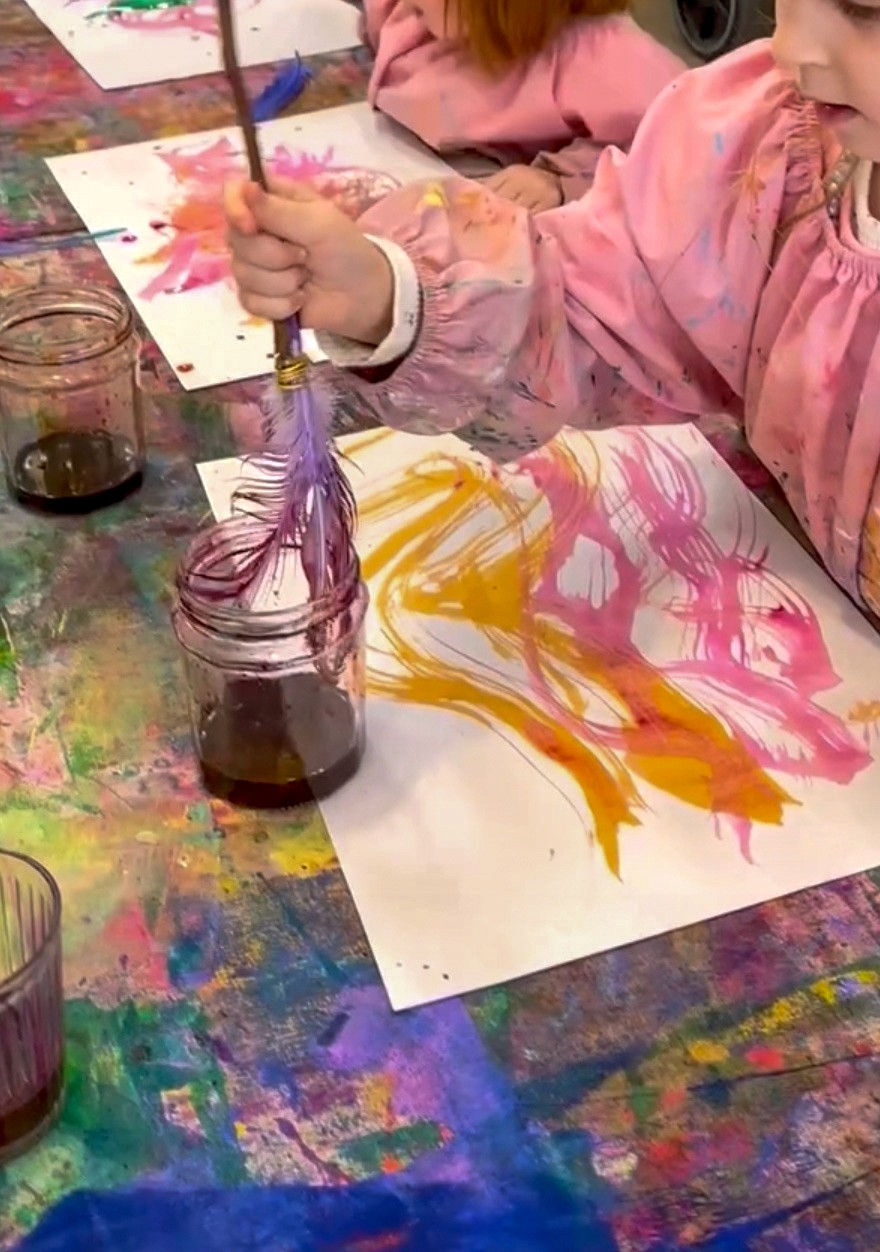
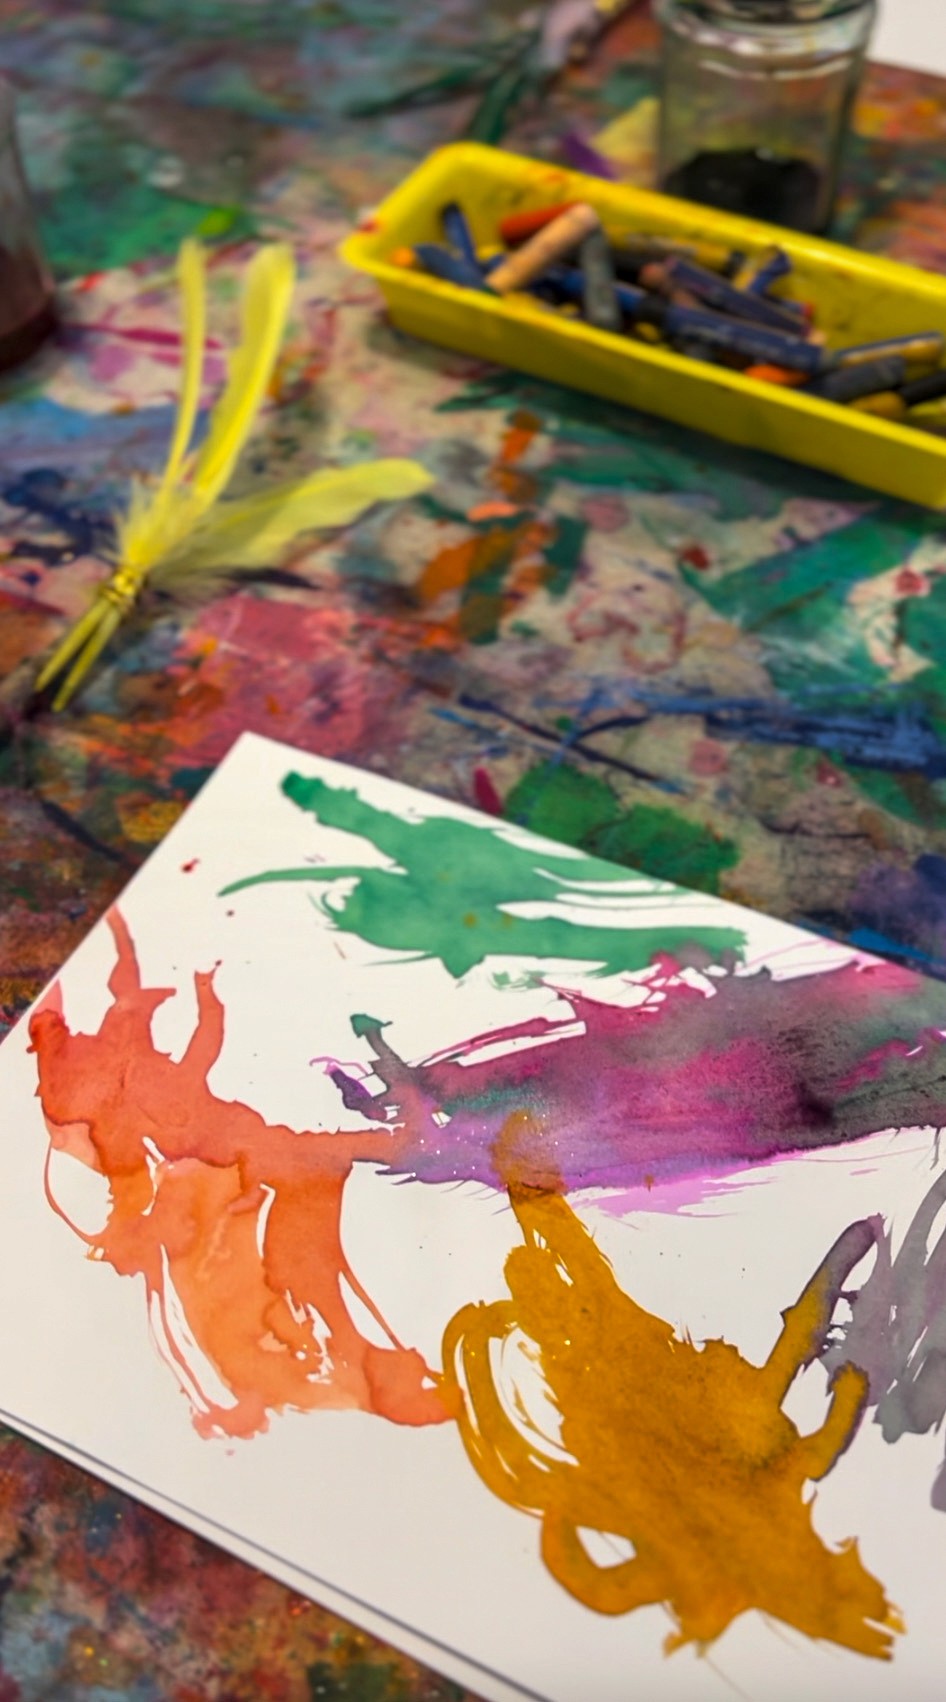
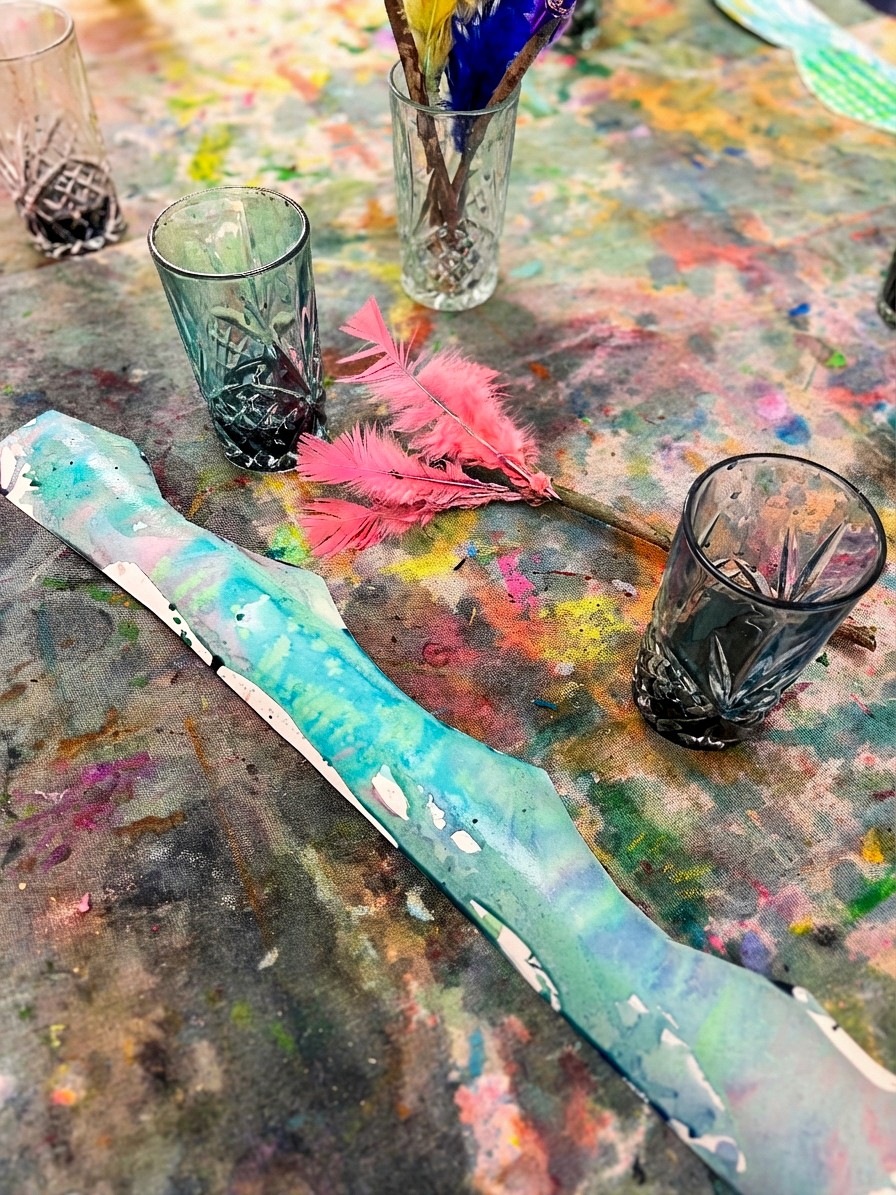
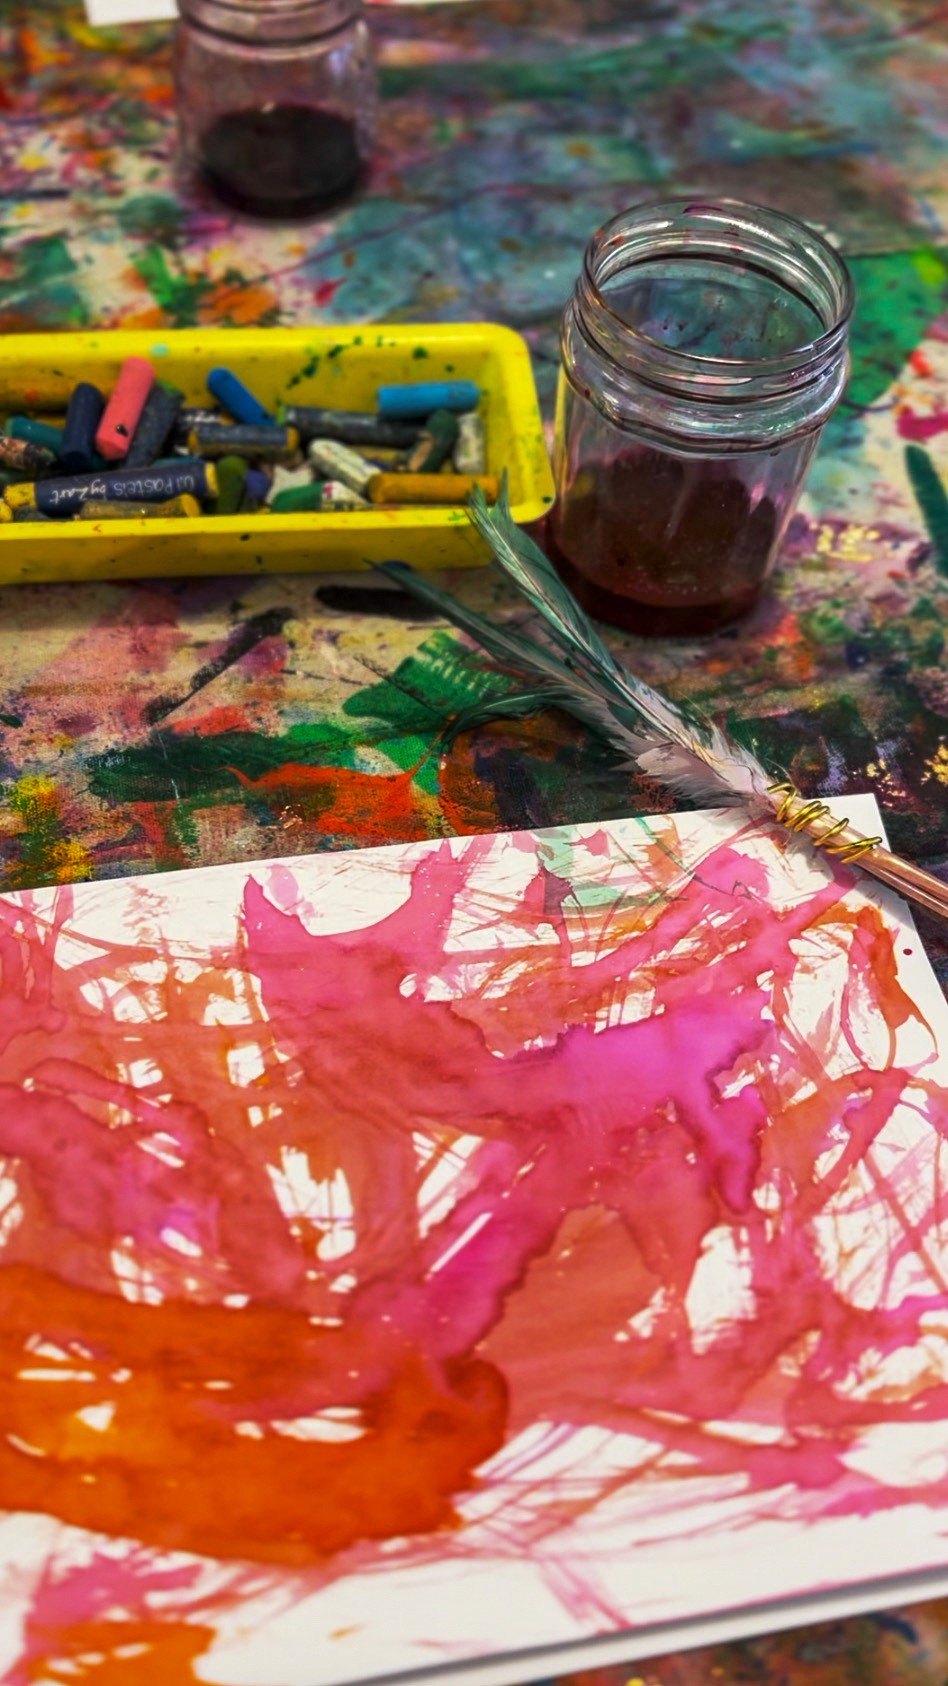
There's something really special about painting with a tool you've made yourself. These feather brushes are simple to put together and they create the most incredible marks... soft, sweeping, completely unpredictable. Gather sticks for handles (we like ones about the length of a pencil, but anything goes), feathers in a range of sizes, and florist wire. The wire gives the brushes a magical feel and adds structure. Just wrap it around the stick and feathers to hold everything together. You'll want about five or so feathers per brush. Set out liquid watercolour in jars alongside oil pastels. You could use plain watercolour paper, or we've had paper crown bases ready for kids to paint on.
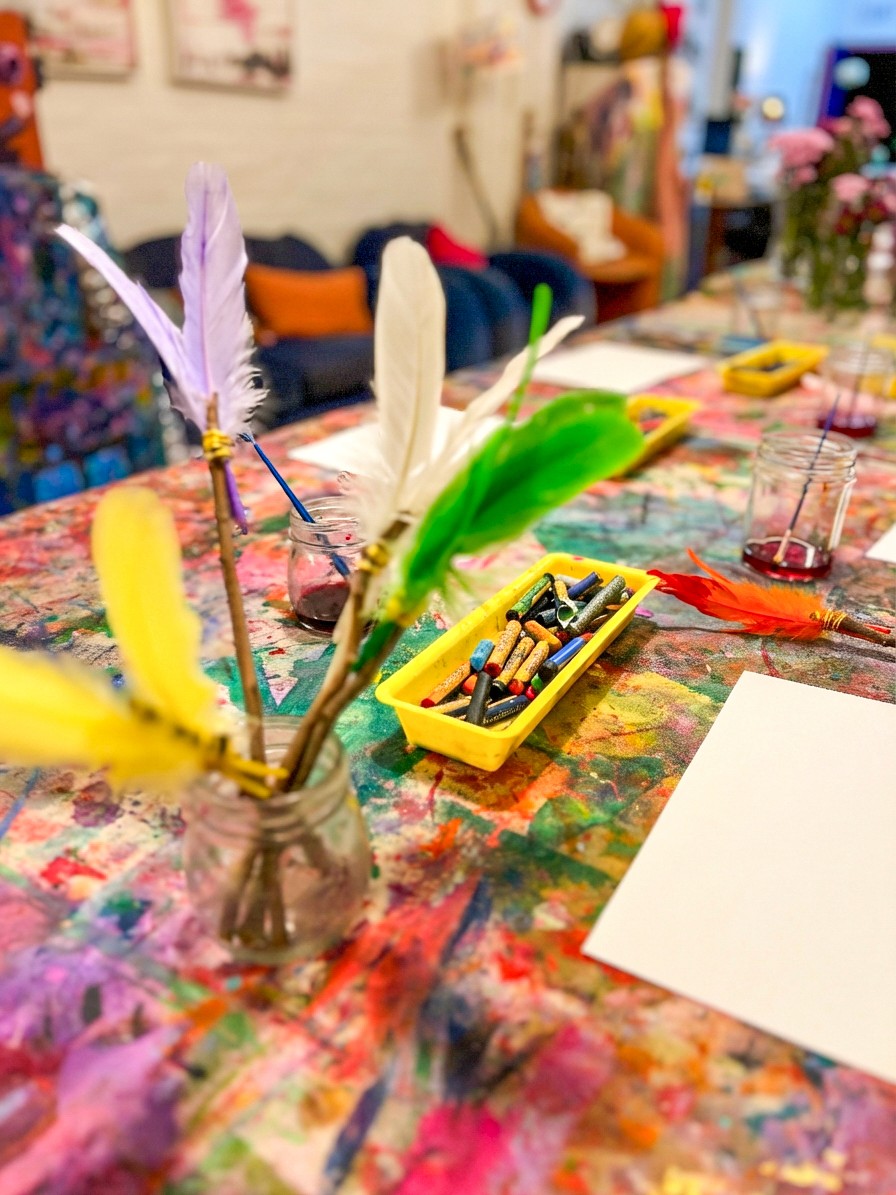
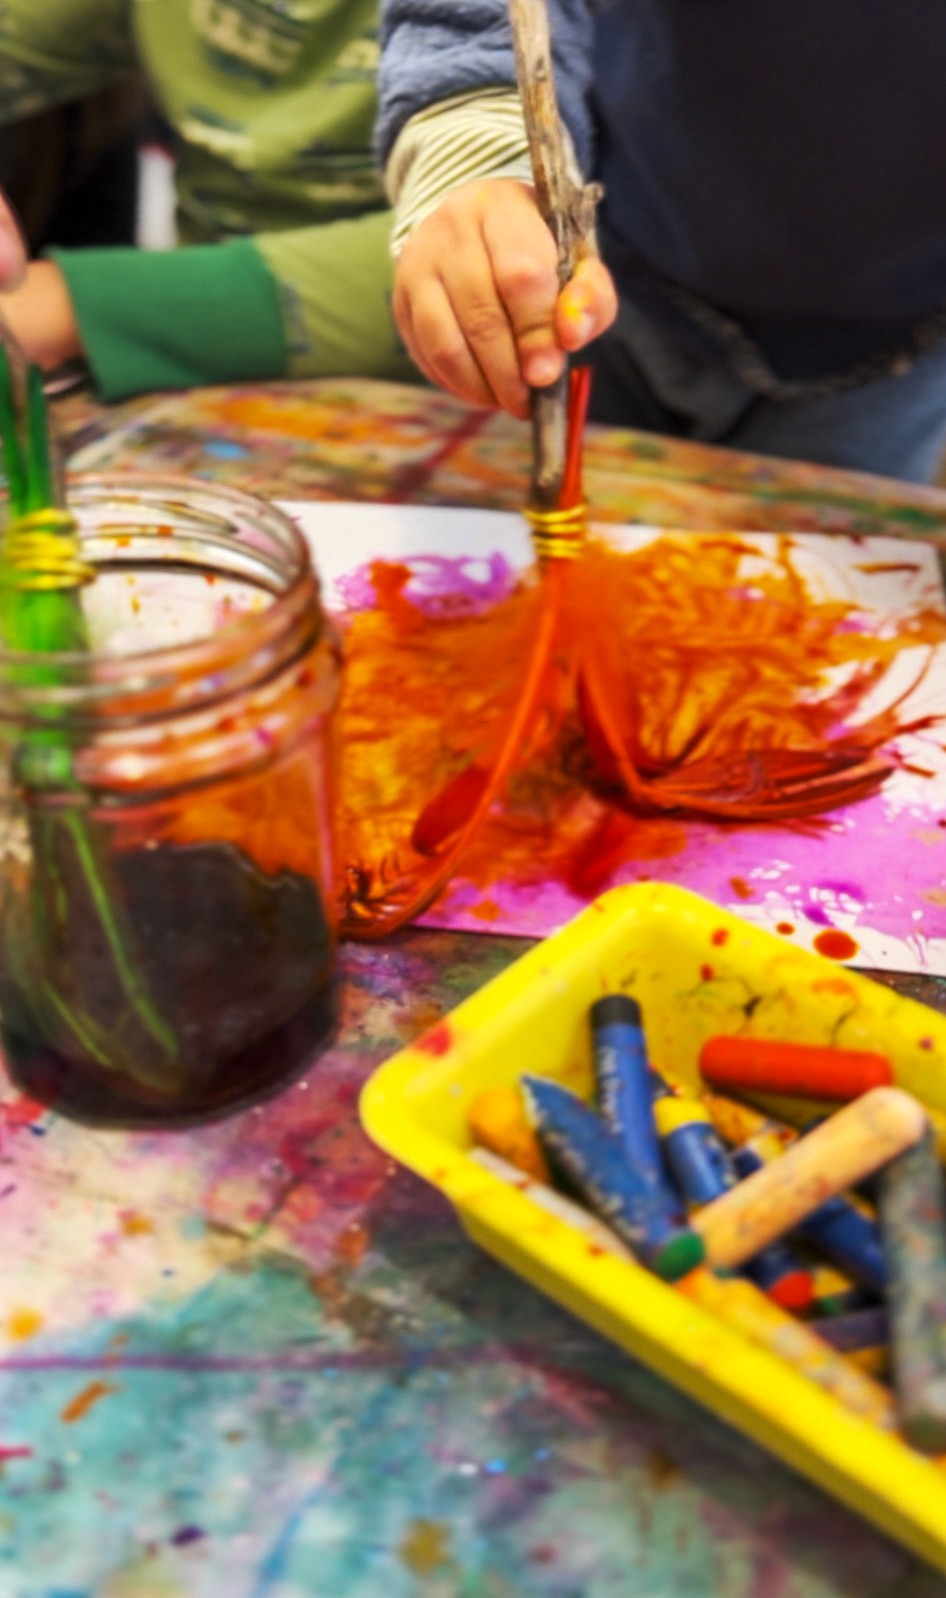
The Making
Let artists start by making their brushes, wrapping feathers onto sticks with wire, experimenting with different feather sizes and arrangements. It's fun to see the variety of brushes that come out of this... some carefully constructed, others wild and full. Once the brushes are ready, it's time to paint. The marks feather brushes make are gorgeous: light, wispy strokes that look completely different from anything a regular brush can do. Encourage artists to try sweeping motions, dabbing, dragging, and twirling. Layering liquid watercolour with oil pastel resist creates beautiful effects too.

Variations
Try using the feather brushes on fabric instead of paper for a completely different texture.
You could also pair this with the Peacock Still Life activity... paint the still life using the brushes you've just made!
Materials
• Sticks (roughly pencil length)
• Feathers, a variety of sizes
• Florist wire
• Liquid watercolour in jars
• Oil pastels
• Watercolour paper
• Optional: paper crown bases
• Scissors
Back to Top
Feather Brushes
Craft your own magical painting tools from sticks, wire, and real feathers.
Bookmark
Creative Exploration
The Set Up
There's something really special about painting with a tool you've made yourself. These feather brushes are simple to put together and they create the most incredible marks... soft, sweeping, completely unpredictable. Gather sticks for handles (we like ones about the length of a pencil, but anything goes), feathers in a range of sizes, and florist wire. The wire gives the brushes a magical feel and adds structure. Just wrap it around the stick and feathers to hold everything together. You'll want about five or so feathers per brush. Set out liquid watercolour in jars alongside oil pastels. You could use plain watercolour paper, or we've had paper crown bases ready for kids to paint on.
The Making
Let artists start by making their brushes, wrapping feathers onto sticks with wire, experimenting with different feather sizes and arrangements. It's fun to see the variety of brushes that come out of this... some carefully constructed, others wild and full. Once the brushes are ready, it's time to paint. The marks feather brushes make are gorgeous: light, wispy strokes that look completely different from anything a regular brush can do. Encourage artists to try sweeping motions, dabbing, dragging, and twirling. Layering liquid watercolour with oil pastel resist creates beautiful effects too.
Variations
Try using the feather brushes on fabric instead of paper for a completely different texture.
You could also pair this with the Peacock Still Life activity... paint the still life using the brushes you've just made!
Materials
• Sticks (roughly pencil length)
• Feathers, a variety of sizes
• Florist wire
• Liquid watercolour in jars
• Oil pastels
• Watercolour paper
• Optional: paper crown bases
• Scissors
Back to Top
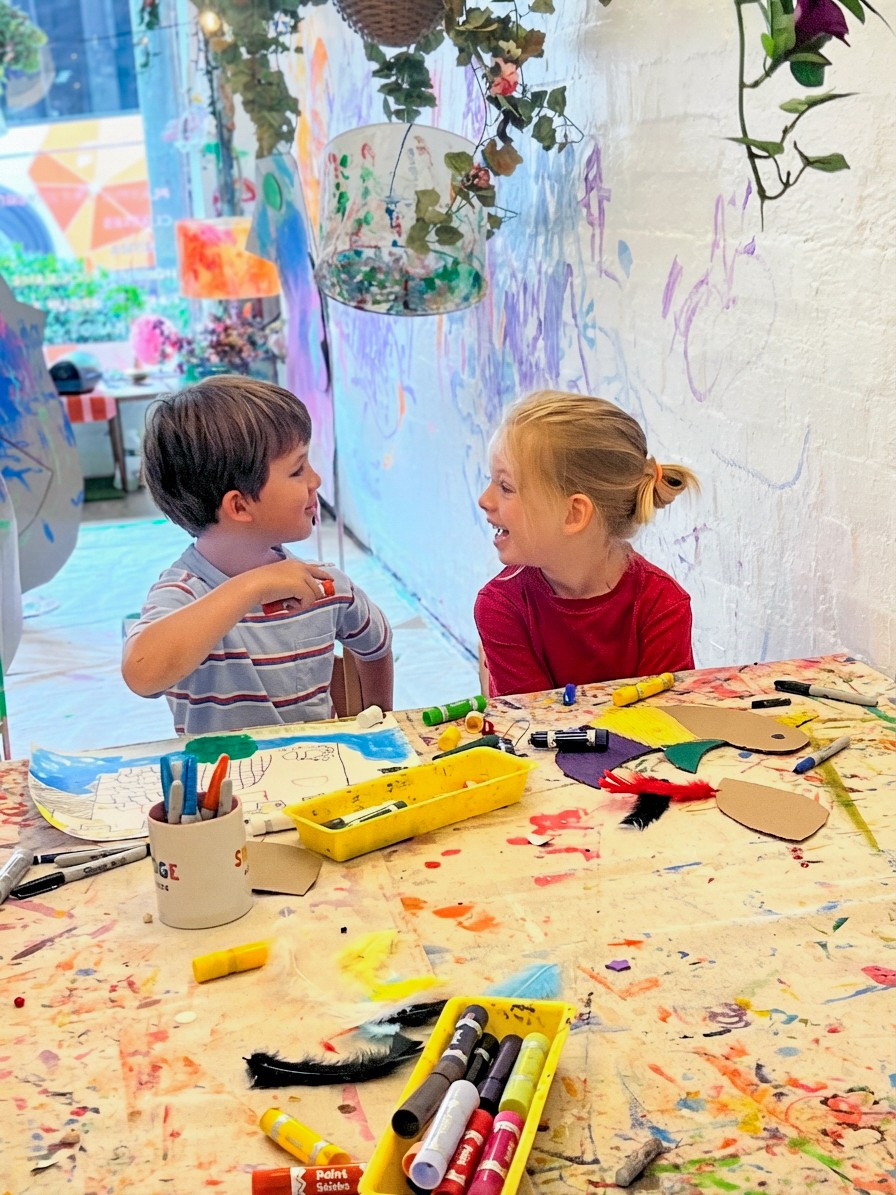
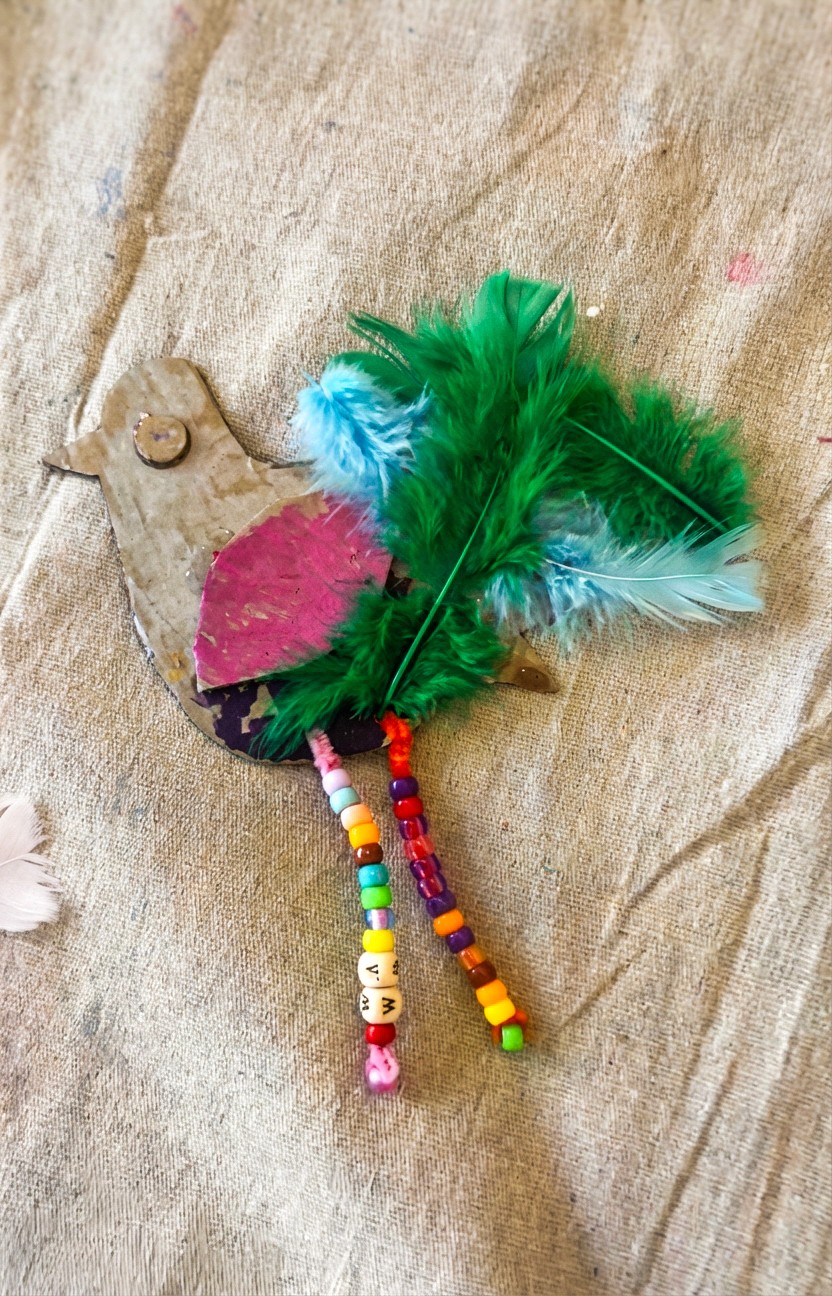
Build a Bird
Birds bursting with personality.
Bookmark
Sculpture

The Set Up
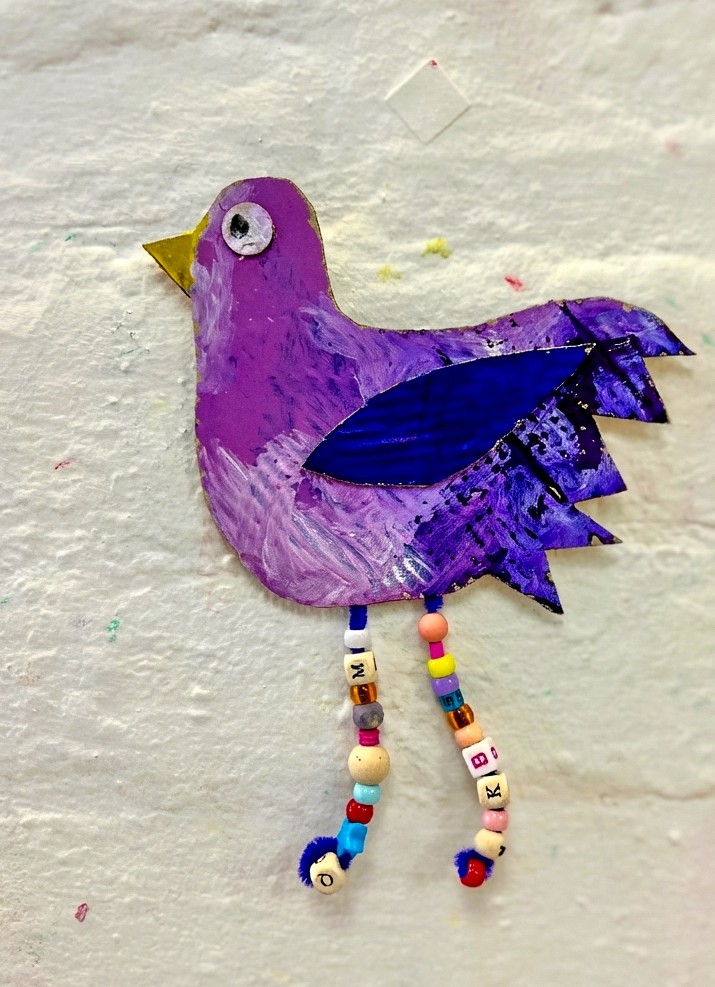
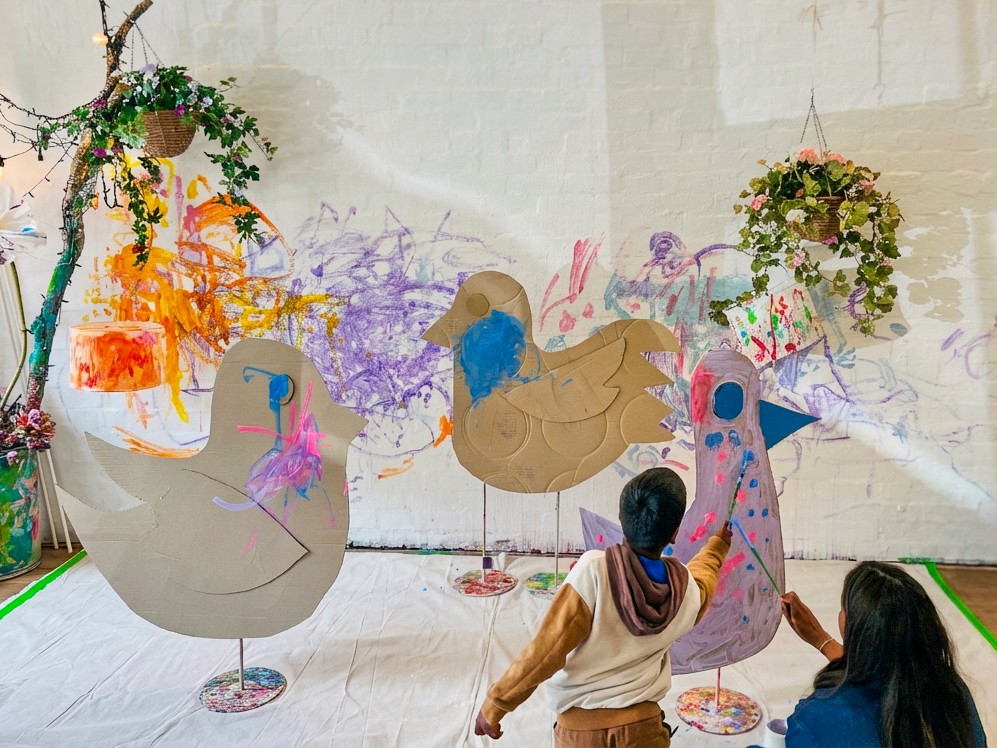
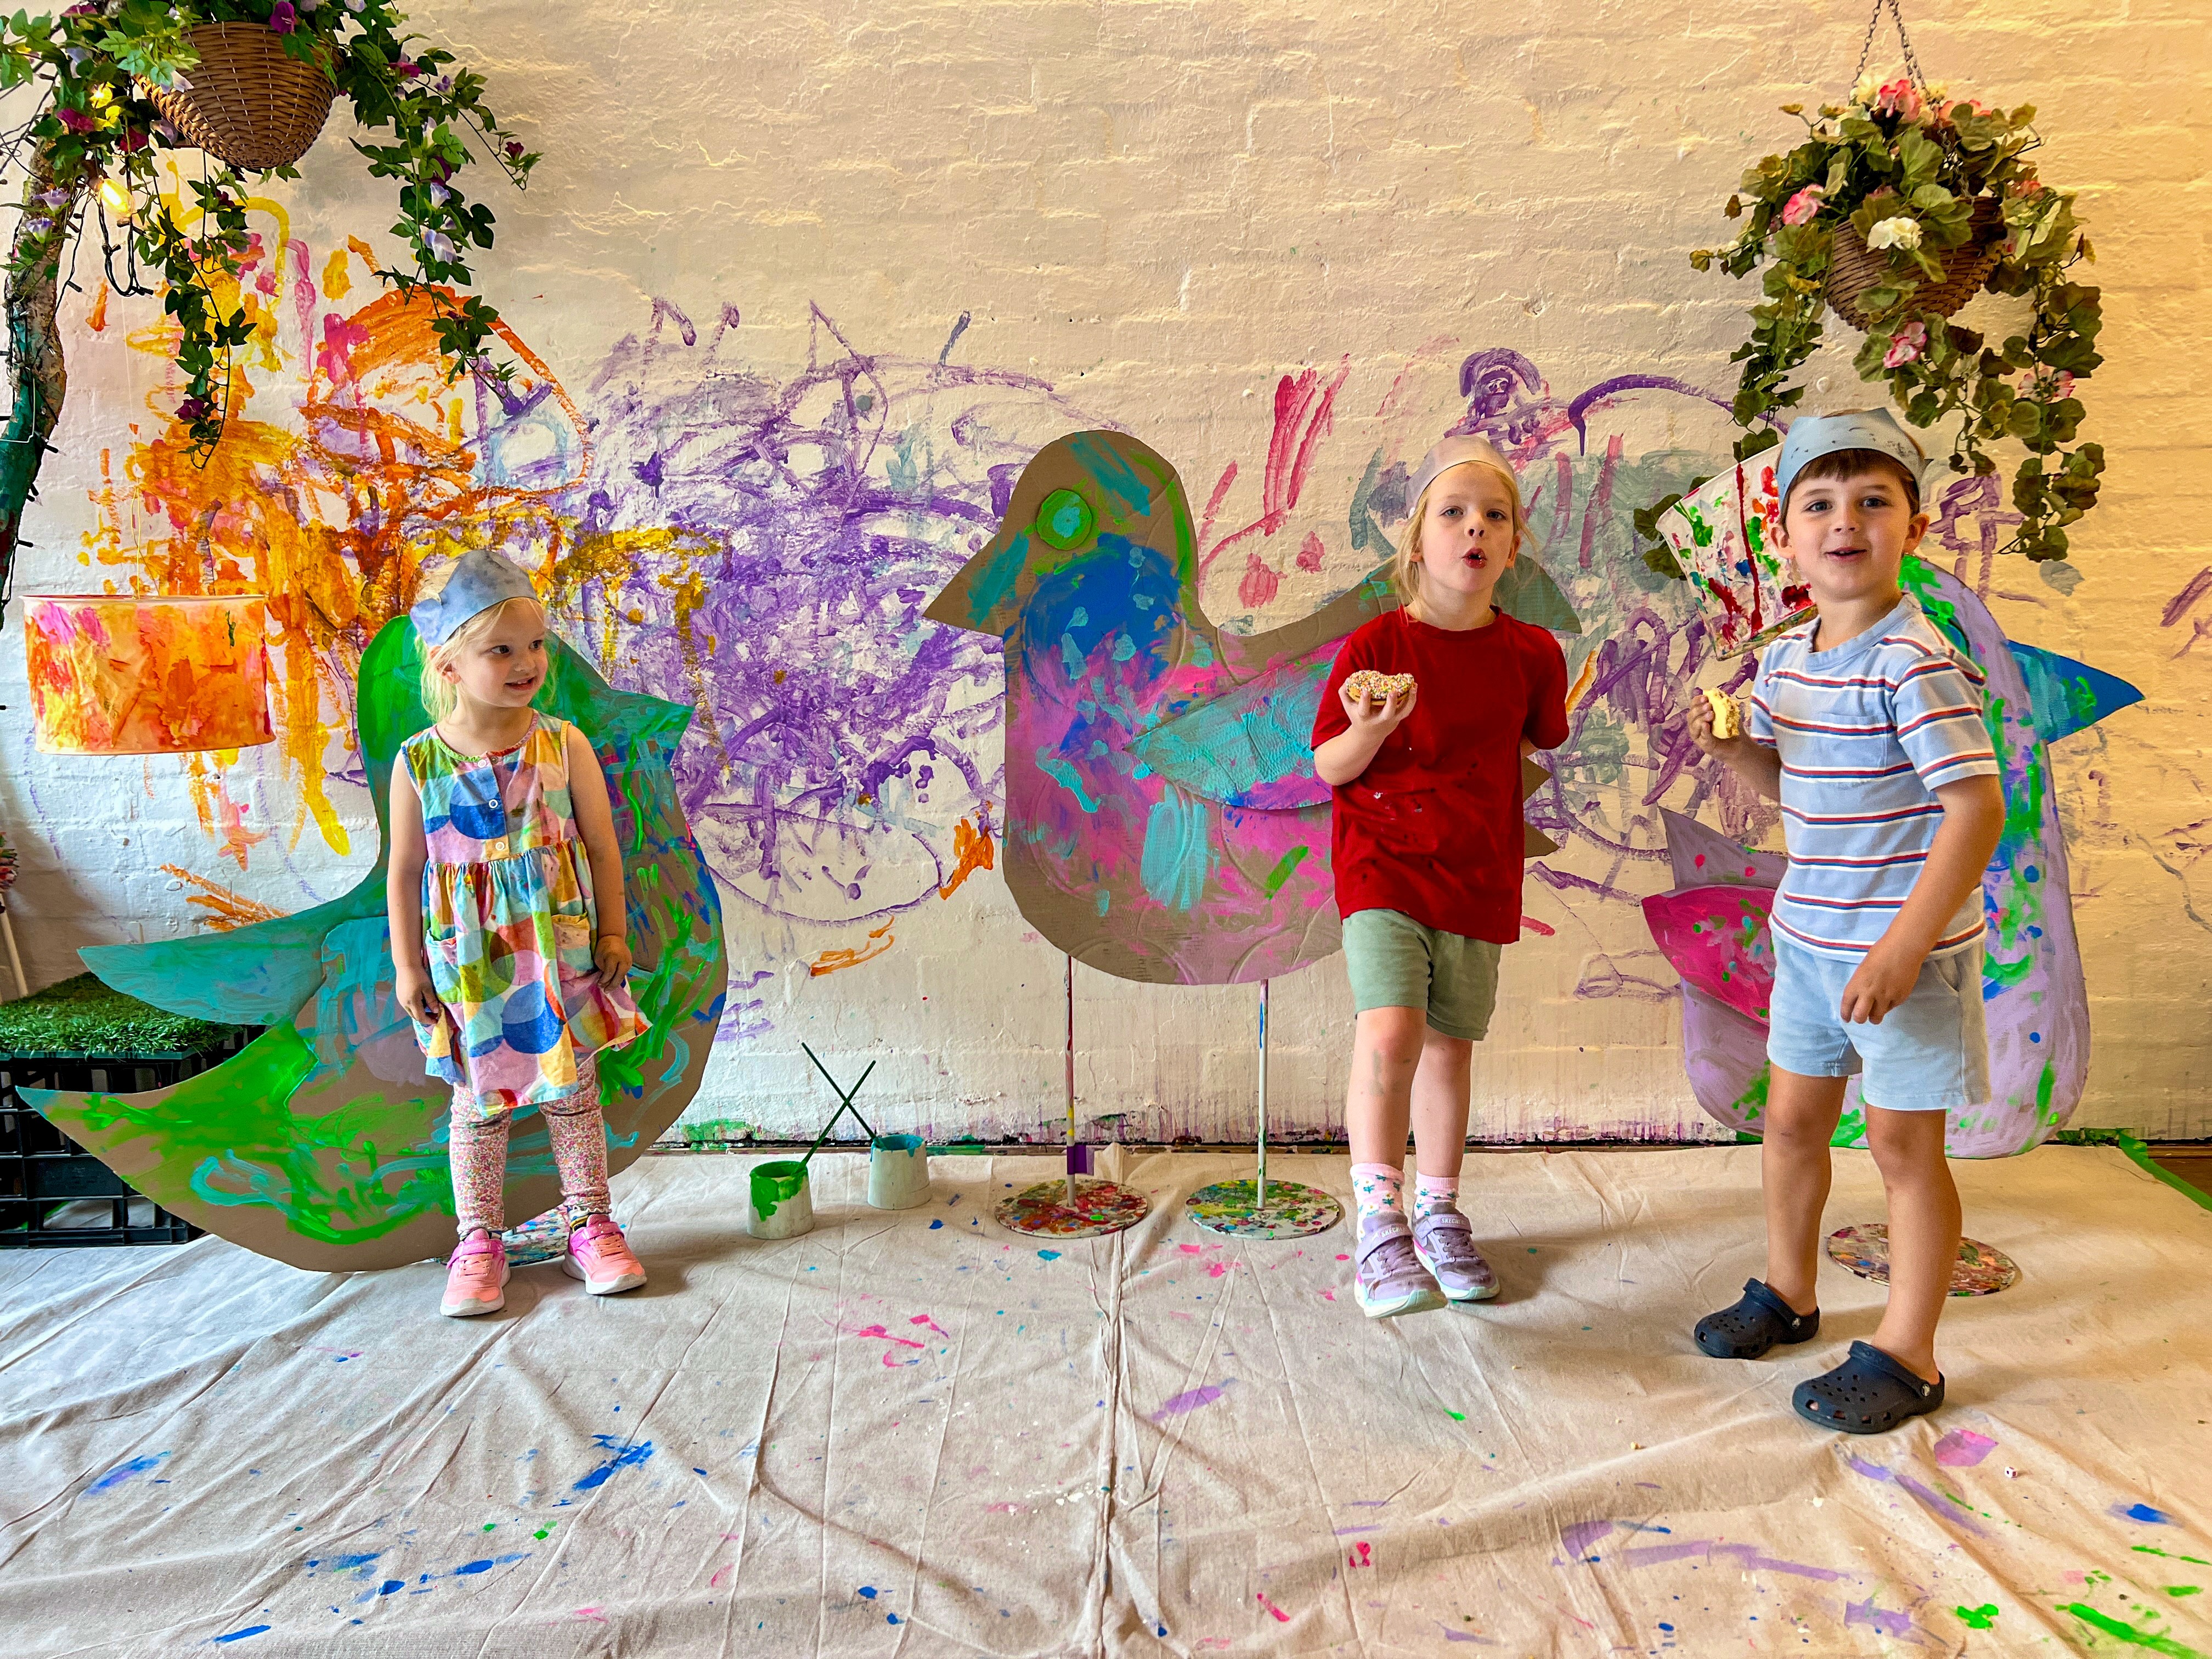
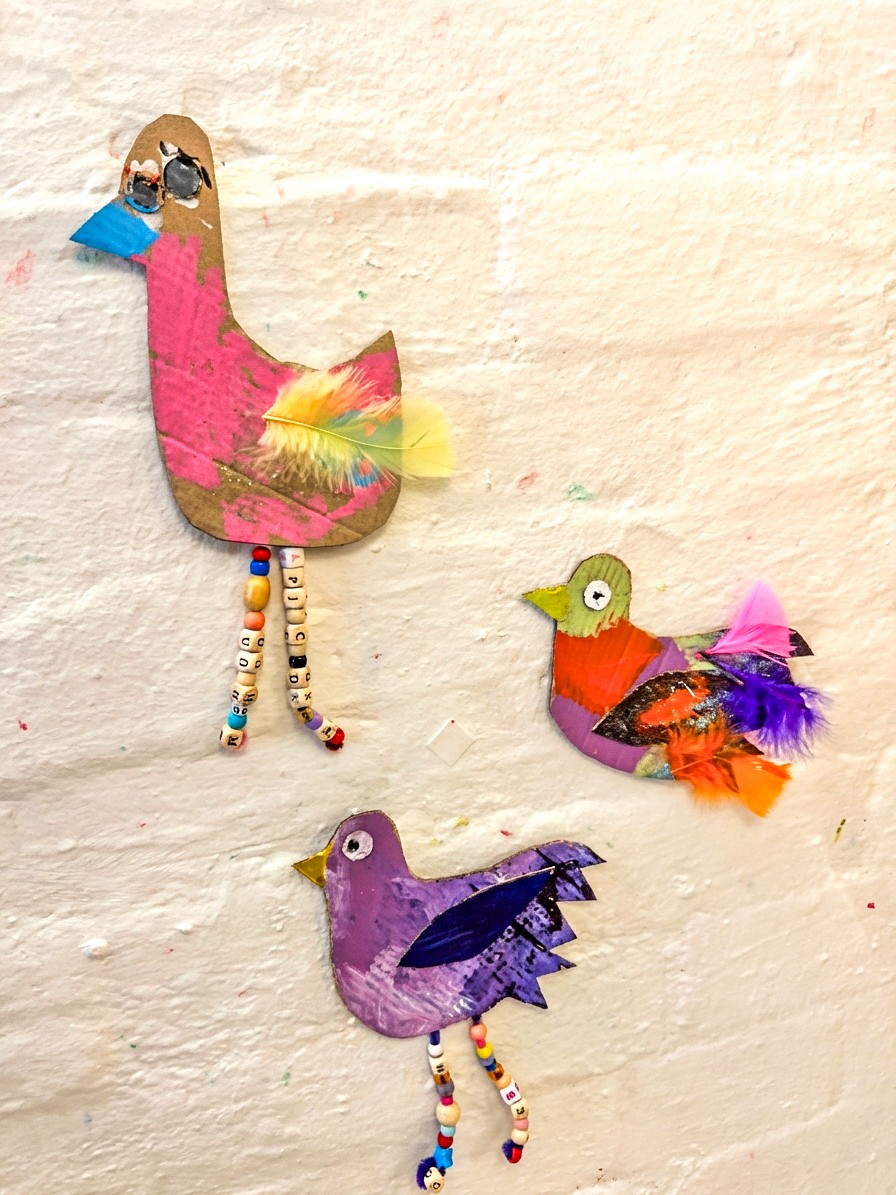
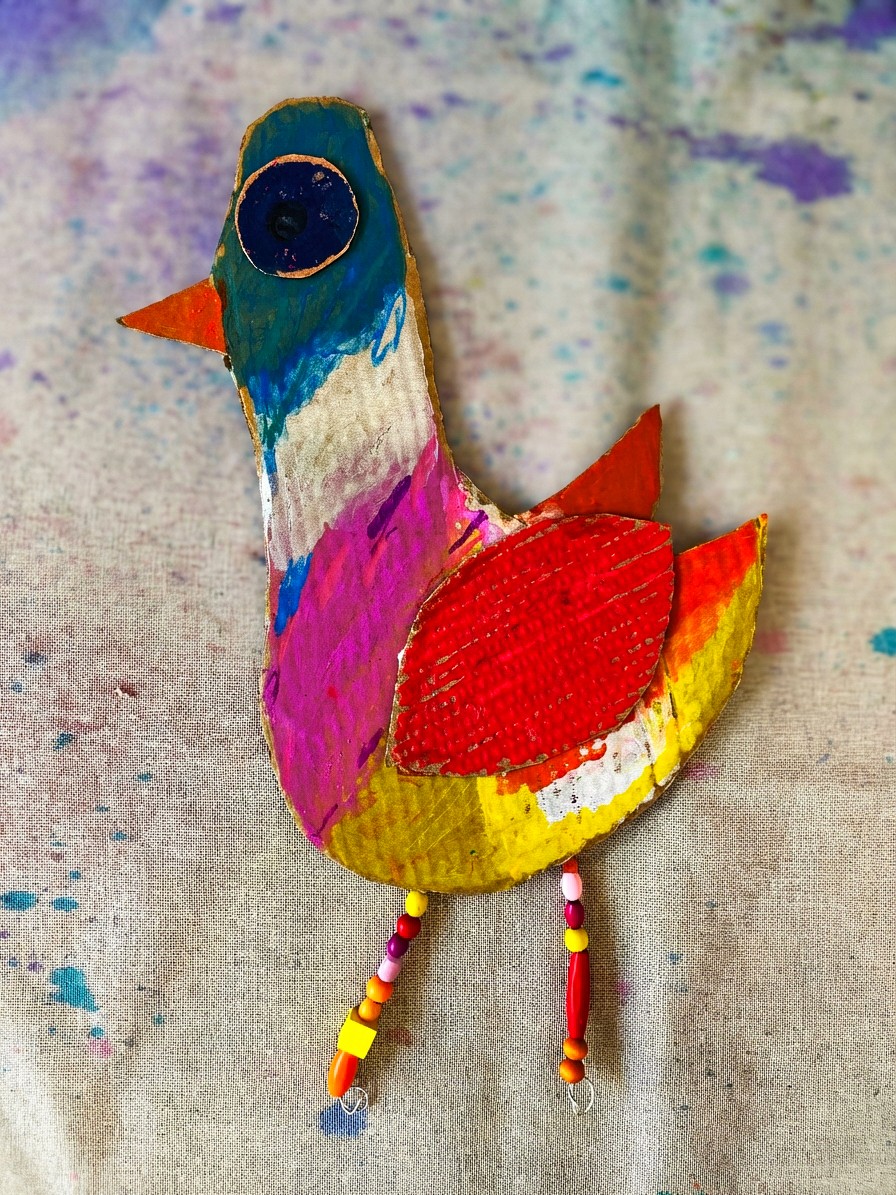
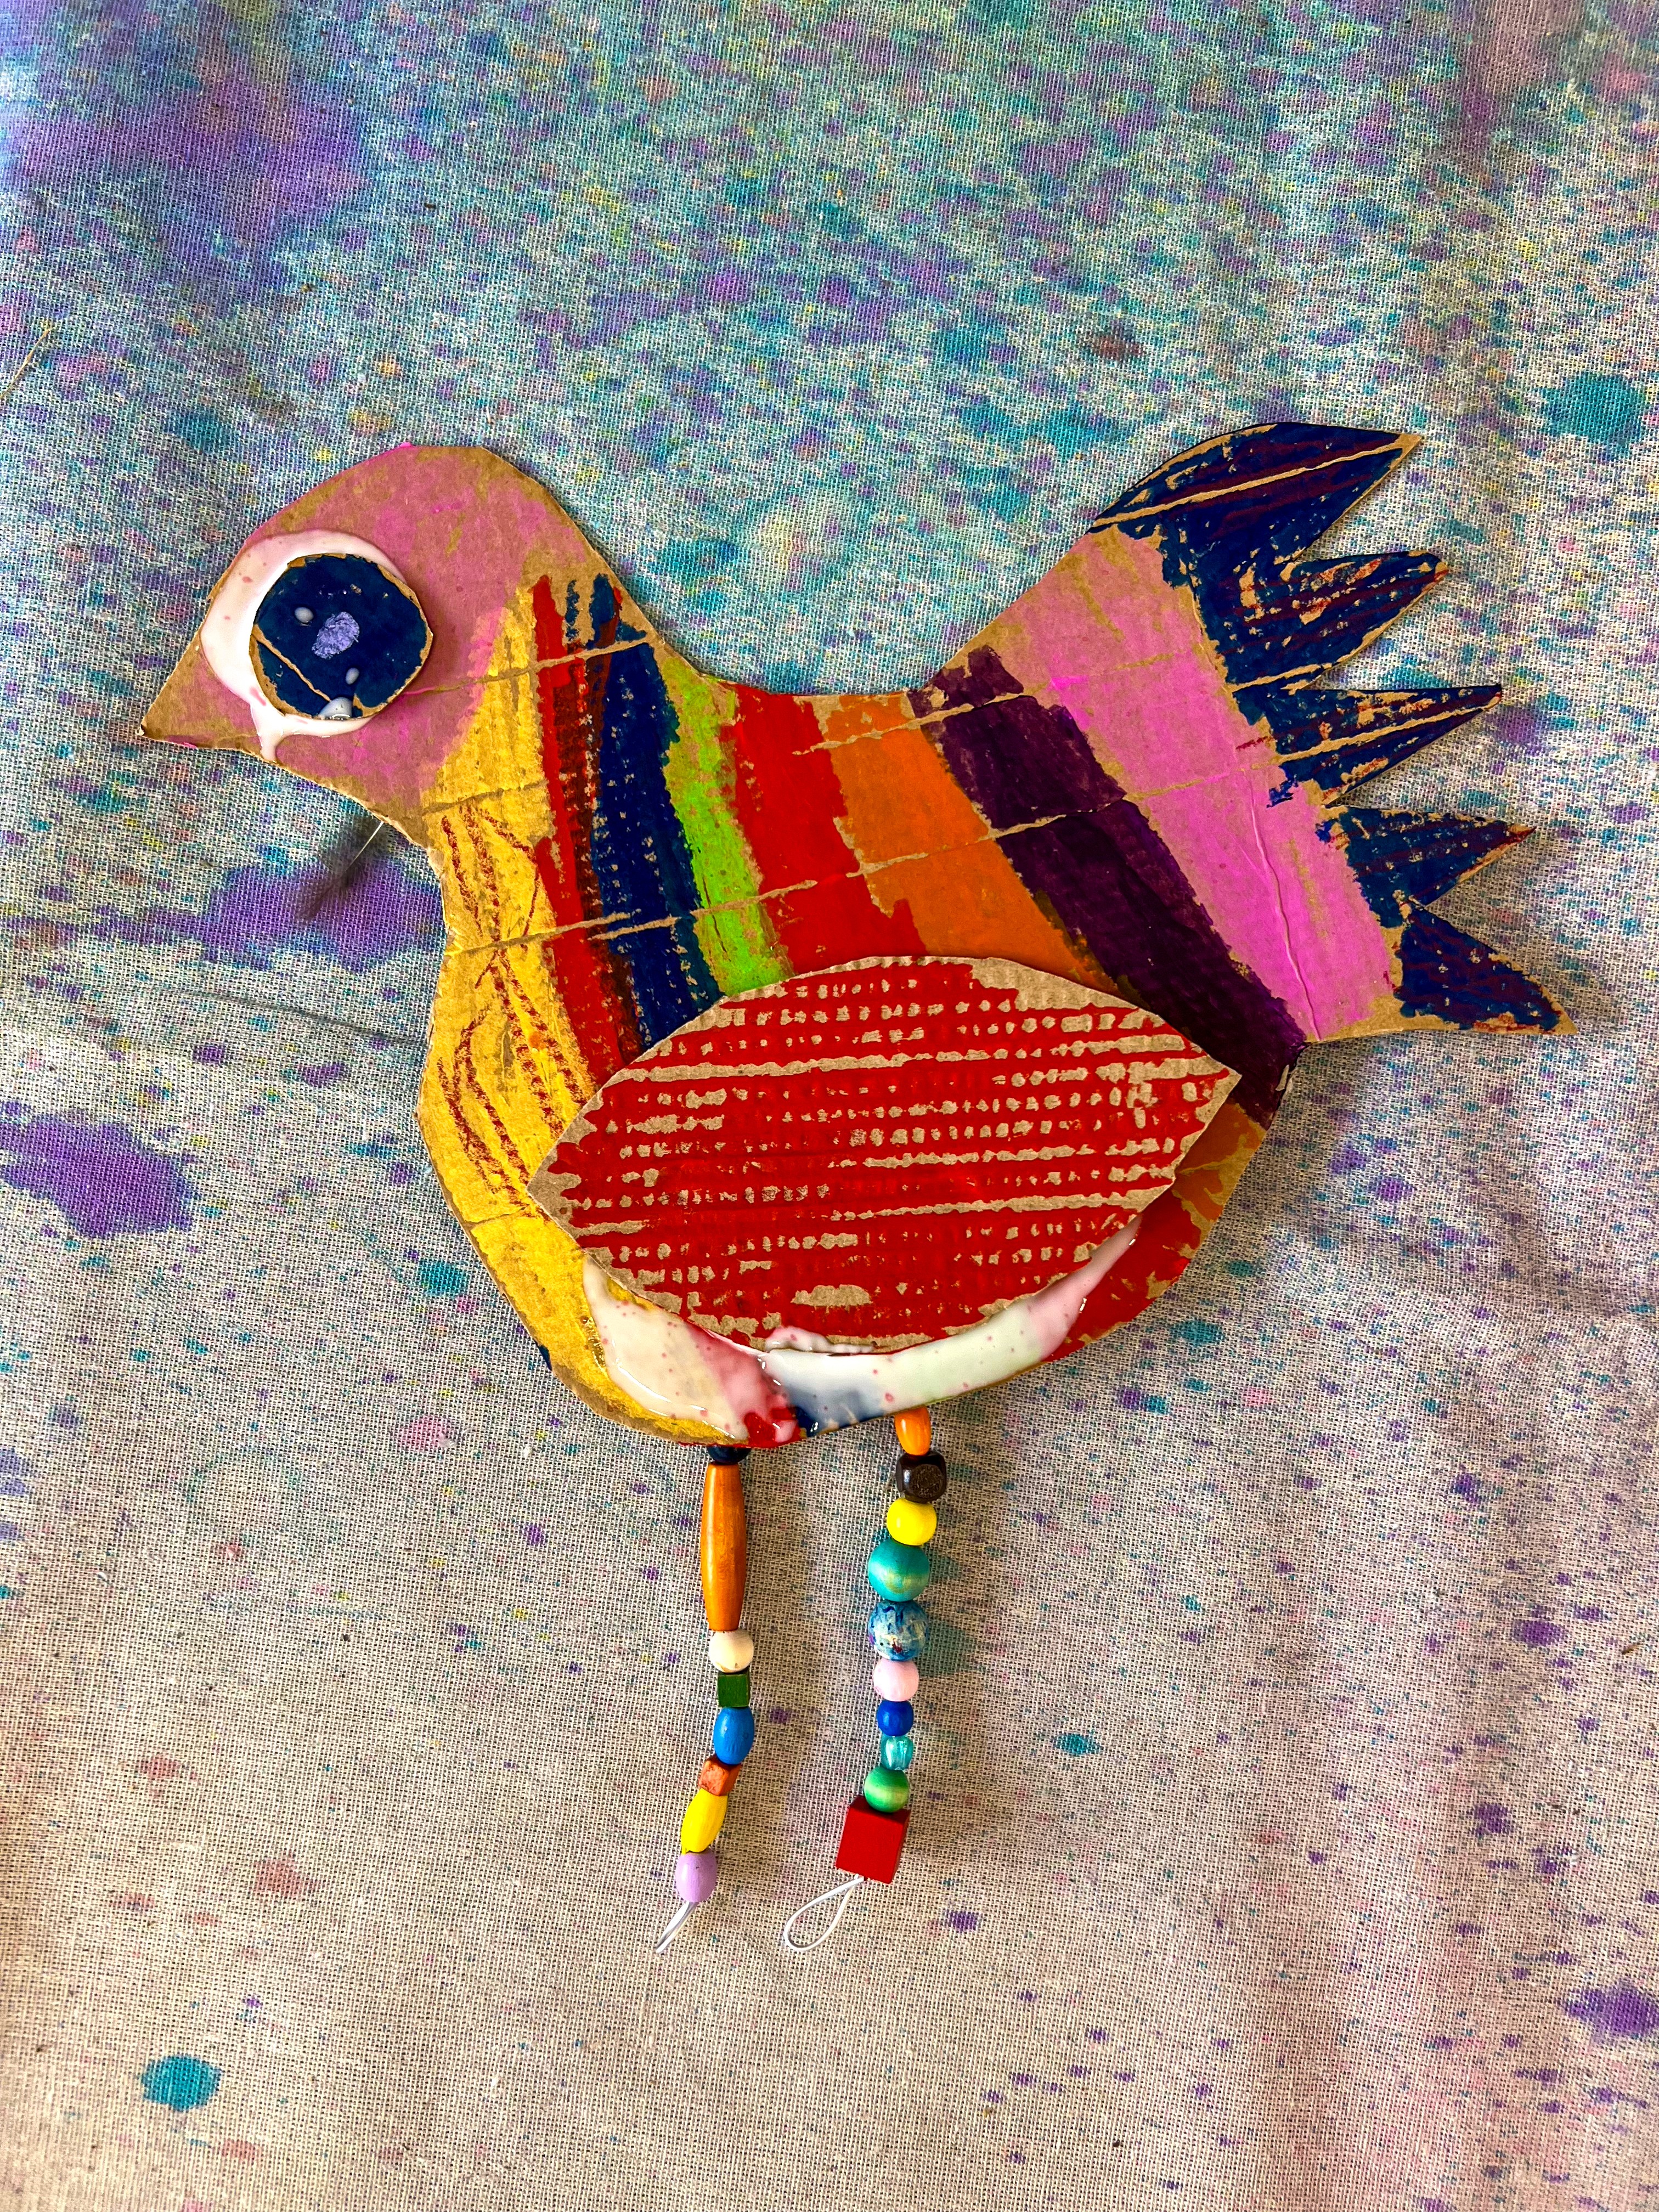
It's all about personality and was inspired by the wonderful Colourful Minds Kids, who themselves were inspired by Chris Haughton's illustrations in his book Shh! We Have a Plan. Every bird turns out completely different, and the placement of the wings is what really brings them to life. Angled up and they look like they're mid-flight, tucked down and they're resting, spread wide and they're showing off. It's amazing how much character a cardboard bird can have!
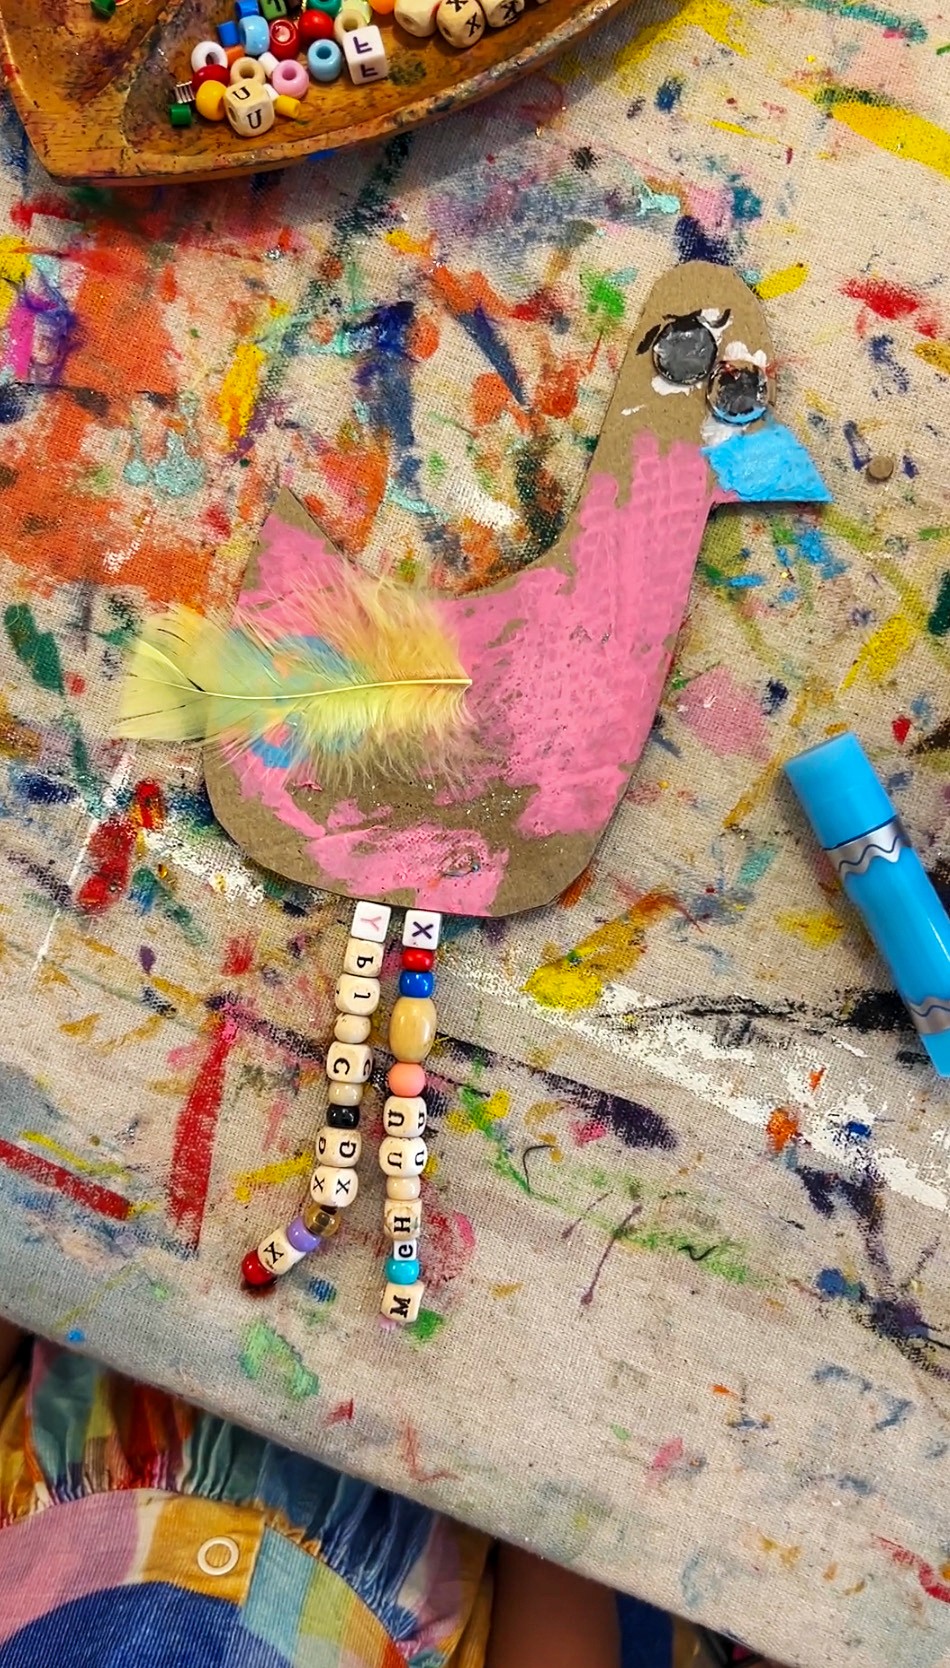
Pre-cut a selection of bird body shapes in different sizes, along with separate wing pieces and circles for eyes. Lay these out so artists can mix and match. Curate pipe cleaners and beads for creating dangling legs, paper straws for extra structural details, and any kind of collage material you like: feathers (of course!), tissue paper, fabric scraps, buttons, sequins.

The Making
Artists choose a body shape, attach wings wherever they like (this is the fun bit... there's no right place), add eyes, and then decorate to their heart's content. Thread beads onto the pipe cleaner legs before bending the end into a little foot shape. They dangle beautifully and add so much character. If you want the birds to stand, fold the cardboard at the base to create a little stand, or prop them up with a blob of play dough.
These look incredible hung up together as a flock! Connect them back to your Cardboard Aviary if you're running both art experiences.

Materials
• Cardboard bird body shapes (pre-cut or draw your own)
• Separate cardboard wing pieces and eye circles
Paint sticks and oil pastels
• Pipe cleaners and beads for legs
• Paper straws
• Collage materials (feathers, tissue paper, fabric, buttons, sequins)
• Glue sticks and PVA glue
• Scissors
Back to Top
Build a Bird
Birds bursting with personality.
Bookmark
Sculpture
The Set Up
It's all about personality and was inspired by the wonderful Colourful Minds Kids, who themselves were inspired by Chris Haughton's illustrations in his book Shh! We Have a Plan. Every bird turns out completely different, and the placement of the wings is what really brings them to life. Angled up and they look like they're mid-flight, tucked down and they're resting, spread wide and they're showing off. It's amazing how much character a cardboard bird can have!
Pre-cut a selection of bird body shapes in different sizes, along with separate wing pieces and circles for eyes. Lay these out so artists can mix and match. Curate pipe cleaners and beads for creating dangling legs, paper straws for extra structural details, and any kind of collage material you like: feathers (of course!), tissue paper, fabric scraps, buttons, sequins.
The Making
Artists choose a body shape, attach wings wherever they like (this is the fun bit... there's no right place), add eyes, and then decorate to their heart's content. Thread beads onto the pipe cleaner legs before bending the end into a little foot shape. They dangle beautifully and add so much character. If you want the birds to stand, fold the cardboard at the base to create a little stand, or prop them up with a blob of play dough.
These look incredible hung up together as a flock! Connect them back to your Cardboard Aviary if you're running both art experiences.
Materials
• Cardboard bird body shapes (pre-cut or draw your own)
• Separate cardboard wing pieces and eye circles
Paint sticks and oil pastels
• Pipe cleaners and beads for legs
• Paper straws
• Collage materials (feathers, tissue paper, fabric, buttons, sequins)
• Glue sticks and PVA glue
• Scissors
Back to Top
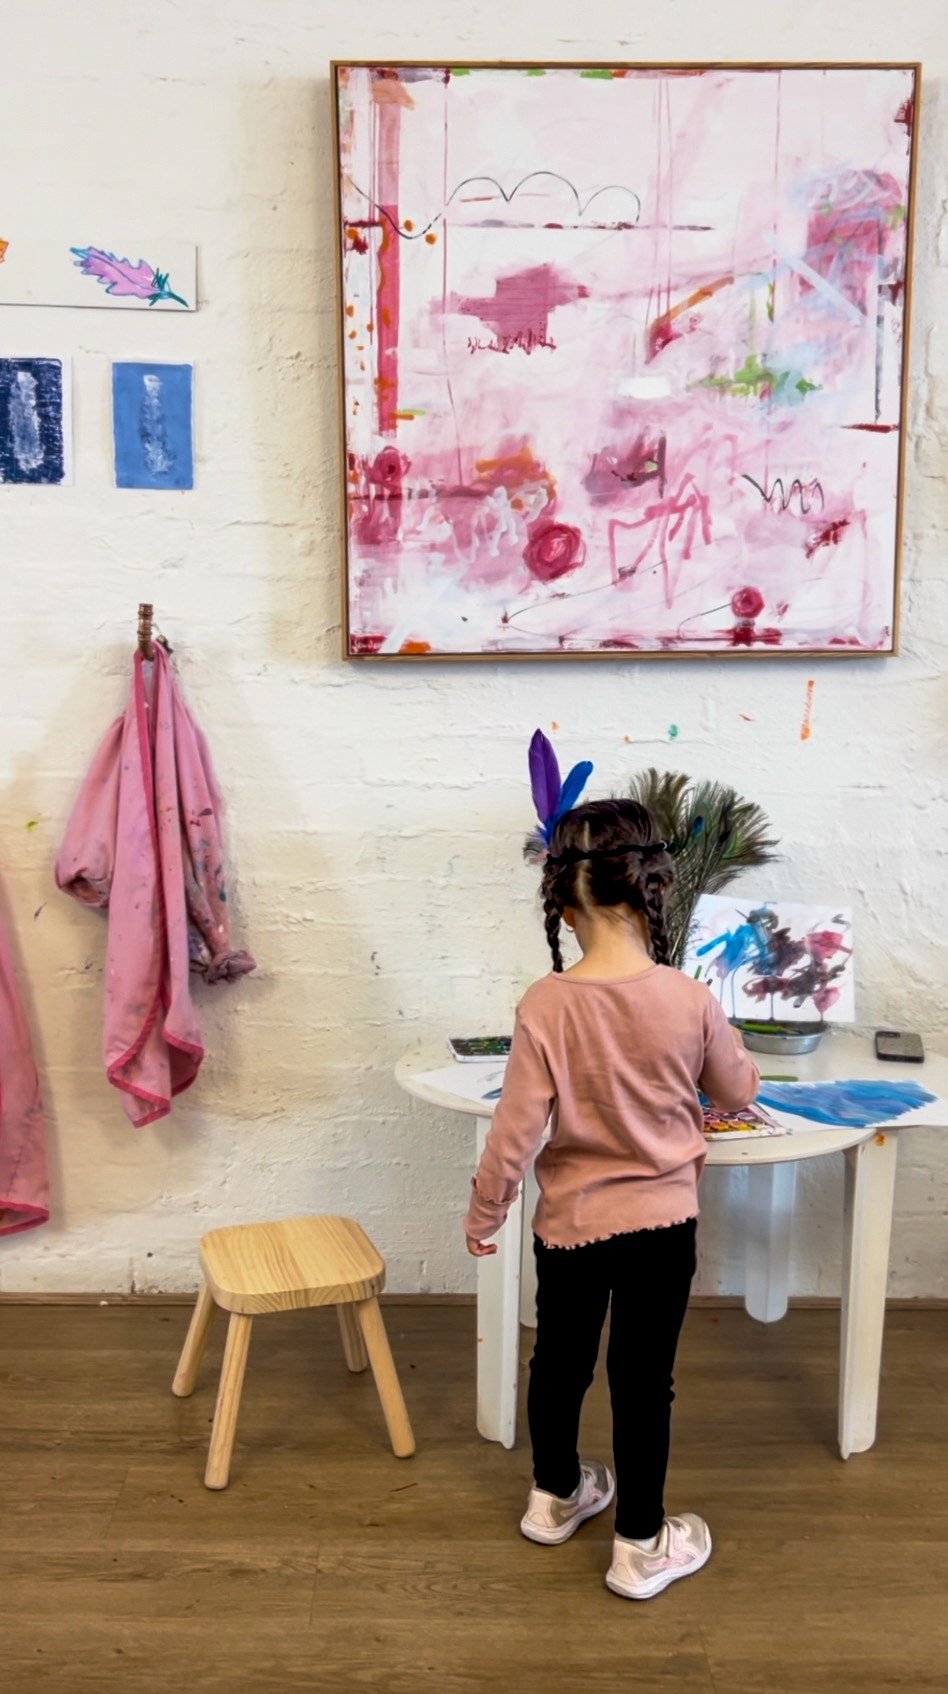
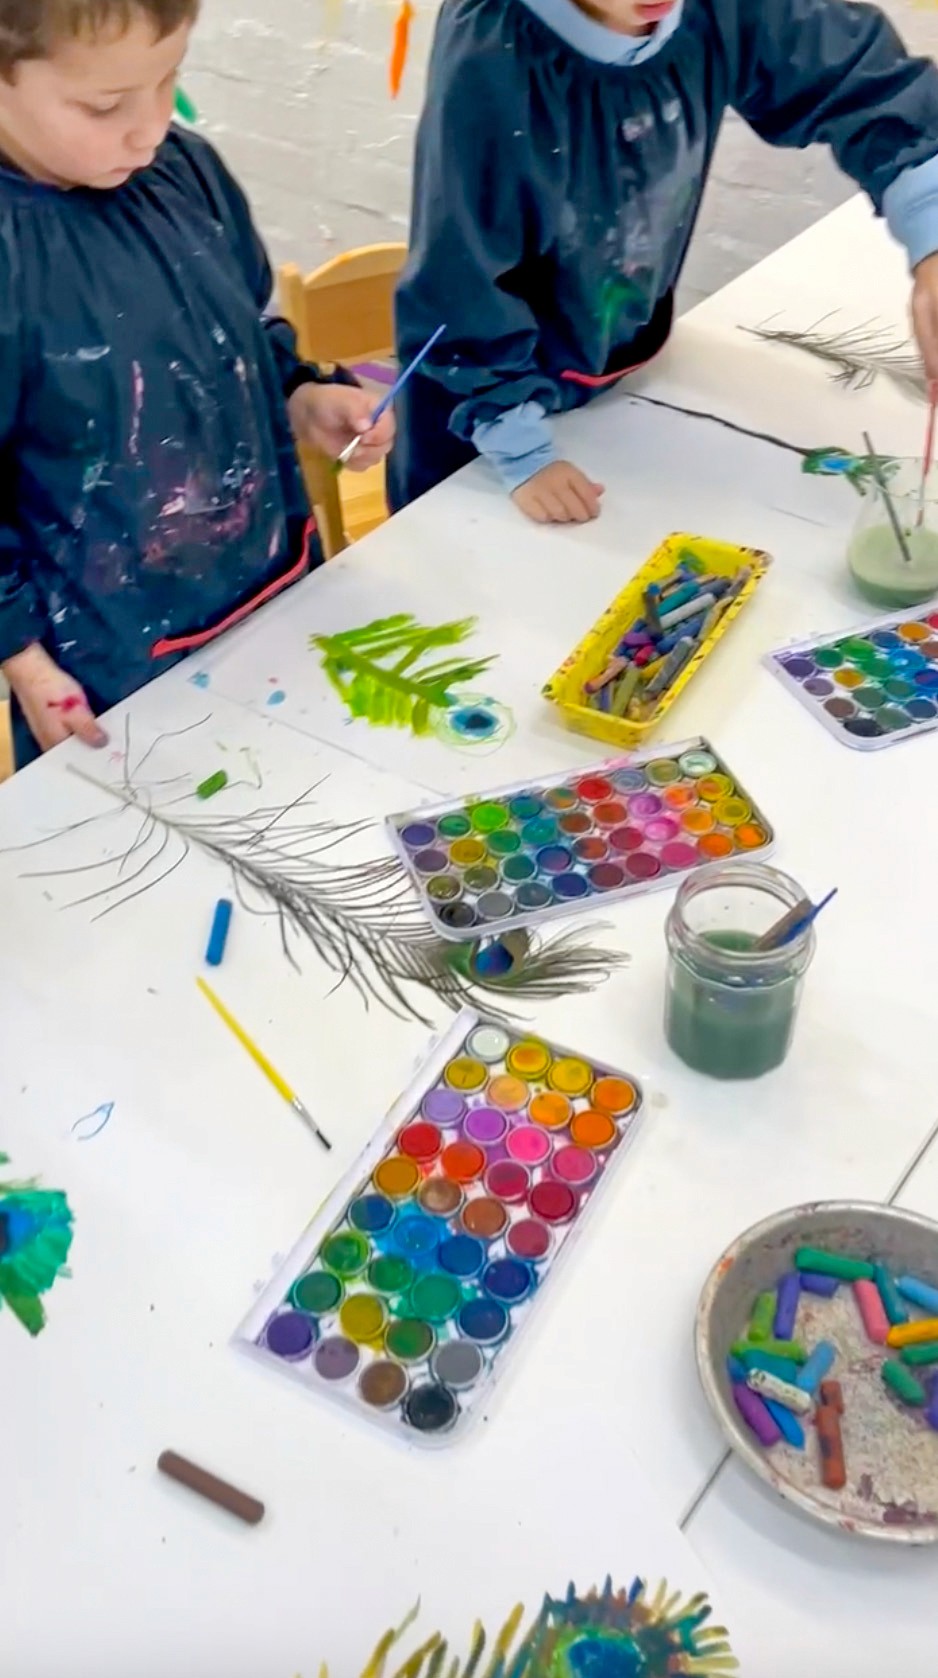
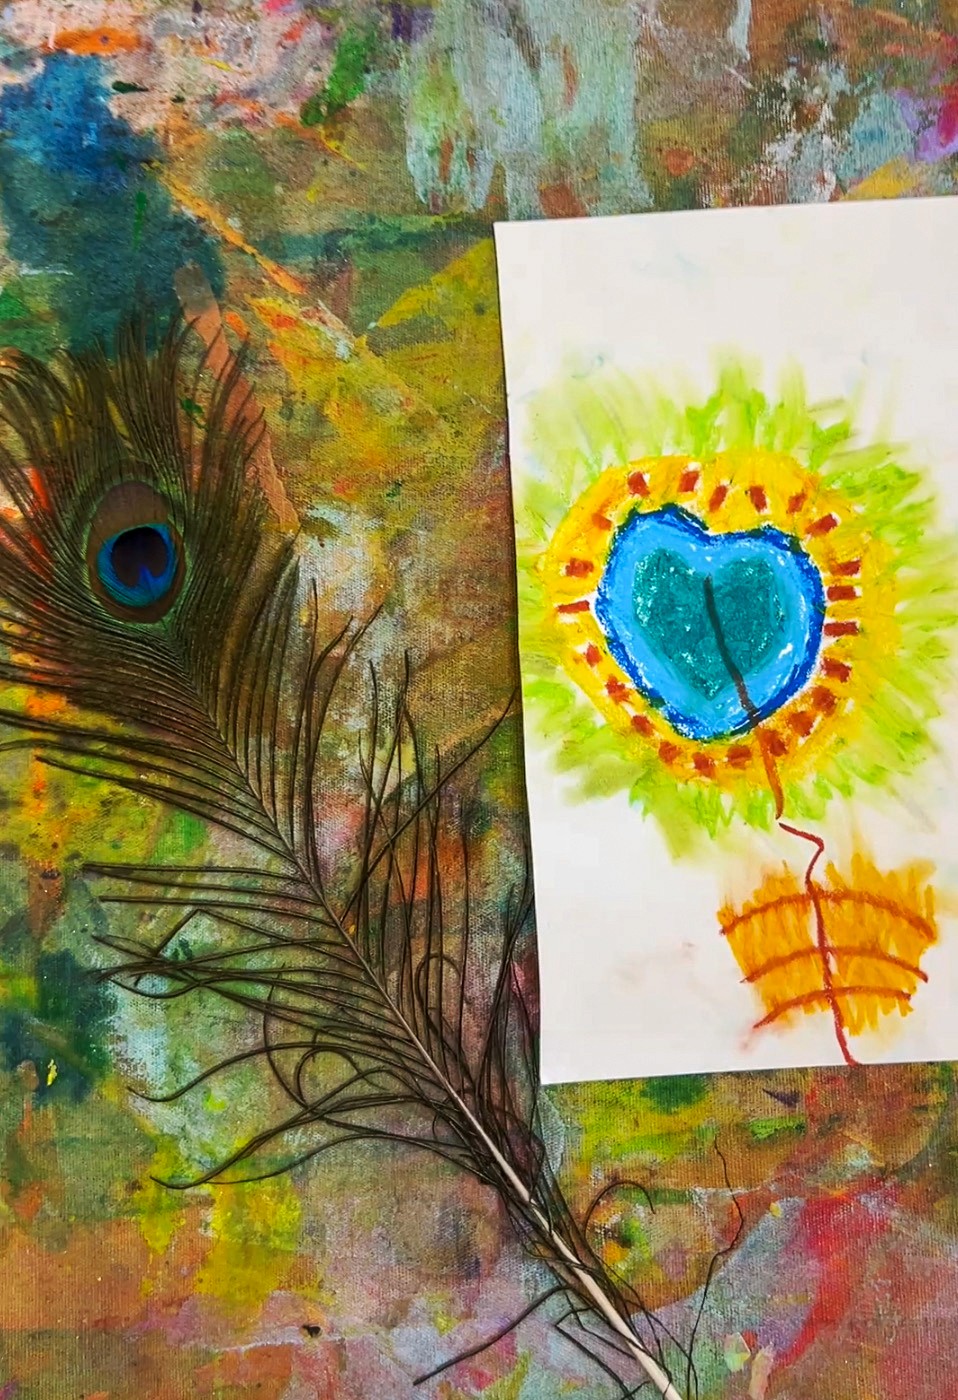
Peacock Still Life
Look closely at real feathers and capture every gorgeous detail.
Bookmark
Painting & Drawing

The Set Up
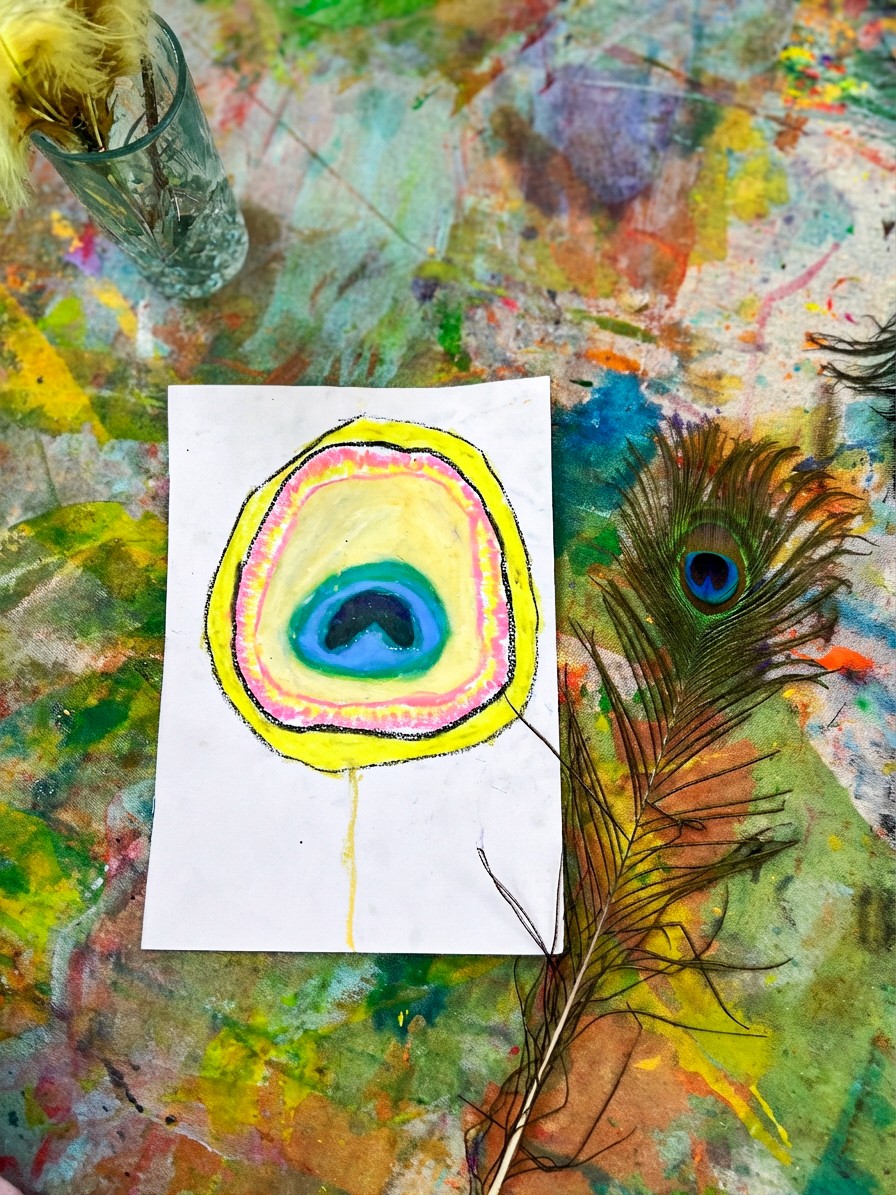
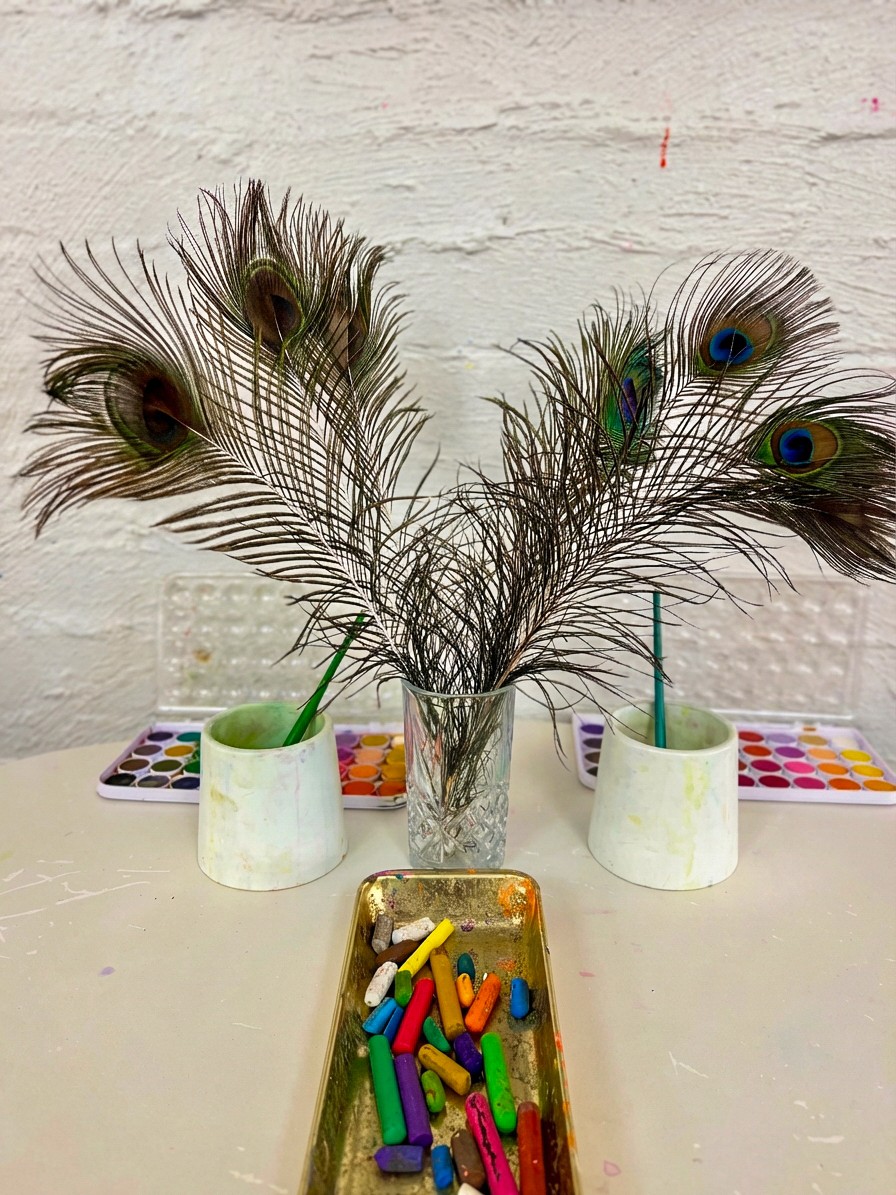
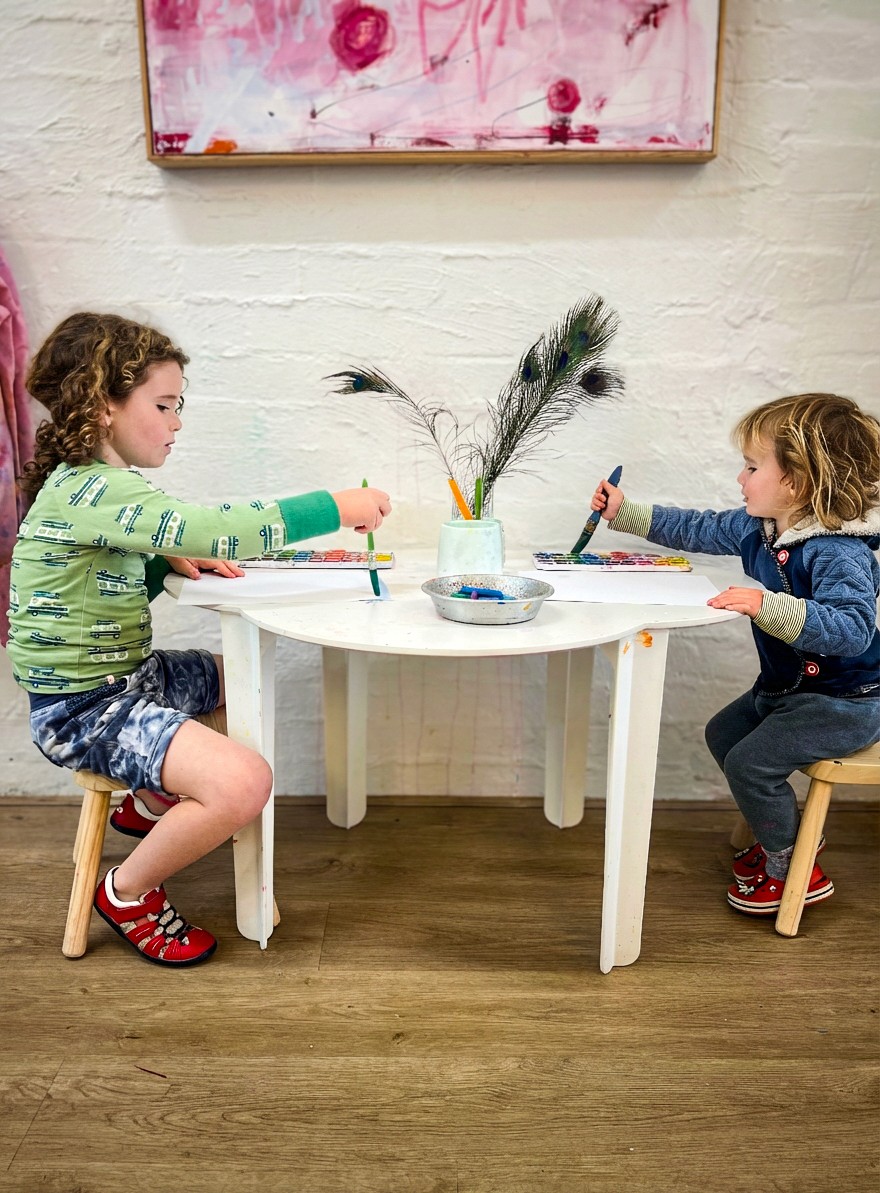
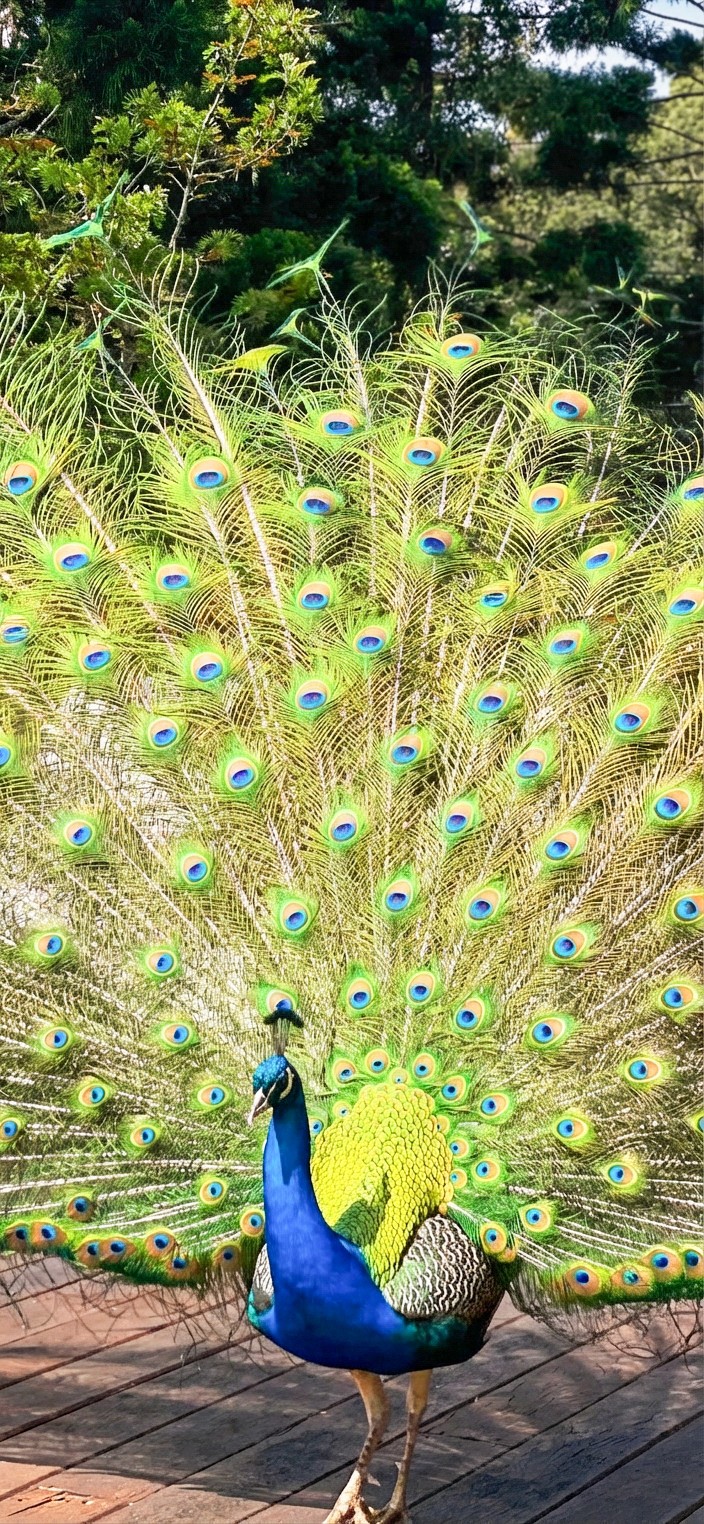
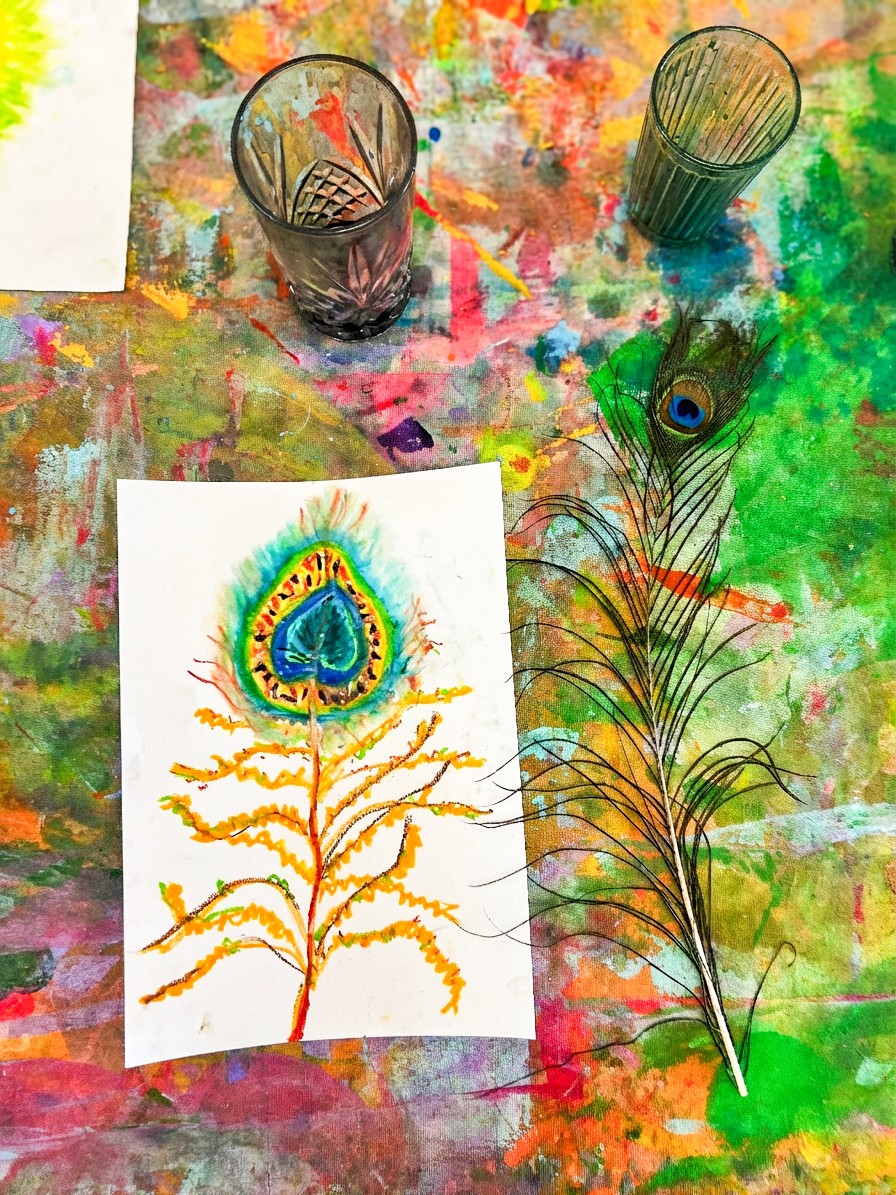
Observational drawing of feathers is so incredible. The colours, the patterns, the way light catches those iridescent greens and blues... peacock feathers especially are like tiny masterpieces from nature. This is one of those quieter activities that really draws artists in.
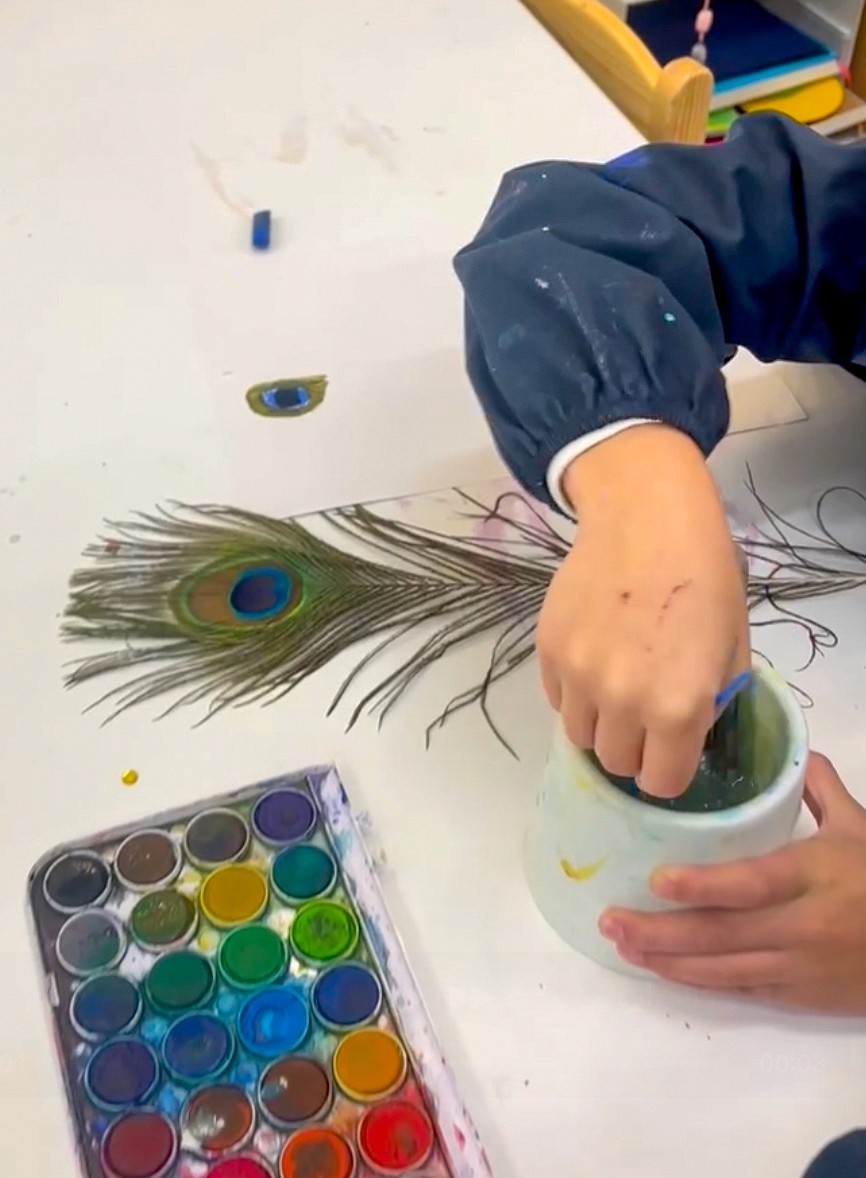
Place feathers in the centre of the table, a mix of peacock feathers and other interesting feathers if you have them. Set out oil pastels in curated colours (greens, blues, teals, golds) alongside watercolour palettes. We love offering long, thin paper for this activity to mimic the shape of the feathers themselves.
The Making
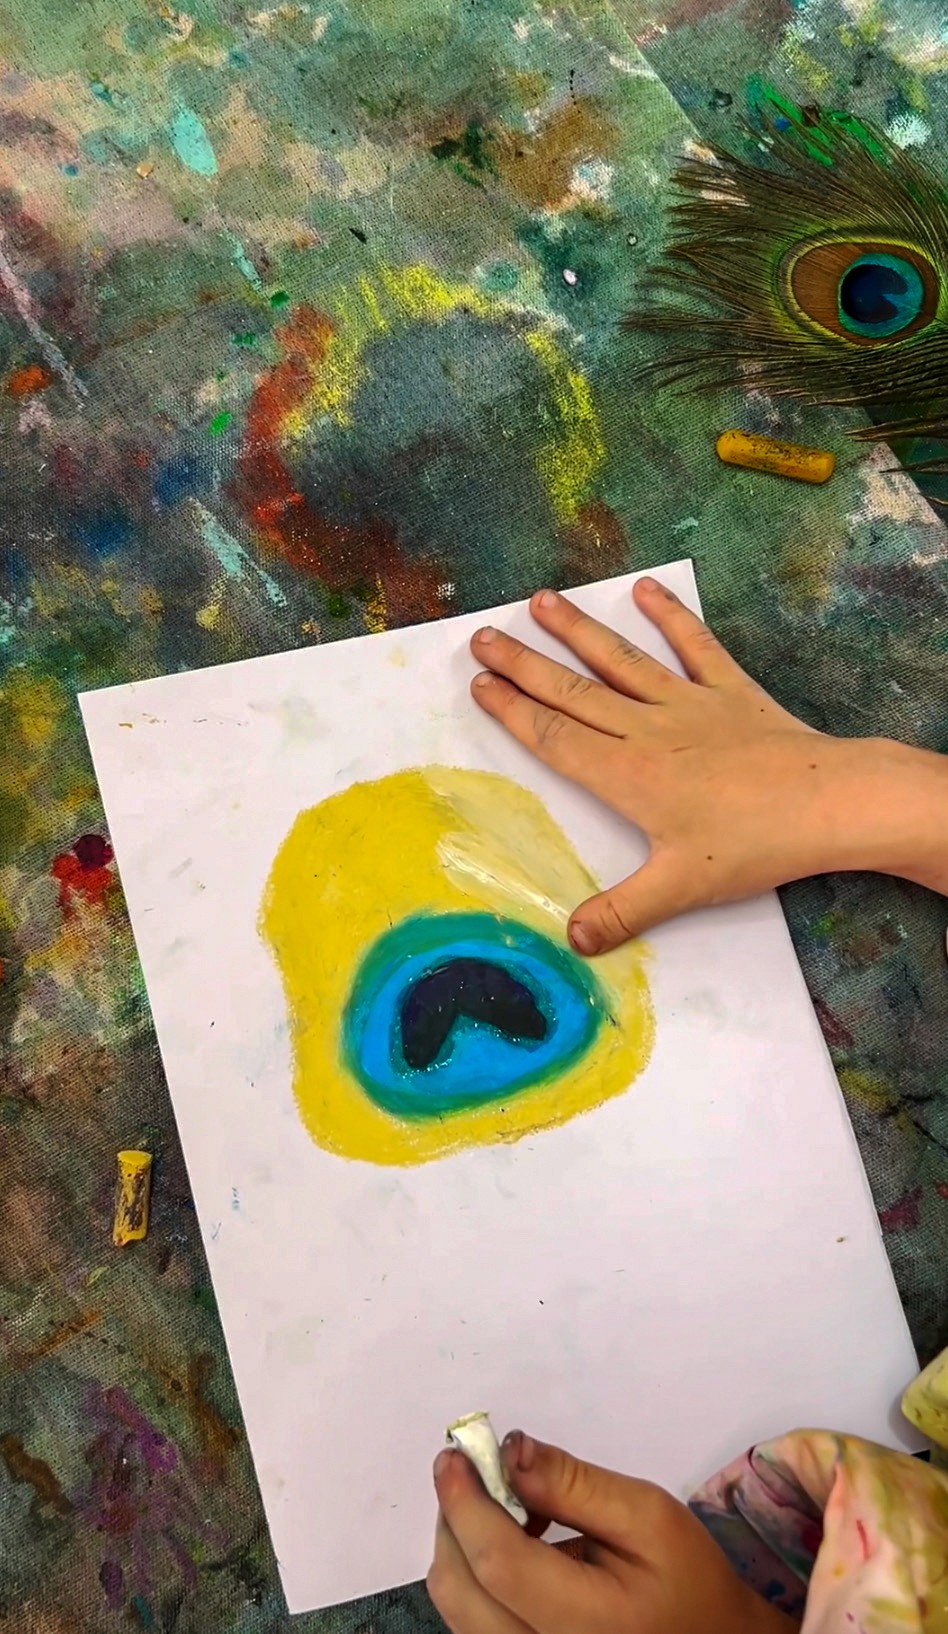
Invite artists to look really closely at the feathers before they start. What colours can they see? Where does the feather change from one colour to another? Can they see the tiny lines that make up each barb? There's no rush. The looking is just as important as the drawing.
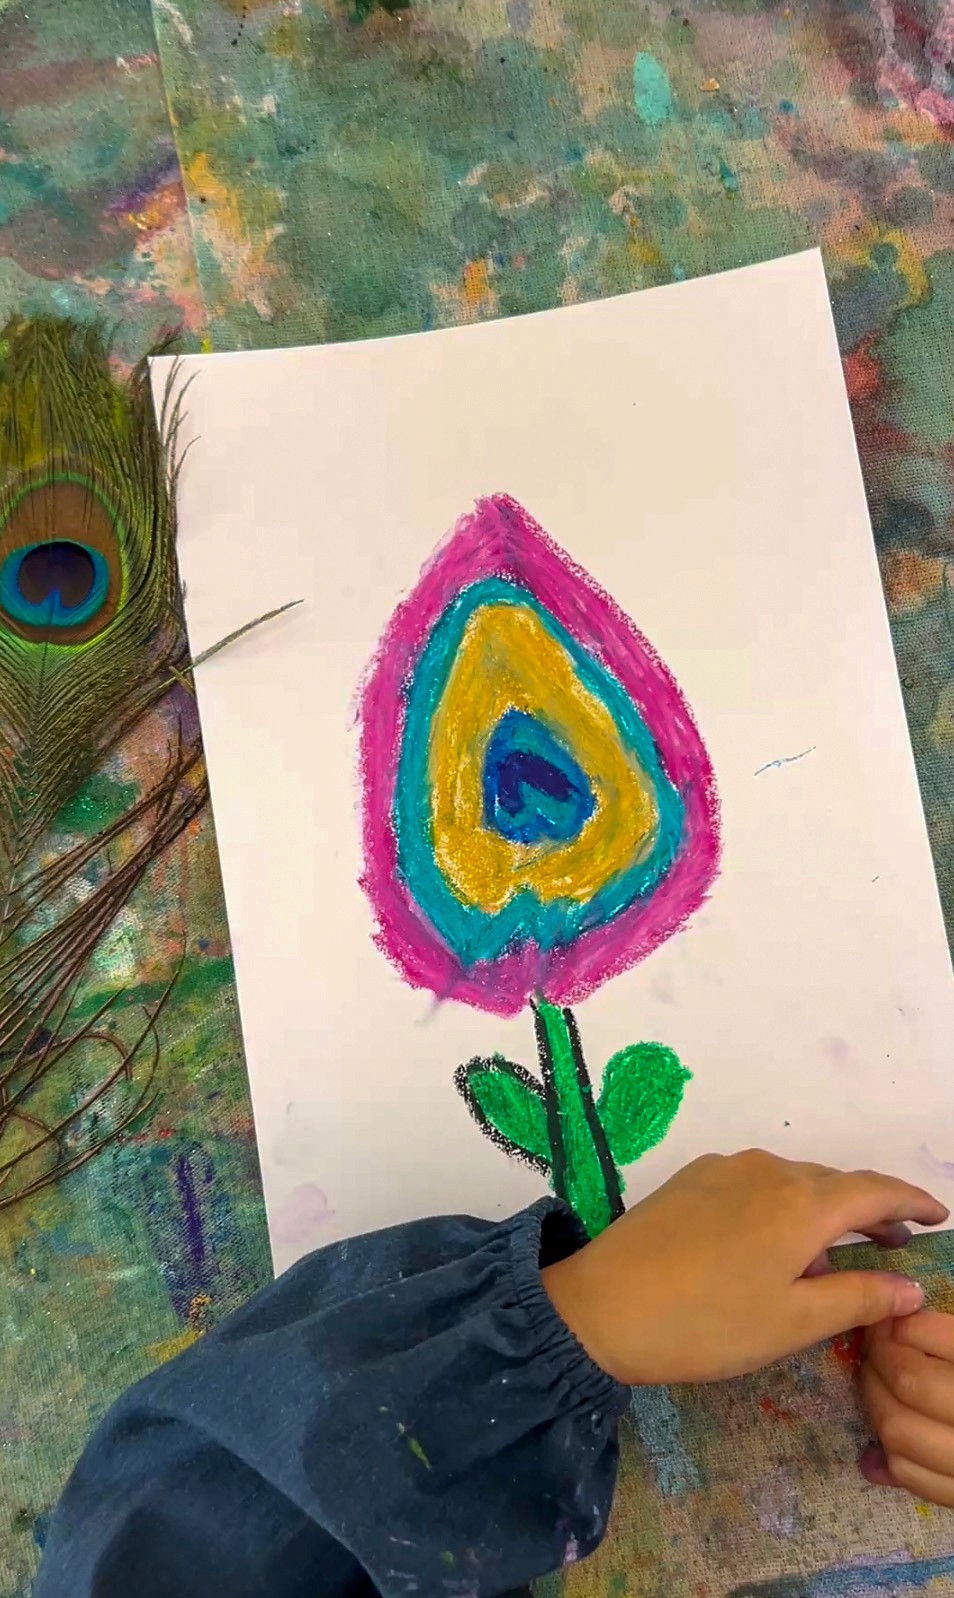
Oil pastels are beautiful for this because they capture the richness of the colours. Layering colours on top of each other creates that gorgeous depth you see in real feathers. Adding a watercolour wash over the top gives a lovely resist effect and ties everything together.
You can also offer the feather brushes from the previous activity as an alternative painting tool. Using feathers to paint feathers? Don't mind if we do!

Variations
Offer black paper with metallic oil pastels for a completely different mood.
Print high-quality images of birds of paradise, toucans, or rosellas to expand the still life options beyond feathers.

Materials
• Peacock feathers and other interesting feathers
• Oil pastels, curated palette of greens, blues, teals, golds, and purples
• Watercolour palettes
• Watercolour paper, including long thin strips
• Brushes and water pots
• Optional: feather brushes from the Feather Brushes activity
• Optional: black paper and metallic oil pastels
Gallery
Back to Top
Peacock Still Life
Look closely at real feathers and capture every gorgeous detail.
Bookmark
Painting & Drawing
The Set Up
Observational drawing of feathers is so incredible. The colours, the patterns, the way light catches those iridescent greens and blues... peacock feathers especially are like tiny masterpieces from nature. This is one of those quieter activities that really draws artists in.
Place feathers in the centre of the table, a mix of peacock feathers and other interesting feathers if you have them. Set out oil pastels in curated colours (greens, blues, teals, golds) alongside watercolour palettes. We love offering long, thin paper for this activity to mimic the shape of the feathers themselves.
The Making
Invite artists to look really closely at the feathers before they start. What colours can they see? Where does the feather change from one colour to another? Can they see the tiny lines that make up each barb? There's no rush. The looking is just as important as the drawing.
Oil pastels are beautiful for this because they capture the richness of the colours. Layering colours on top of each other creates that gorgeous depth you see in real feathers. Adding a watercolour wash over the top gives a lovely resist effect and ties everything together.
You can also offer the feather brushes from the previous activity as an alternative painting tool. Using feathers to paint feathers? Don't mind if we do!
Variations
Offer black paper with metallic oil pastels for a completely different mood.
Print high-quality images of birds of paradise, toucans, or rosellas to expand the still life options beyond feathers.
Materials
• Peacock feathers and other interesting feathers
• Oil pastels, curated palette of greens, blues, teals, golds, and purples
• Watercolour palettes
• Watercolour paper, including long thin strips
• Brushes and water pots
• Optional: feather brushes from the Feather Brushes activity
• Optional: black paper and metallic oil pastels
Gallery
Back to Top
Gelli Printing with Feathers
Press, print, and peel for the most satisfying surprises.
Bookmark
Print Making

The Set Up
If you haven't tried gelli printing before, you are in for a treat. It sounds tricky, but it's honestly one of the most fun, experimental processes you can do... and it's something you can play with over and over. The moment you peel the paper off the plate and see what's underneath is a surprise every single time.
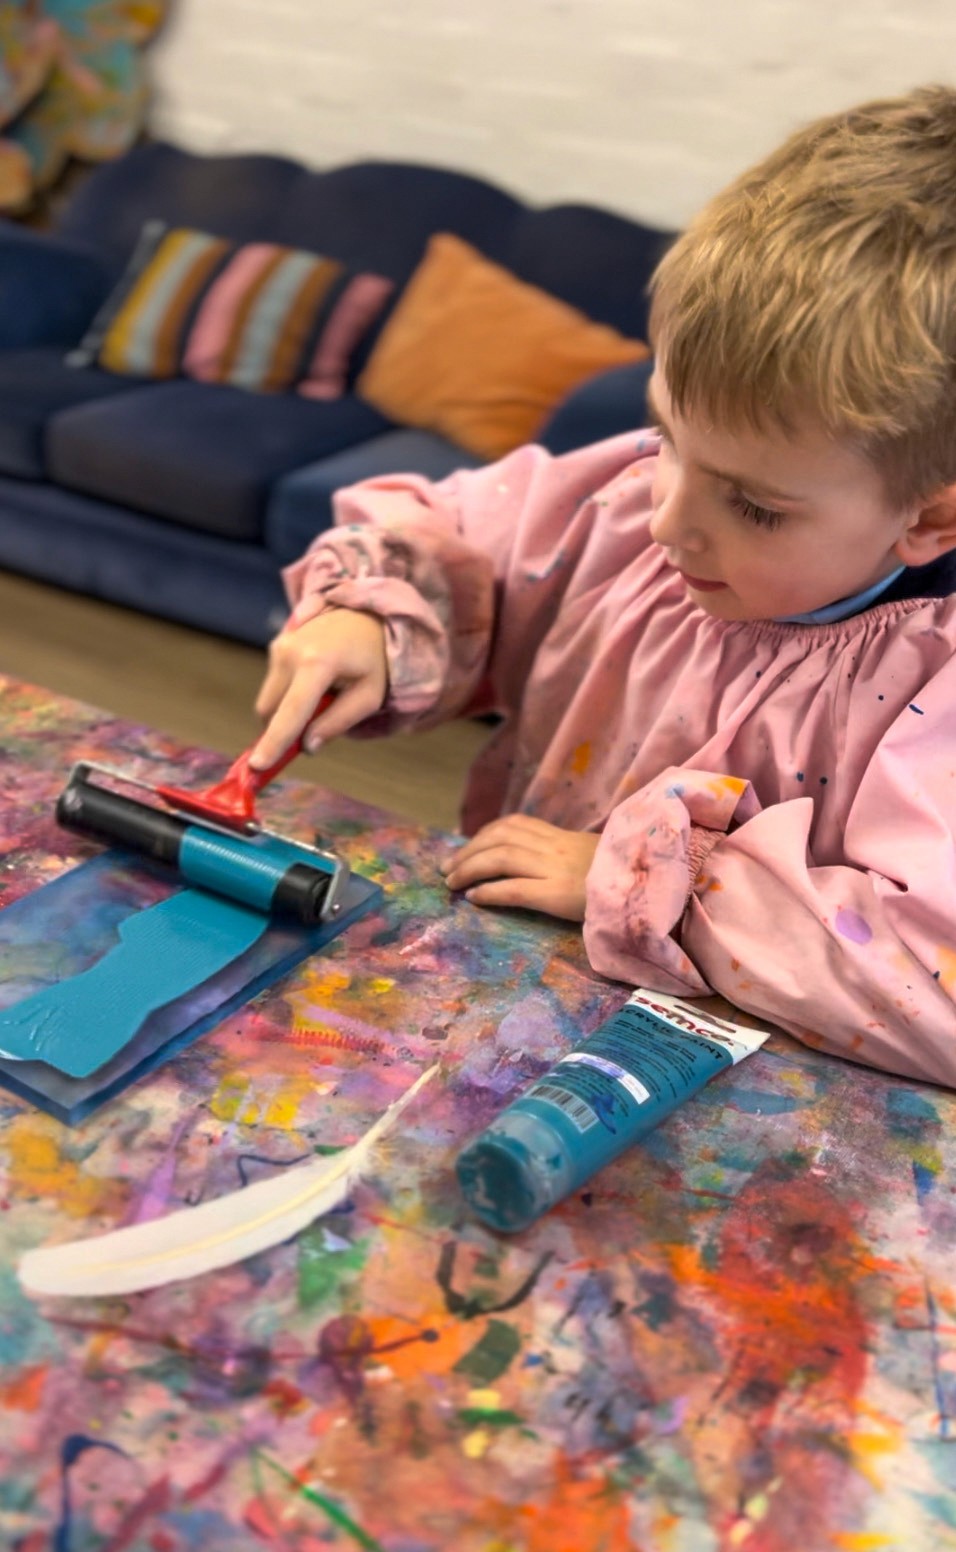
A gelli plate is a soft, flexible printing plate that you roll paint onto, press objects into, and pull prints from. No printing press needed! Set out gelli plates, acrylic paints, brayers (the small rollers for spreading paint), feathers, and thick cardstock.
The Making
The biggest tip with gelli printing: less paint is better. I know it's tempting to load it up, but three or four pea-sized blobs on the plate is plenty. Roll it out with your brayer until it's spread evenly in a thin, smooth layer. If the paint looks thick and gloopy, you've got too much on there.
Roll the brayer in one direction (sideways, then top to bottom) rather than back and forth. Rolling back and forth can lift the paint instead of spreading it, and that's usually what causes muddy results. You want to hear a lovely tacky sound as the brayer rolls... that's how you know the paint layer is just right.
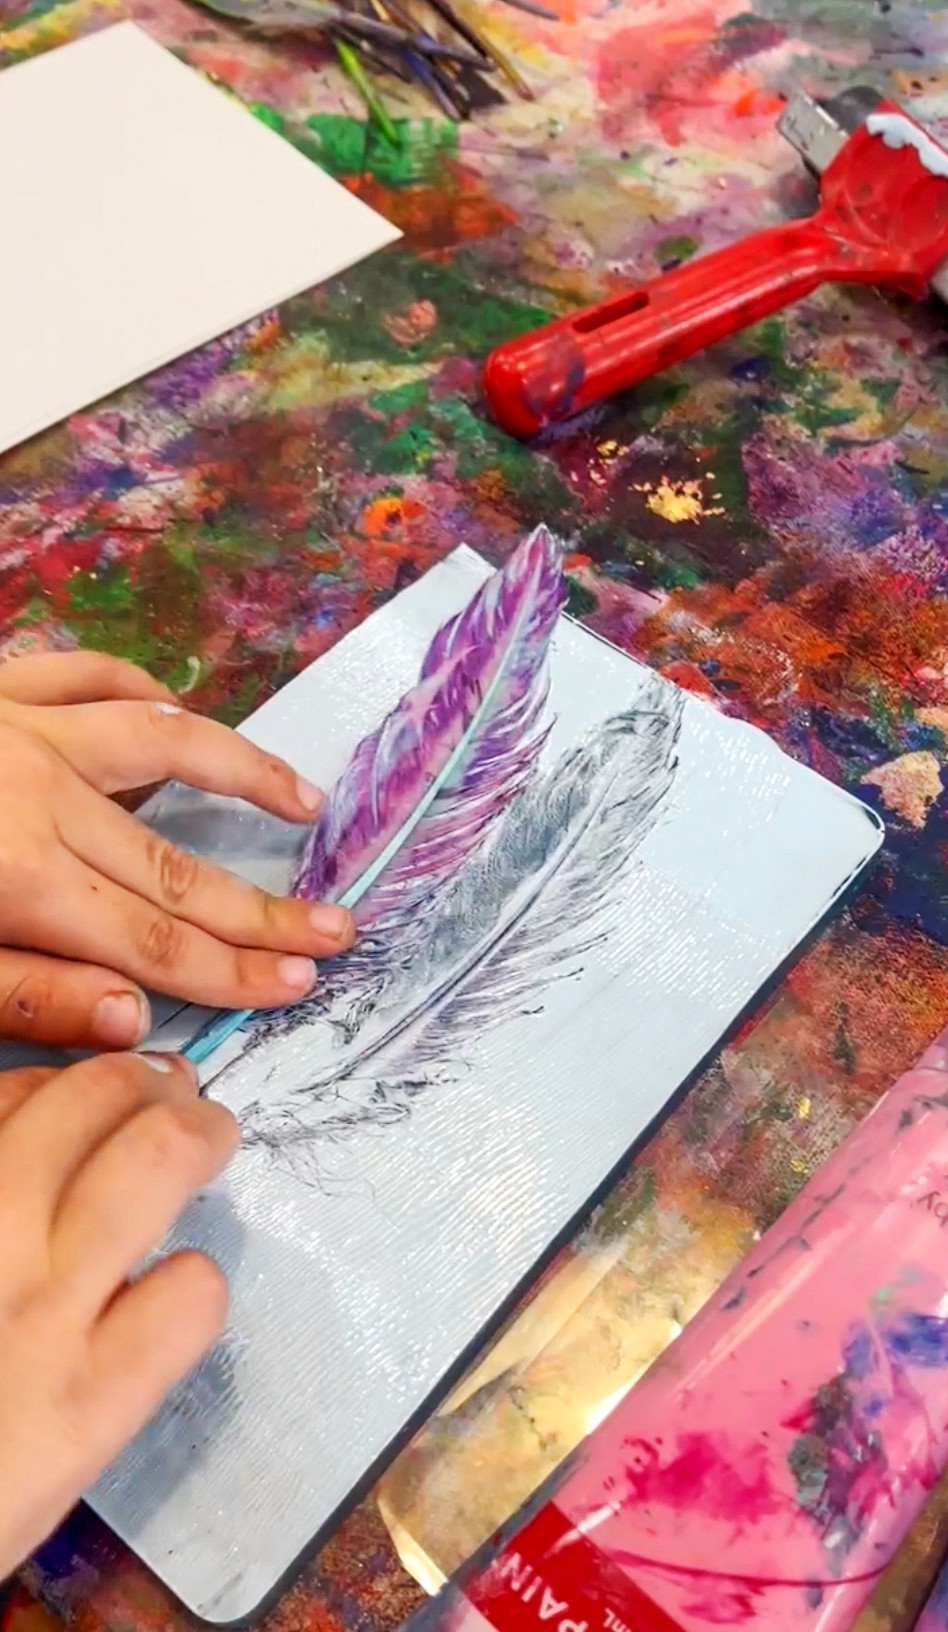
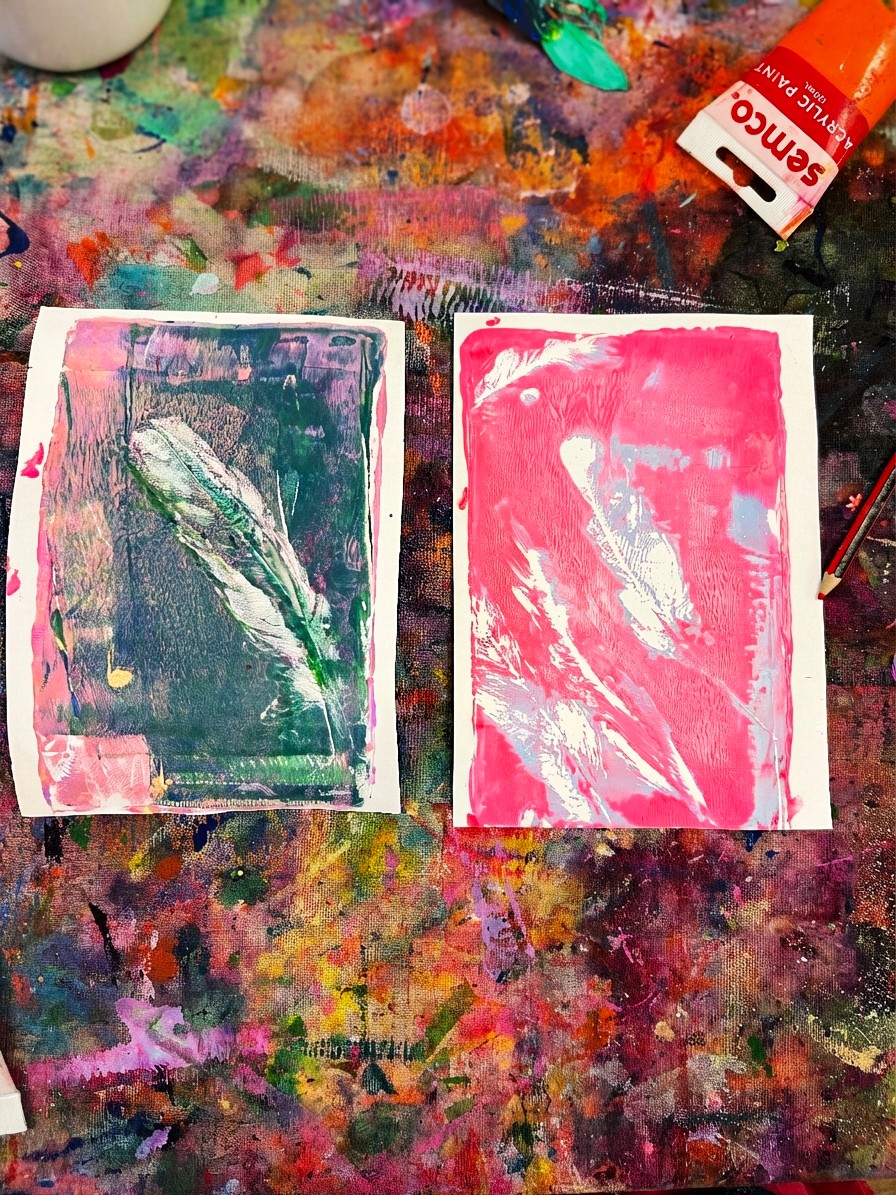
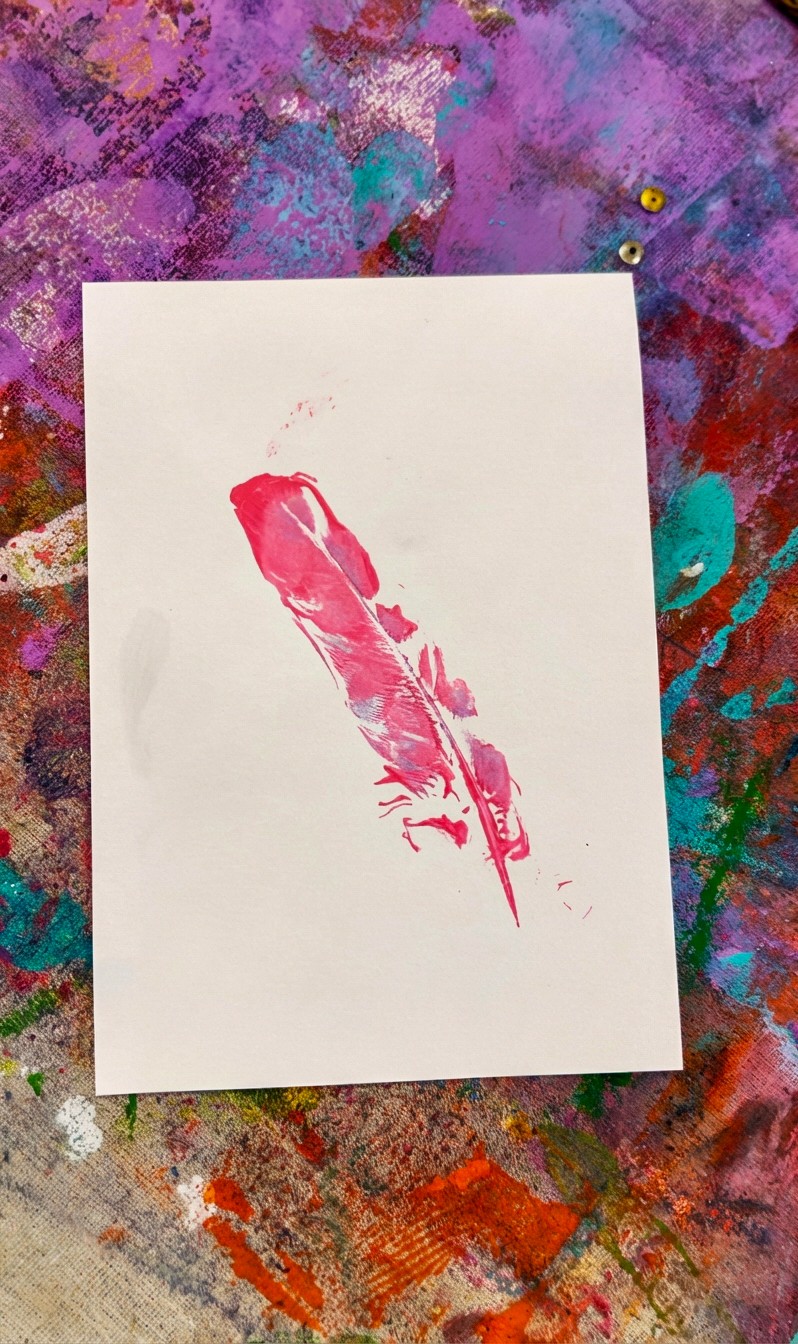
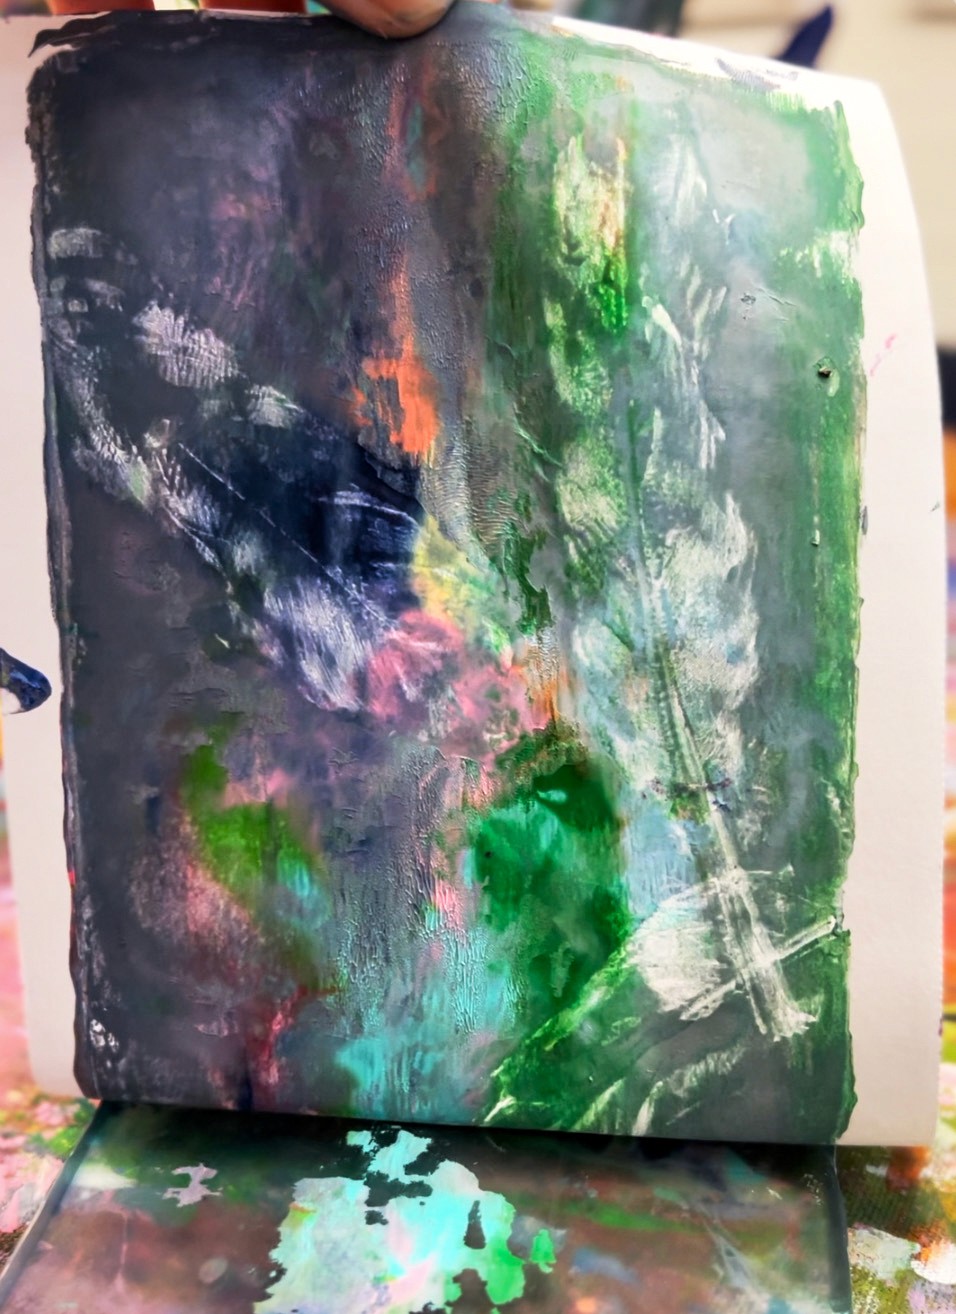
Now lay feathers onto the painted surface, gently press them down, and place your cardstock on top. Smooth it over with your hands, then peel. The feathers leave the most beautiful negative-space impressions, delicate, detailed, and completely unique every time!
Don't forget about ghost prints! After you pull the first print, there's often enough paint left on the plate for a softer, more subtle second print. Just lay another piece of paper down without re-inking. Ghost prints are honestly some of our favourites.
Work quickly so the paint doesn't dry on the plate. If it does start to dry, a quick spritz of water can help, or just wipe the plate clean with a baby wipe and start fresh. That's the beauty of gelli printing... each print takes just a minute or two, so you can experiment endlessly.
Smudge Tip
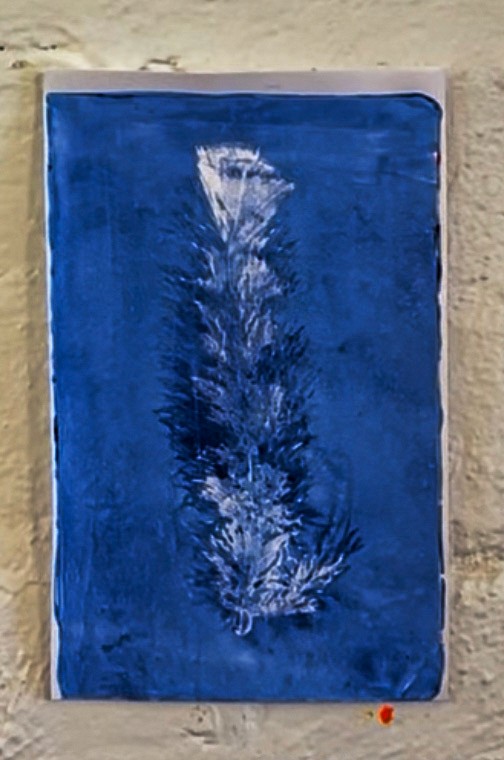
Try contrasting colours for the most striking results... a bright yellow feather print on a deep blue background is stunning. Or you can experiment with marbling colours together or paint mixing directly onto the plate itself.
Variations
Layer multiple prints on the same piece of paper for a rich, textured result. You can also try pressing leaves, lace, or bubble wrap alongside the feathers for different textures and patterns. For a first go, start with just one colour and feathers to keep it simple, then build up to more complex layers as confidence grows. Although as we know, kids have the most incredibly creative minds, so just letting them go for it in the beginning is my forever favourite!

Materials
• Gelli plates (5x7 inch or 8x10 inch are great sizes to start with)
• Acrylic paints, a curated colour palette works best
• Brayers / rollers
• Feathers, a range of sizes and shapes
• Thick cardstock (at least 200gsm)
• Paper towels or baby wipes for cleaning plates
• A spray bottle of water
• Drop cloth
Back to Top
Gelli Printing with Feathers
Press, print, and peel for the most satisfying surprises.
Bookmark
Print Making
The Set Up
If you haven't tried gelli printing before, you are in for a treat. It sounds tricky, but it's honestly one of the most fun, experimental processes you can do... and it's something you can play with over and over. The moment you peel the paper off the plate and see what's underneath is a surprise every single time.
A gelli plate is a soft, flexible printing plate that you roll paint onto, press objects into, and pull prints from. No printing press needed! Set out gelli plates, acrylic paints, brayers (the small rollers for spreading paint), feathers, and thick cardstock.
The Making
The biggest tip with gelli printing: less paint is better. I know it's tempting to load it up, but three or four pea-sized blobs on the plate is plenty. Roll it out with your brayer until it's spread evenly in a thin, smooth layer. If the paint looks thick and gloopy, you've got too much on there.
Roll the brayer in one direction (sideways, then top to bottom) rather than back and forth. Rolling back and forth can lift the paint instead of spreading it, and that's usually what causes muddy results. You want to hear a lovely tacky sound as the brayer rolls... that's how you know the paint layer is just right.
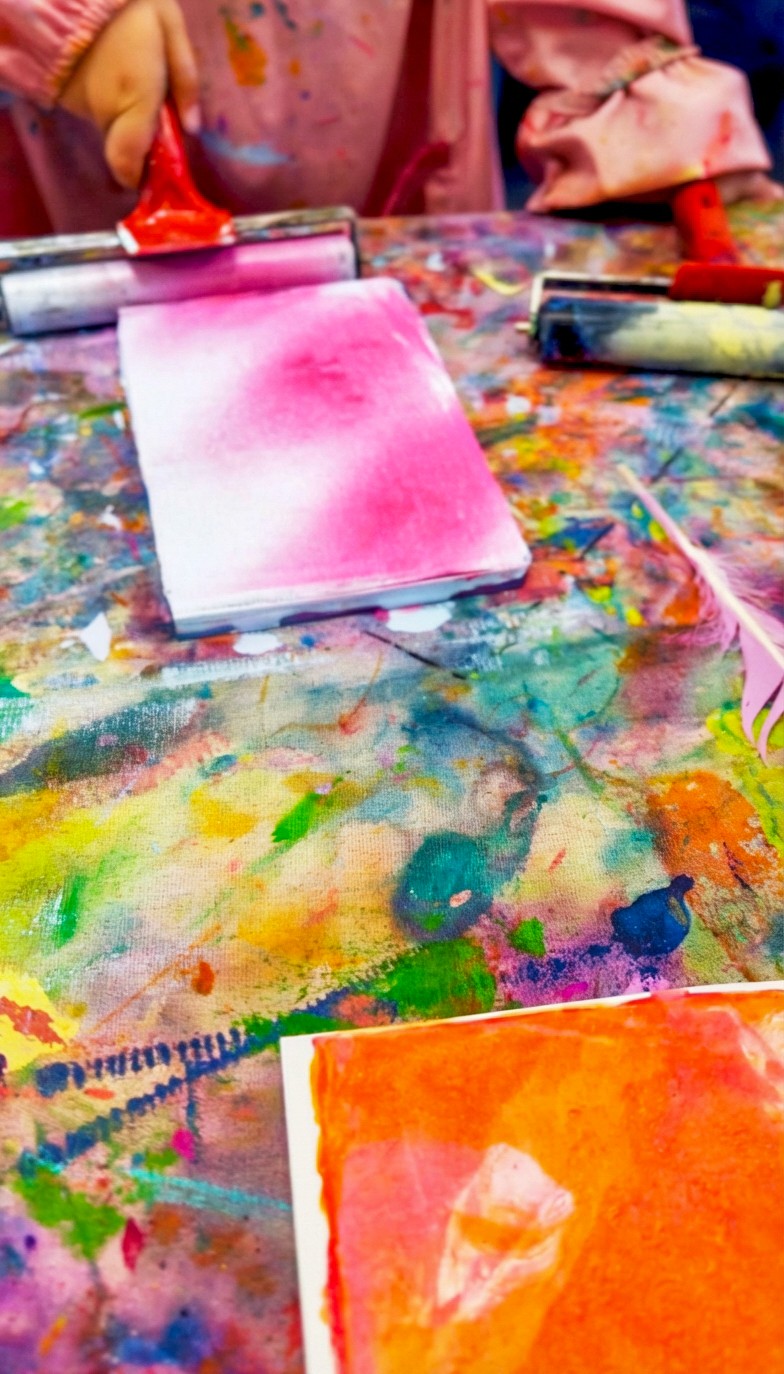
Now lay feathers onto the painted surface, gently press them down, and place your cardstock on top. Smooth it over with your hands, then peel. The feathers leave the most beautiful negative-space impressions, delicate, detailed, and completely unique every time!
Don't forget about ghost prints! After you pull the first print, there's often enough paint left on the plate for a softer, more subtle second print. Just lay another piece of paper down without re-inking. Ghost prints are honestly some of our favourites.
Work quickly so the paint doesn't dry on the plate. If it does start to dry, a quick spritz of water can help, or just wipe the plate clean with a baby wipe and start fresh. That's the beauty of gelli printing... each print takes just a minute or two, so you can experiment endlessly.
Smudge Tip
Try contrasting colours for the most striking results... a bright yellow feather print on a deep blue background is stunning. Or you can experiment with marbling colours together or paint mixing directly onto the plate itself.
Variations
Layer multiple prints on the same piece of paper for a rich, textured result. You can also try pressing leaves, lace, or bubble wrap alongside the feathers for different textures and patterns. For a first go, start with just one colour and feathers to keep it simple, then build up to more complex layers as confidence grows. Although as we know, kids have the most incredibly creative minds, so just letting them go for it in the beginning is my forever favourite!
Materials
• Gelli plates (5x7 inch or 8x10 inch are great sizes to start with)
• Acrylic paints, a curated colour palette works best
• Brayers / rollers
• Feathers, a range of sizes and shapes
• Thick cardstock (at least 200gsm)
• Paper towels or baby wipes for cleaning plates
• A spray bottle of water
• Drop cloth
Back to Top
Gelli Printing with Feathers
Press, print, and peel for the most satisfying surprises.
Bookmark
Print Making
The Set Up
If you haven't tried gelli printing before, you are in for a treat. It sounds tricky, but it's honestly one of the most fun, experimental processes you can do... and it's something you can play with over and over. The moment you peel the paper off the plate and see what's underneath is a surprise every single time.
A gelli plate is a soft, flexible printing plate that you roll paint onto, press objects into, and pull prints from. No printing press needed! Set out gelli plates, acrylic paints, brayers (the small rollers for spreading paint), feathers, and thick cardstock.
The Making
The biggest tip with gelli printing: less paint is better. I know it's tempting to load it up, but three or four pea-sized blobs on the plate is plenty. Roll it out with your brayer until it's spread evenly in a thin, smooth layer. If the paint looks thick and gloopy, you've got too much on there.
Roll the brayer in one direction (sideways, then top to bottom) rather than back and forth. Rolling back and forth can lift the paint instead of spreading it, and that's usually what causes muddy results. You want to hear a lovely tacky sound as the brayer rolls... that's how you know the paint layer is just right.
Now lay feathers onto the painted surface, gently press them down, and place your cardstock on top. Smooth it over with your hands, then peel. The feathers leave the most beautiful negative-space impressions, delicate, detailed, and completely unique every time!
Don't forget about ghost prints! After you pull the first print, there's often enough paint left on the plate for a softer, more subtle second print. Just lay another piece of paper down without re-inking. Ghost prints are honestly some of our favourites.
Work quickly so the paint doesn't dry on the plate. If it does start to dry, a quick spritz of water can help, or just wipe the plate clean with a baby wipe and start fresh. That's the beauty of gelli printing... each print takes just a minute or two, so you can experiment endlessly.
Smudge Tip
Try contrasting colours for the most striking results... a bright yellow feather print on a deep blue background is stunning. Or you can experiment with marbling colours together or paint mixing directly onto the plate itself.
Variations
Layer multiple prints on the same piece of paper for a rich, textured result. You can also try pressing leaves, lace, or bubble wrap alongside the feathers for different textures and patterns. For a first go, start with just one colour and feathers to keep it simple, then build up to more complex layers as confidence grows. Although as we know, kids have the most incredibly creative minds, so just letting them go for it in the beginning is my forever favourite!
Materials
• Gelli plates (5x7 inch or 8x10 inch are great sizes to start with)
• Acrylic paints, a curated colour palette works best
• Brayers / rollers
• Feathers, a range of sizes and shapes
• Thick cardstock (at least 200gsm)
• Paper towels or baby wipes for cleaning plates
• A spray bottle of water
• Drop cloth
Back to Top
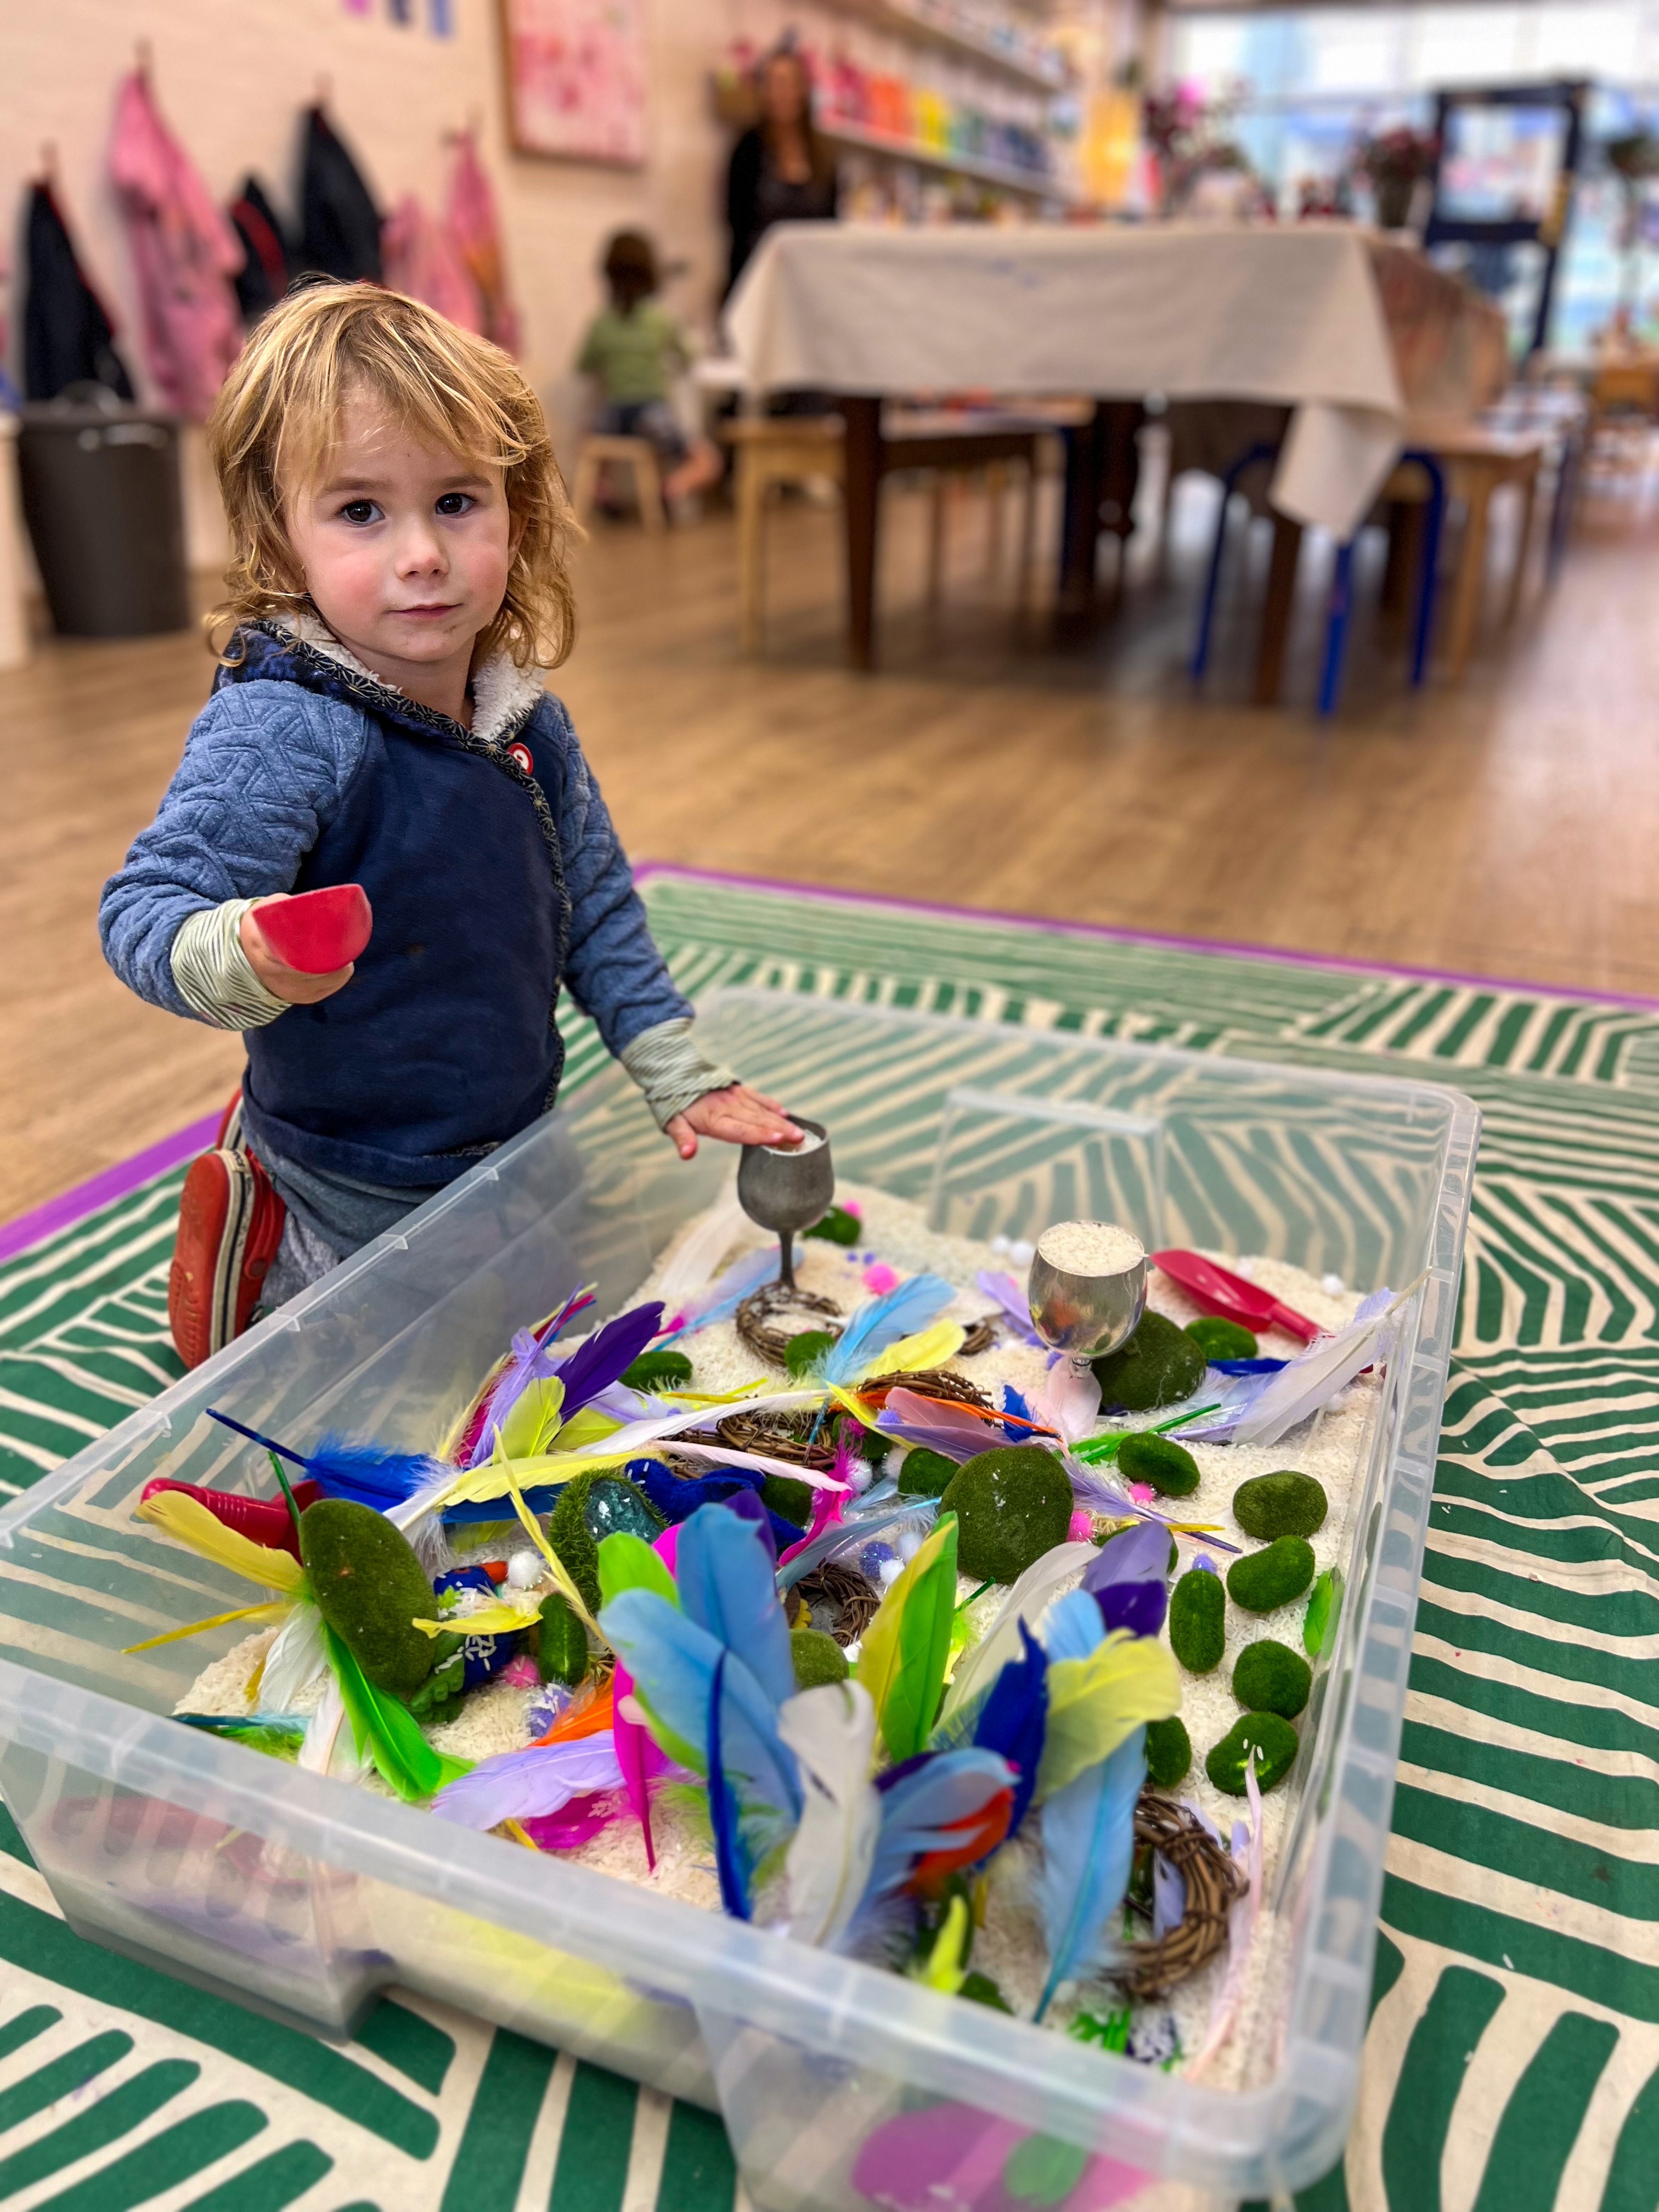
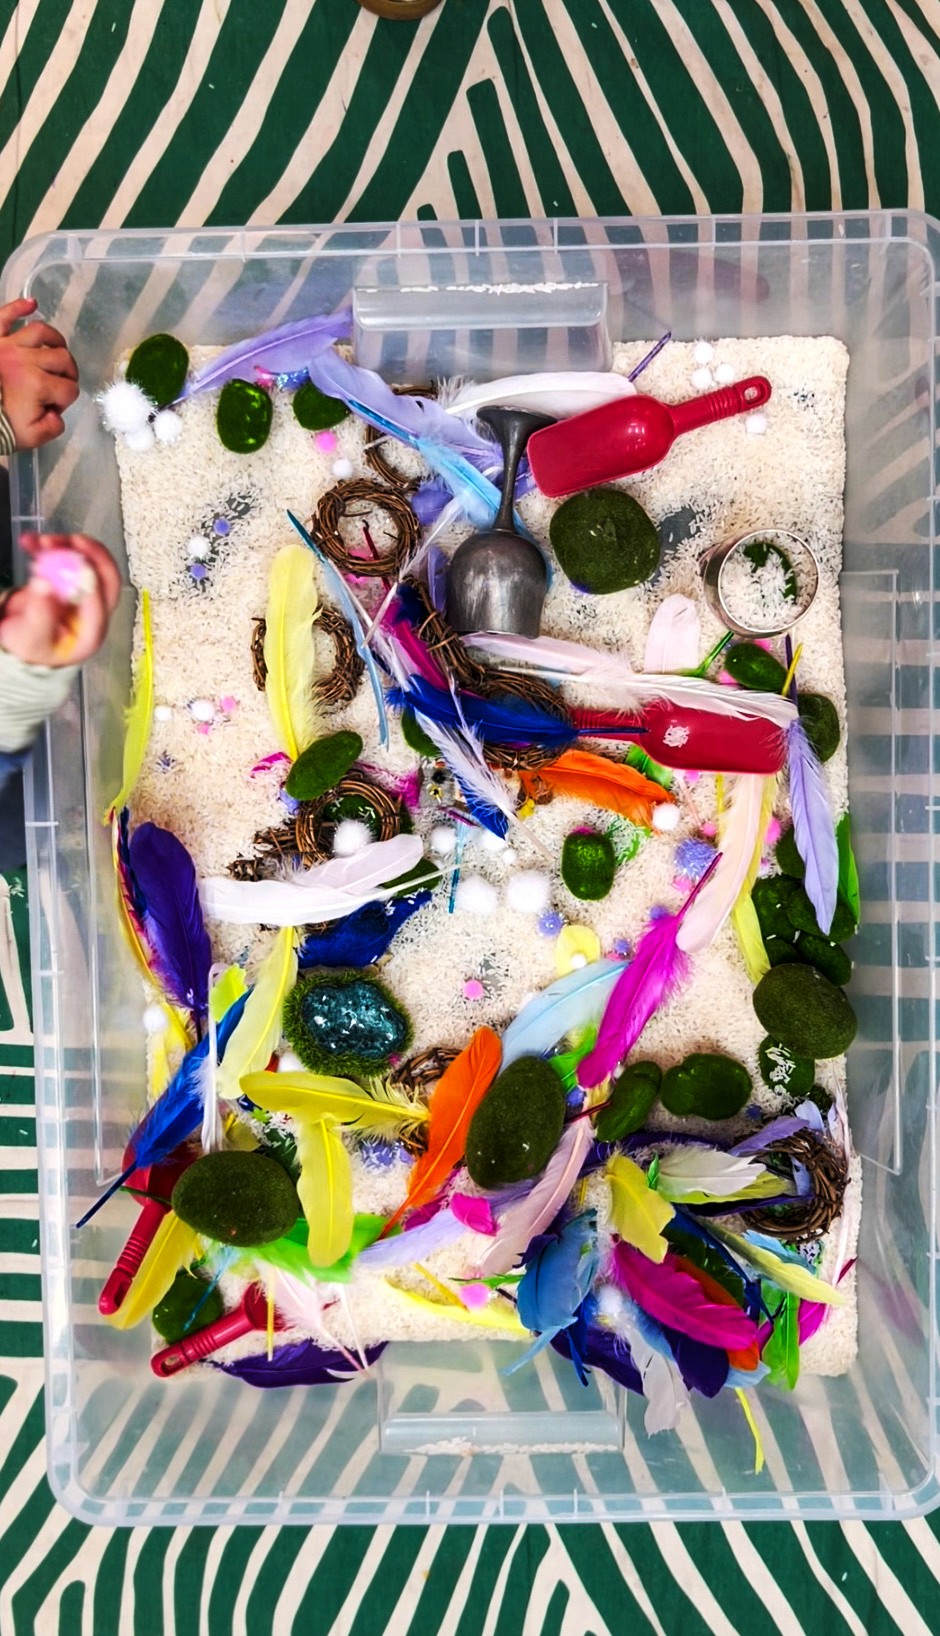
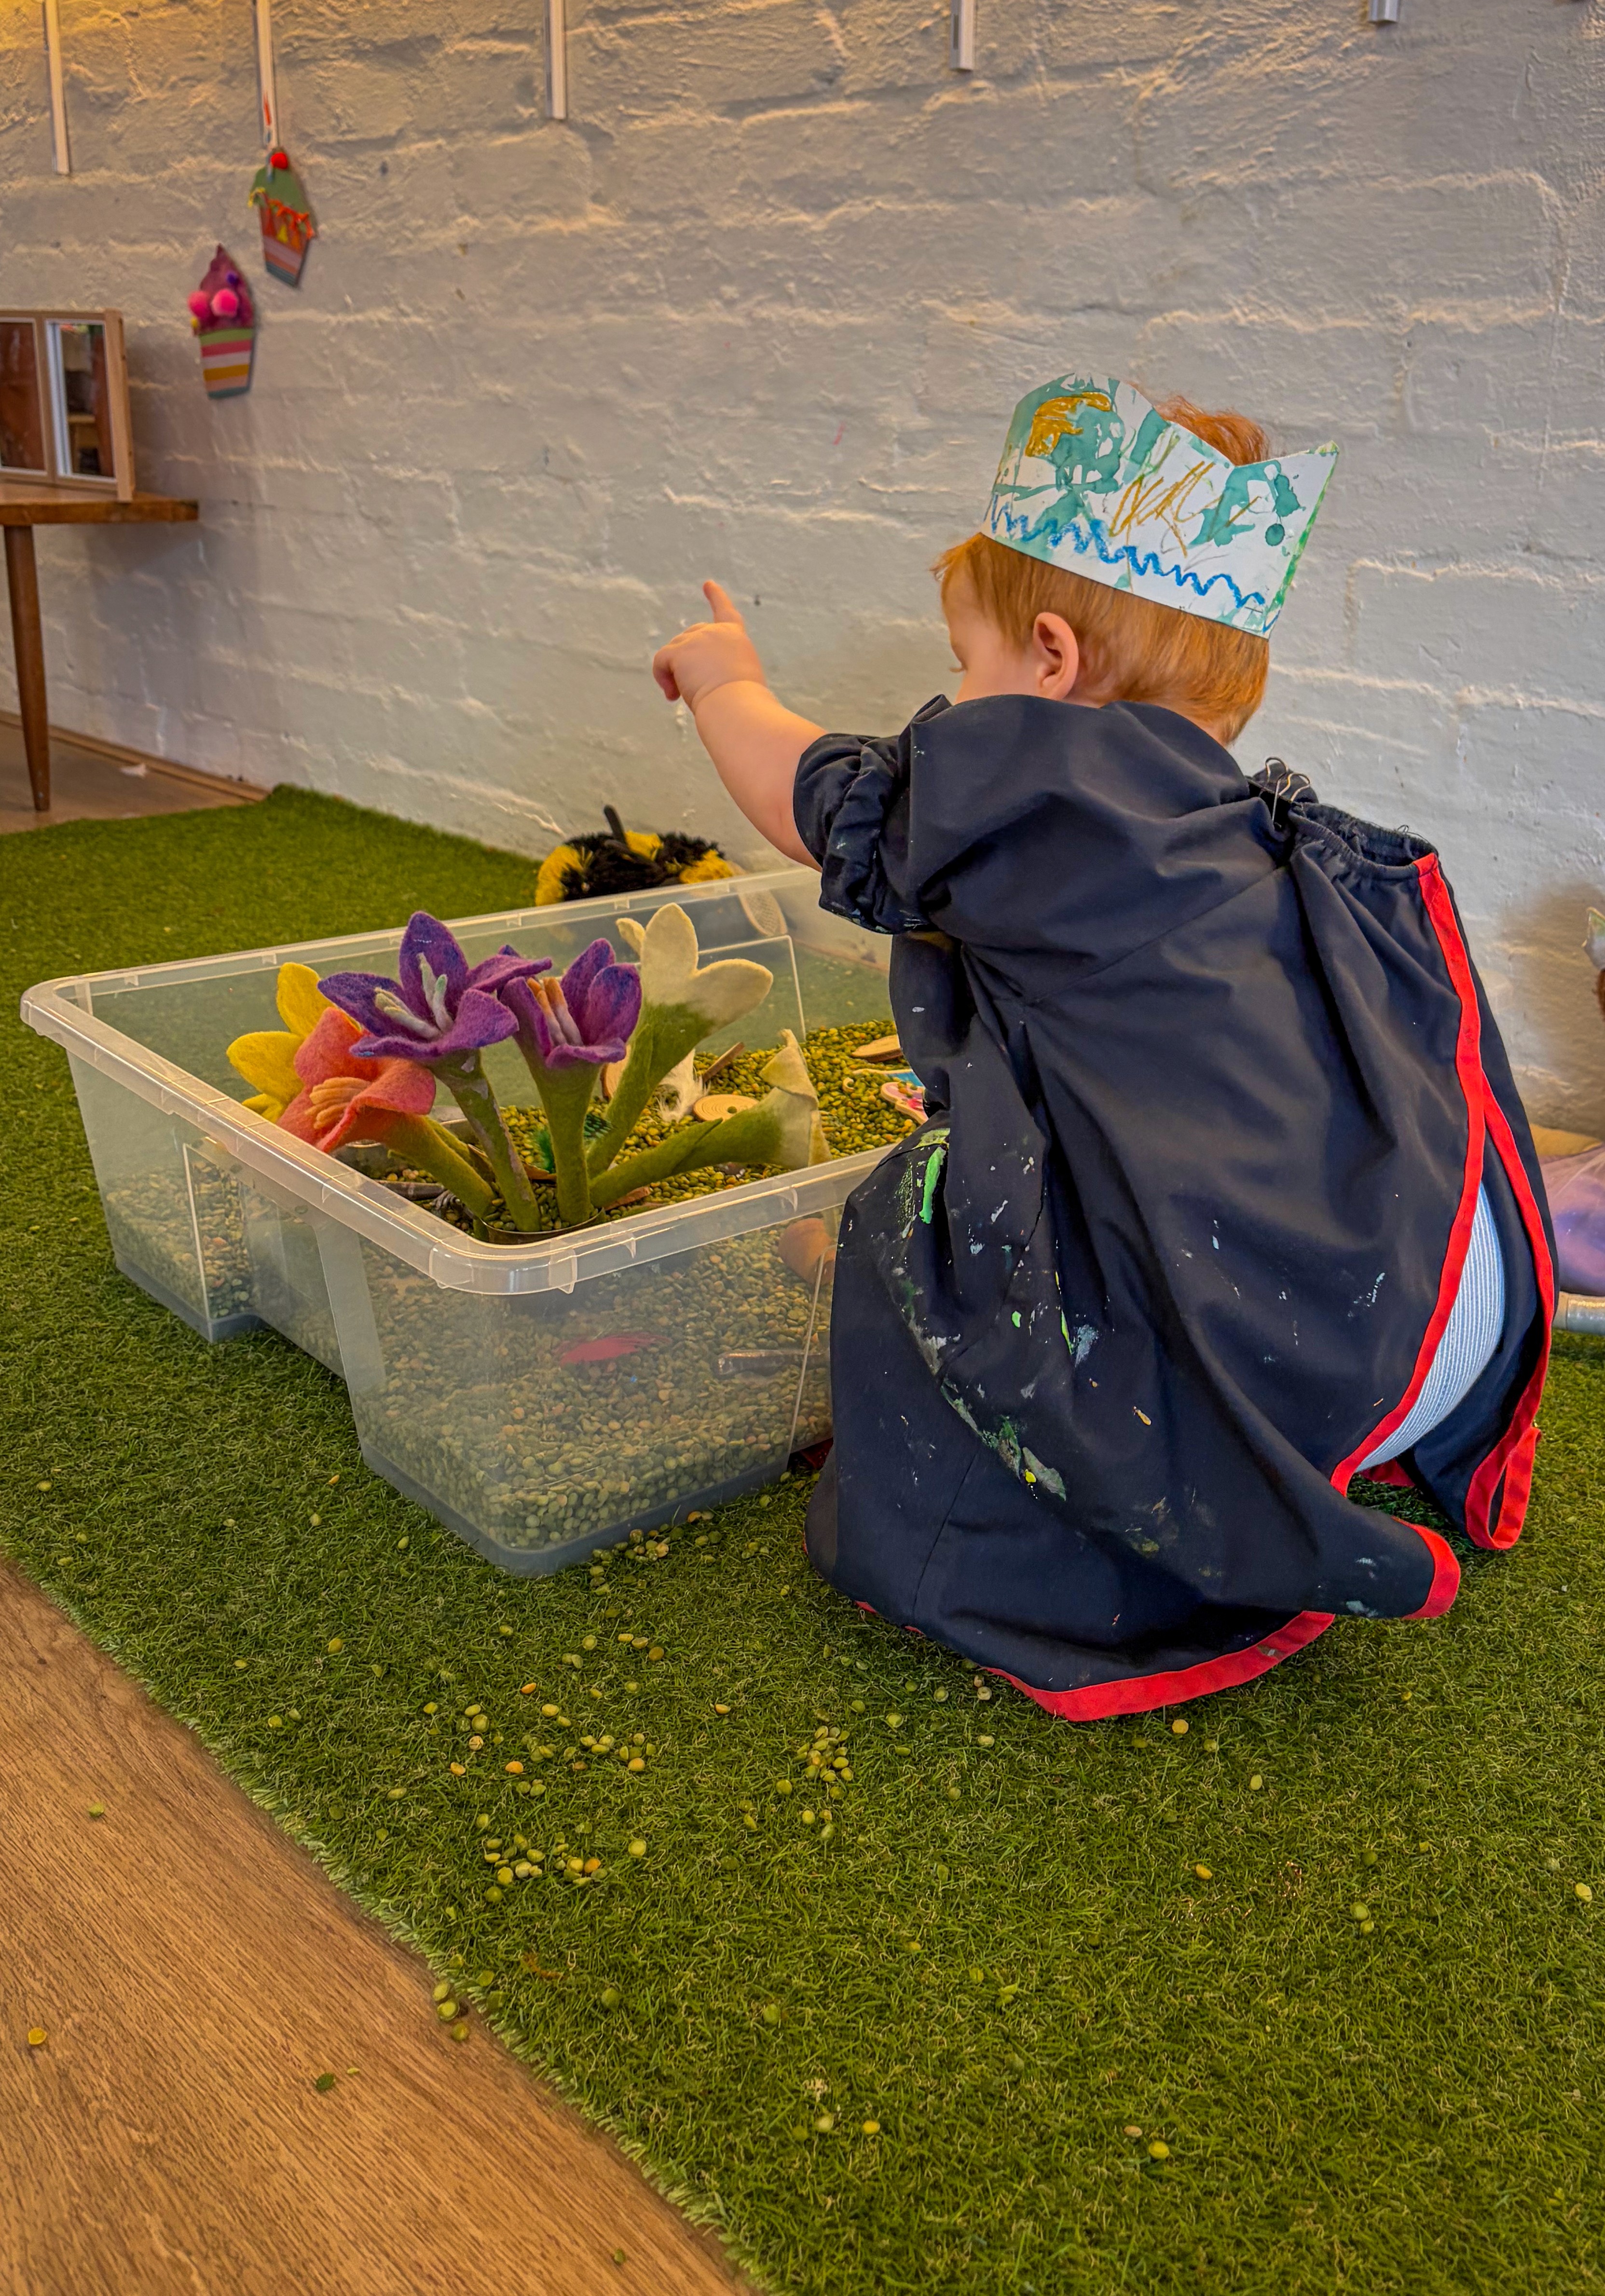
Things with Wings Sensory Play
The softest place for imaginary play
Bookmark
Sensory Play

The Set Up
Start with a base of white rice in a large tray or tub. Layer in colourful feathers, wooden eggs, little twine nests, pom poms and birds toys (or anything with wings!). At Smudge, I've curated a collection of felt birds and dragons from Tara's Treasures; they're the most incredible brand from Melbourne and support women in Nepal with their craft... we absolutely love them. IKEA also has the cutest little fluffy bees.
Pop a few picture books nearby to extend the play. Chris Haughton's Shh! We Have a Plan is perfect for this theme, and we also love Are You a Butterfly? by Judy Allen and Feathers for Phoebe by Rod Clement. Having books within reach gives children another way into the world you've set up.
Why Sensory Play?
Sensory play supports language development, fine motor skills, and emotional regulation. It gives children the space to explore textures and materials at their own pace, and the open-ended nature of it means there's no right or wrong way to engage. Set it up, step back, and let the play come!
Materials
• Large tray or tub
• White rice as a sensory base
• Colourful feathers
• Little twine nests
• Tara's Treasures felt birds and dragons
• Wooden eggs
Back to Top
Things with Wings Sensory Play
The softest place for imaginary play
Bookmark
Sensory Play
The Set Up
Start with a base of white rice in a large tray or tub. Layer in colourful feathers, wooden eggs, little twine nests, pom poms and birds toys (or anything with wings!). At Smudge, I've curated a collection of felt birds and dragons from Tara's Treasures; they're the most incredible brand from Melbourne and support women in Nepal with their craft... we absolutely love them. IKEA also has the cutest little fluffy bees.
Pop a few picture books nearby to extend the play. Chris Haughton's Shh! We Have a Plan is perfect for this theme, and we also love Are You a Butterfly? by Judy Allen and Feathers for Phoebe by Rod Clement. Having books within reach gives children another way into the world you've set up.
Why Sensory Play?
Sensory play supports language development, fine motor skills, and emotional regulation. It gives children the space to explore textures and materials at their own pace, and the open-ended nature of it means there's no right or wrong way to engage. Set it up, step back, and let the play come!
Materials
• Large tray or tub
• White rice as a sensory base
• Colourful feathers
• Little twine nests
• Tara's Treasures felt birds and dragons
• Wooden eggs
Back to Top
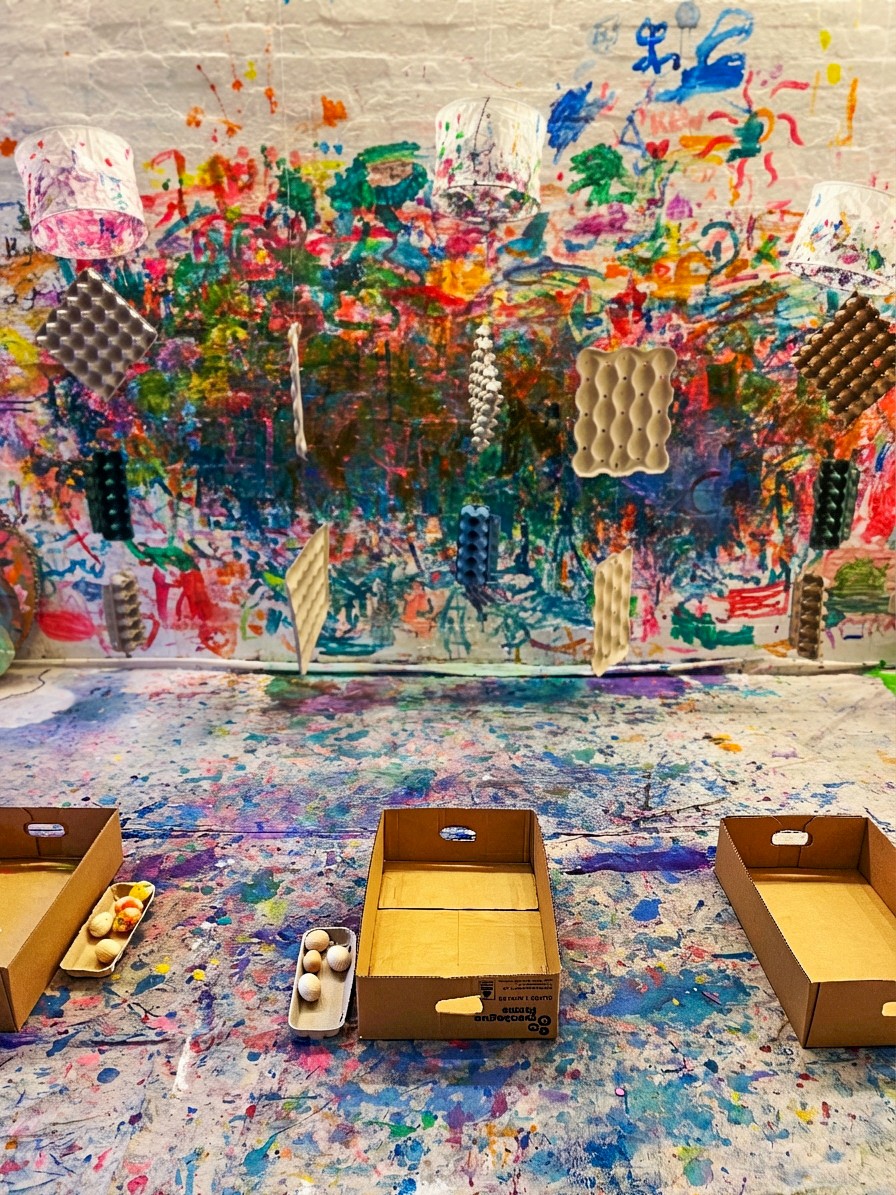
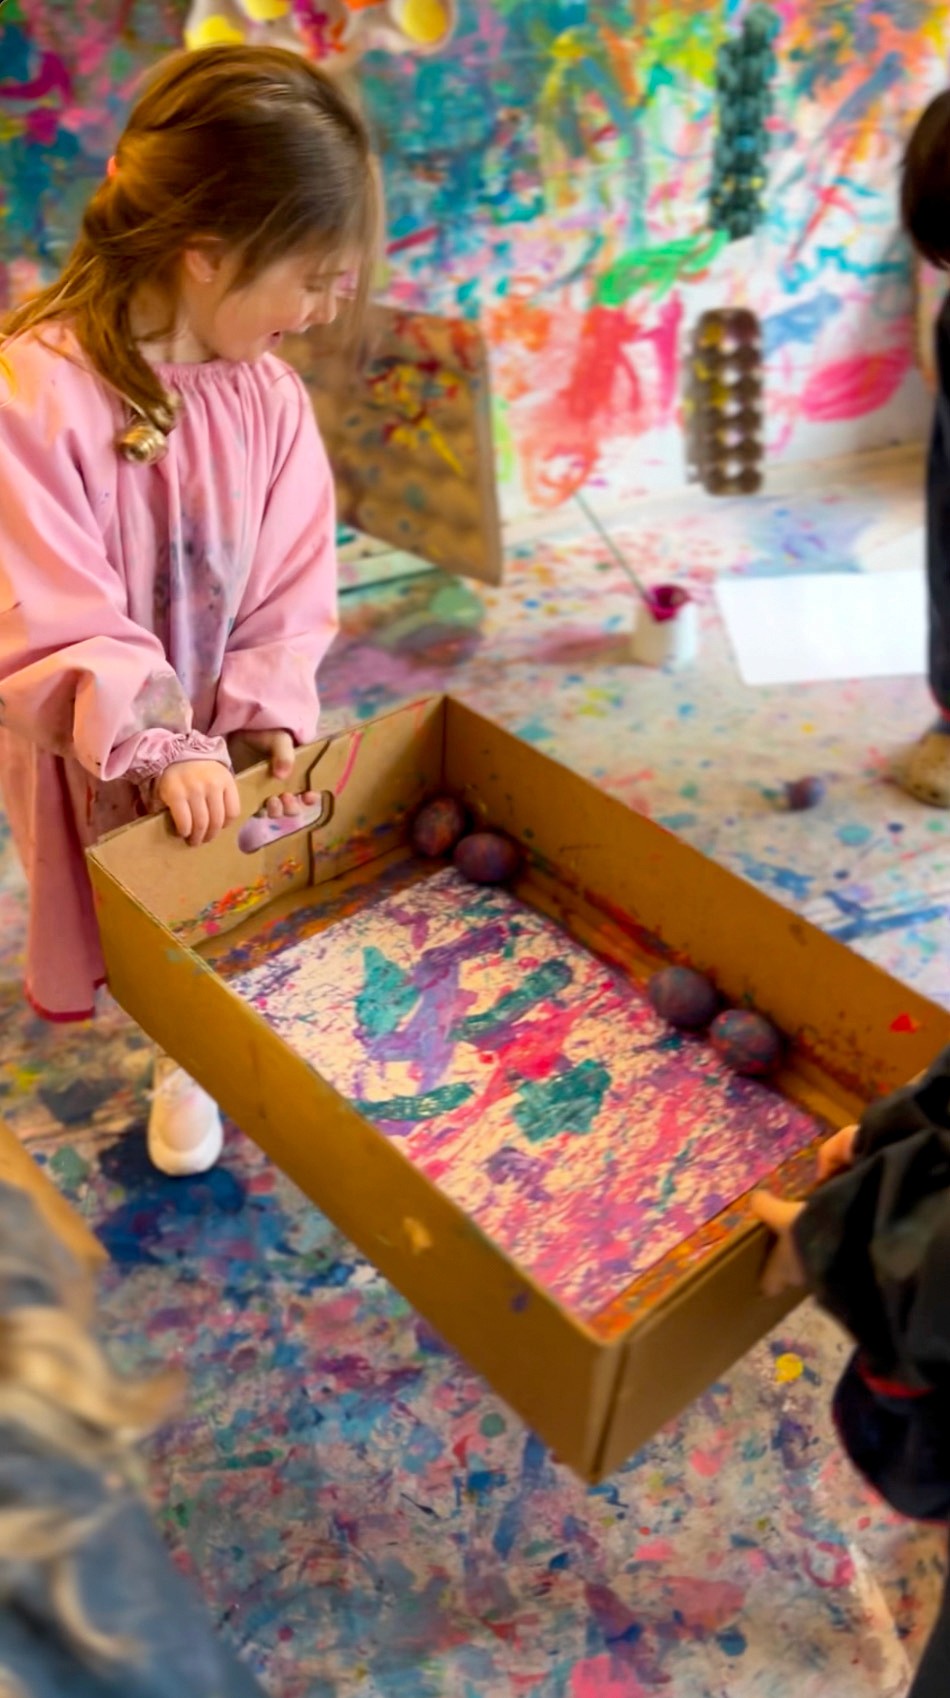
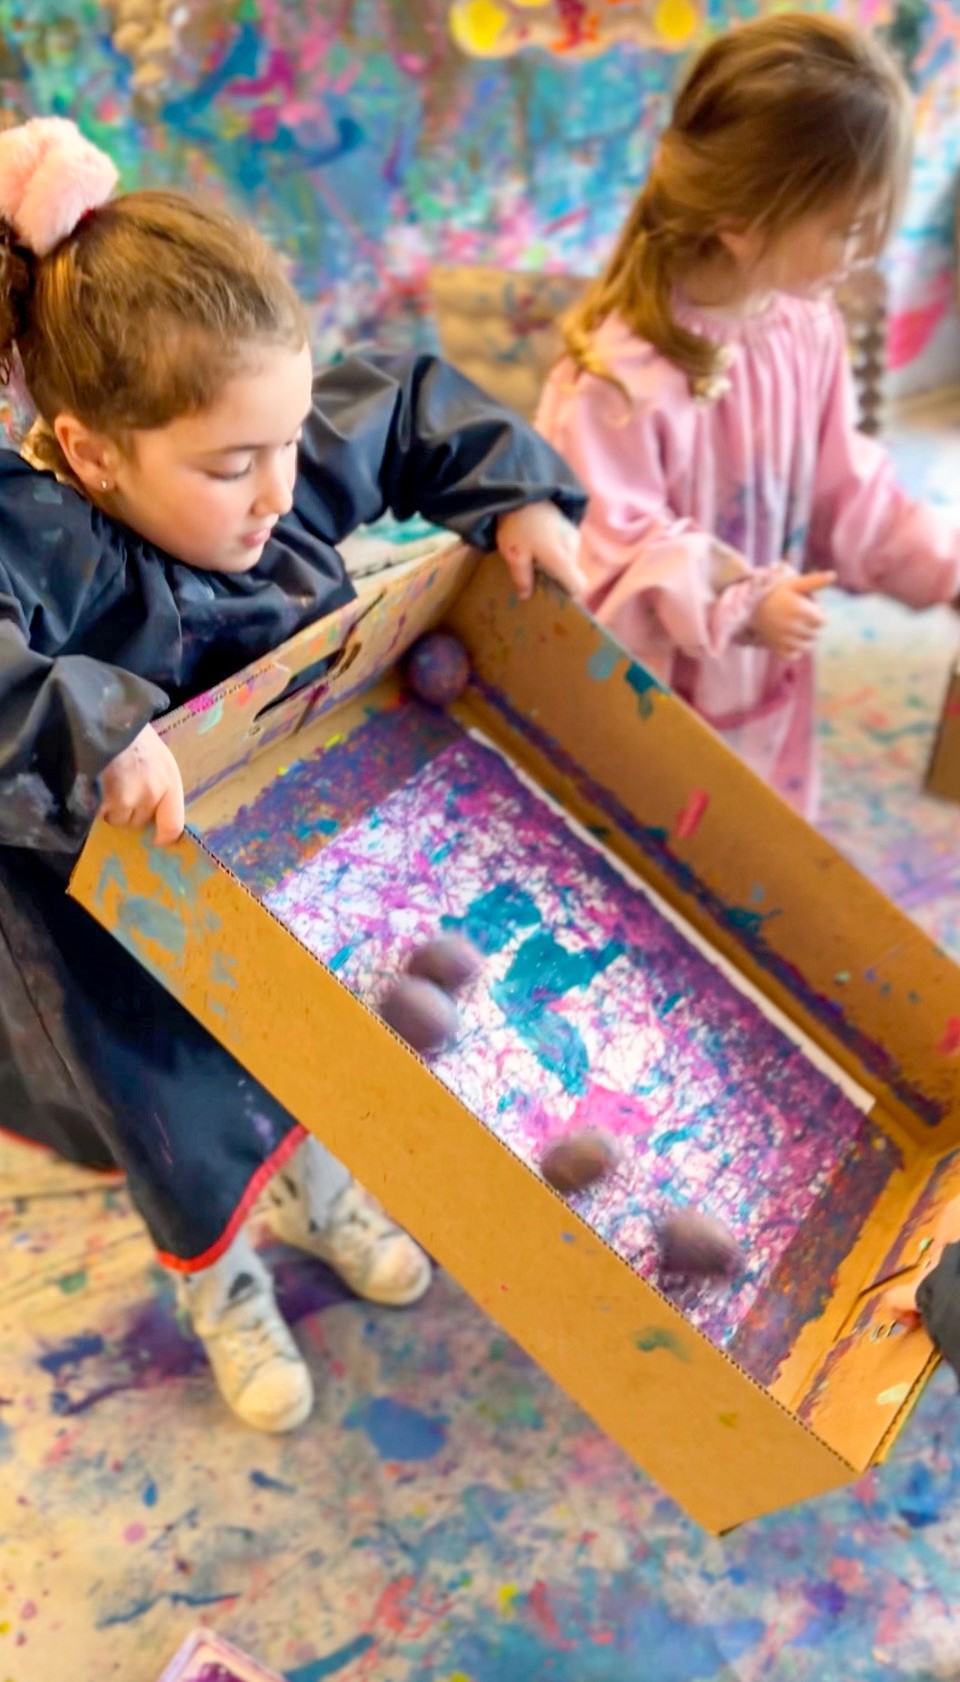
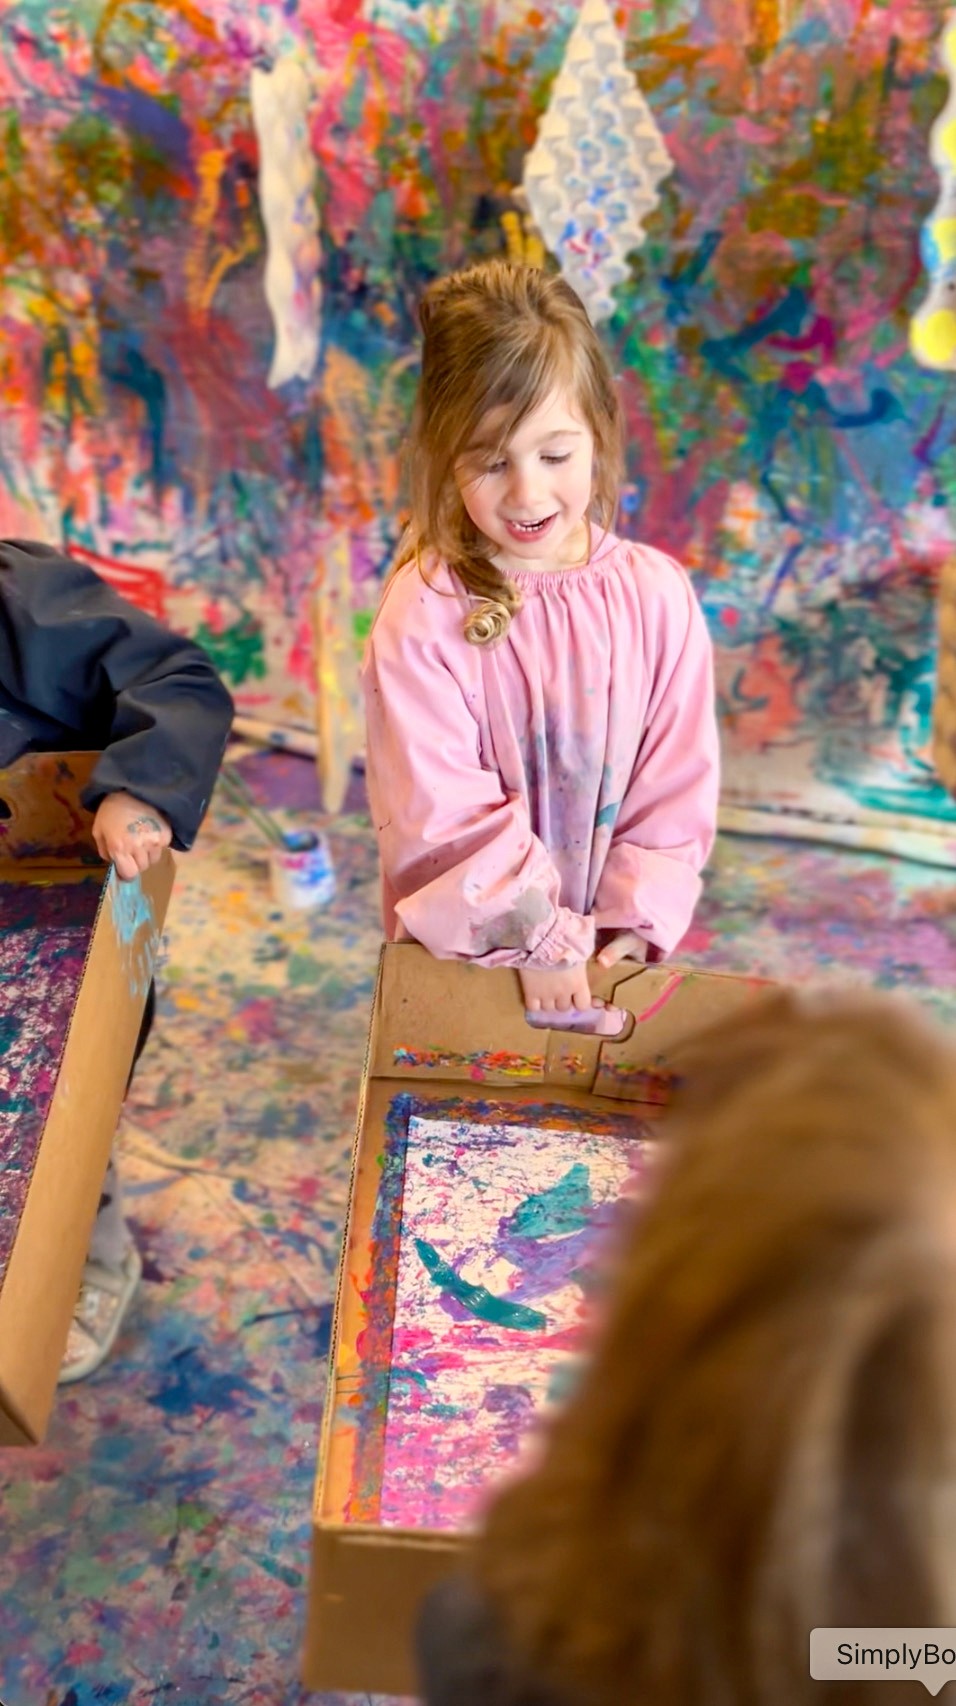
Egg Rolling
Roll wooden eggs through rivers of paint in big, bold, beautiful chaos.
Bookmark
Creative Exploration

The Set Up
Big, collaborative, a little bit messy, and the results are always spectacular. If you're after an art experience that gets everyone moving and laughing, this is it!
We use the big cardboard fruit boxes from our local greengrocer. They have nice high sides that keep things (mostly) contained. Pop an A3 sheet of paper in the bottom, and offer wooden eggs for rolling. You could use any egg or ball shape, just make sure it's heavier than a ping pong ball…those just get stuck in the paint and don't really roll.
Set out paint brushes and jars of paint so artists can plop colour onto the page.

The Making
Artists brush or squeeze paint onto the paper, drop in the eggs, and start rolling. Tilt the box, shake it gently, or just roll the eggs with your hands. The tracks and trails the eggs leave behind are mesmerising... swirling, overlapping, mixing. Every time you add a new colour, the pattern changes.
This is a wonderful one for teamwork. Two or three kids holding the same box and tilting it together creates a beautiful shared experience. But it works just as well solo. There's something incredibly satisfying about rolling an egg through fresh paint and watching the lines appear.
When the paper is covered, pull it out to dry and pop in a fresh sheet.

Materials
• Large cardboard boxes
• A3 paper
• Wooden eggs
• Poster or tempera paints in jars
• Brushes for applying paint
• Optional: marbles or golf balls for different effects (or any balls heavier than ping pong balls)
Back to Top
Egg Rolling
Roll wooden eggs through rivers of paint in big, bold, beautiful chaos.
Bookmark
Creative Exploration
The Set Up
Big, collaborative, a little bit messy, and the results are always spectacular. If you're after an art experience that gets everyone moving and laughing, this is it!
We use the big cardboard fruit boxes from our local greengrocer. They have nice high sides that keep things (mostly) contained. Pop an A3 sheet of paper in the bottom, and offer wooden eggs for rolling. You could use any egg or ball shape, just make sure it's heavier than a ping pong ball…those just get stuck in the paint and don't really roll.
Set out paint brushes and jars of paint so artists can plop colour onto the page.
The Making
Artists brush or squeeze paint onto the paper, drop in the eggs, and start rolling. Tilt the box, shake it gently, or just roll the eggs with your hands. The tracks and trails the eggs leave behind are mesmerising... swirling, overlapping, mixing. Every time you add a new colour, the pattern changes.
This is a wonderful one for teamwork. Two or three kids holding the same box and tilting it together creates a beautiful shared experience. But it works just as well solo. There's something incredibly satisfying about rolling an egg through fresh paint and watching the lines appear.
When the paper is covered, pull it out to dry and pop in a fresh sheet.
Materials
• Large cardboard boxes
• A3 paper
• Wooden eggs
• Poster or tempera paints in jars
• Brushes for applying paint
• Optional: marbles or golf balls for different effects (or any balls heavier than ping pong balls)
Back to Top
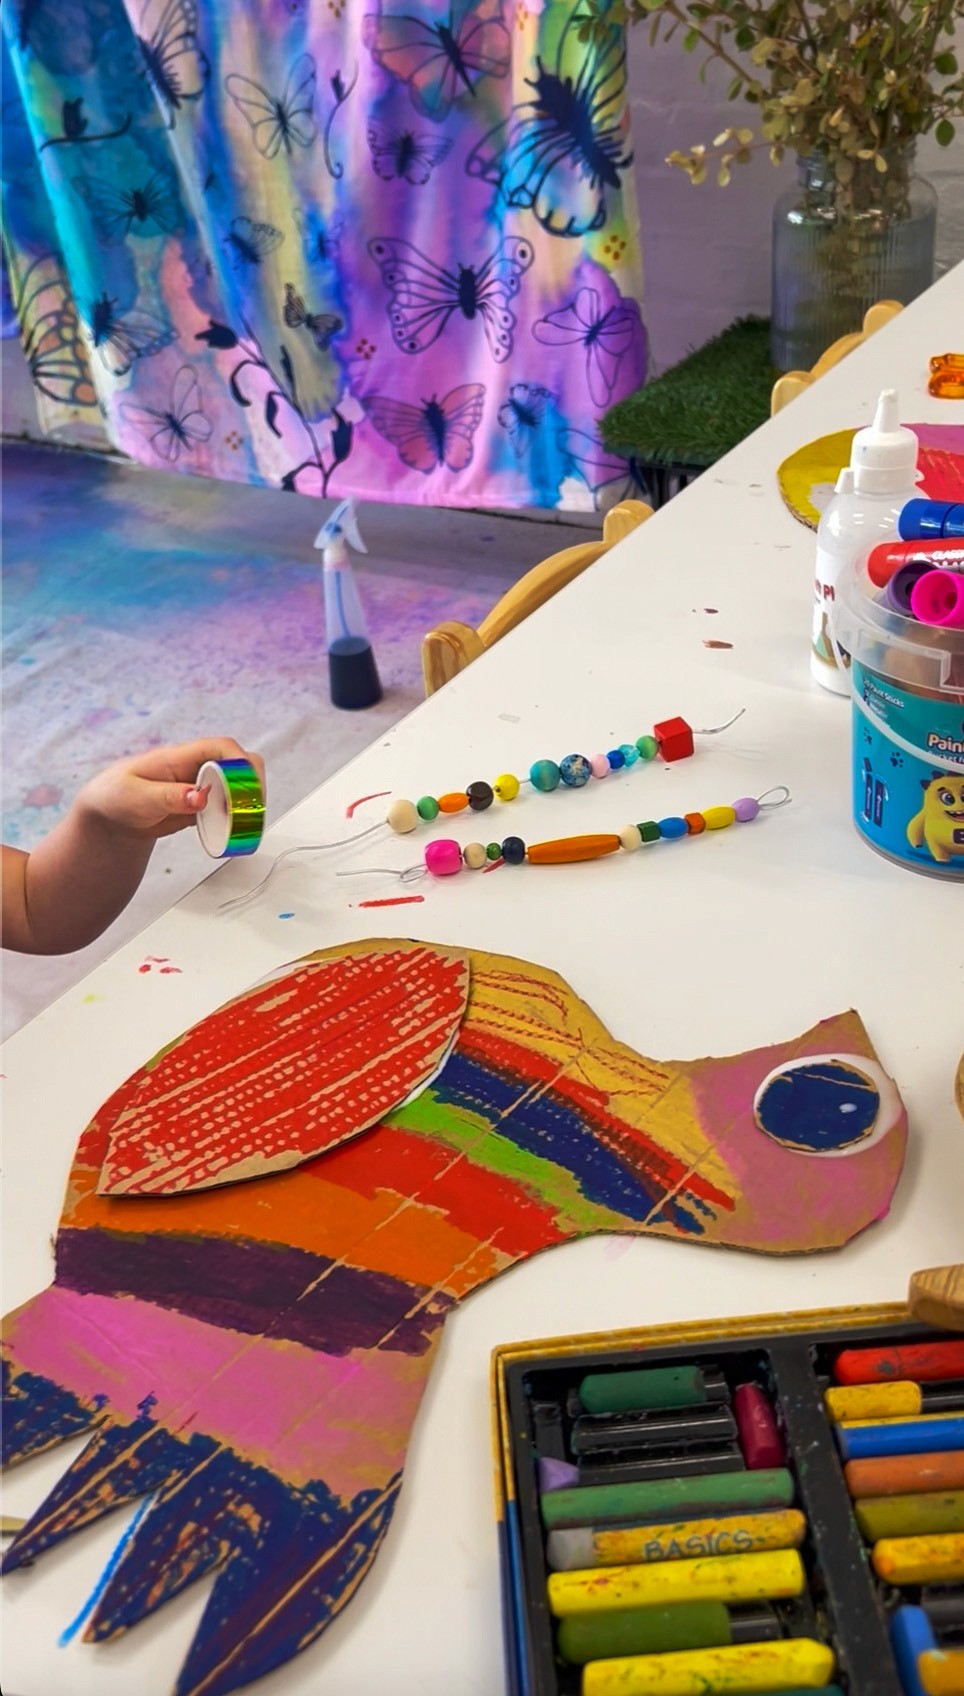
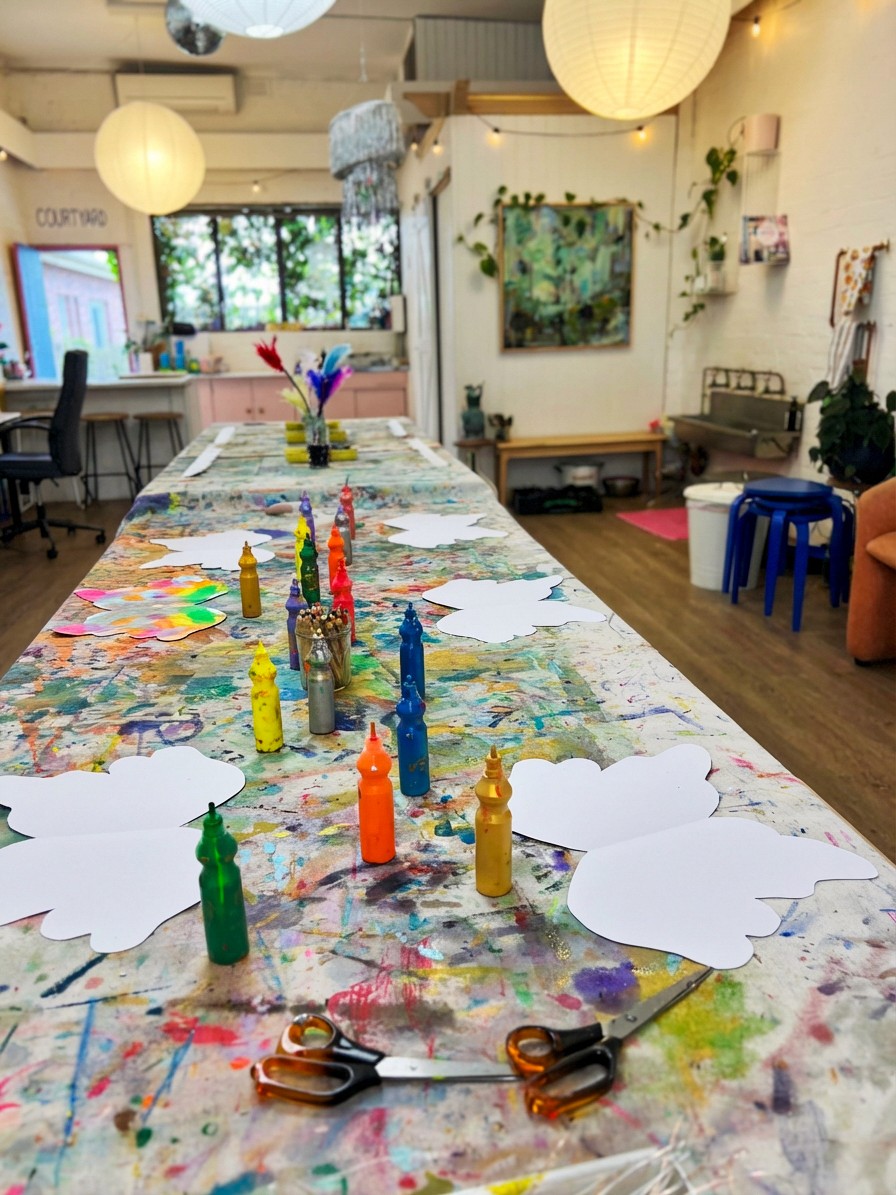
Paint Scraping Wings
Squeeze, smoosh, scrape, and reveal
Bookmark
Painting & Drawing

The Set Up
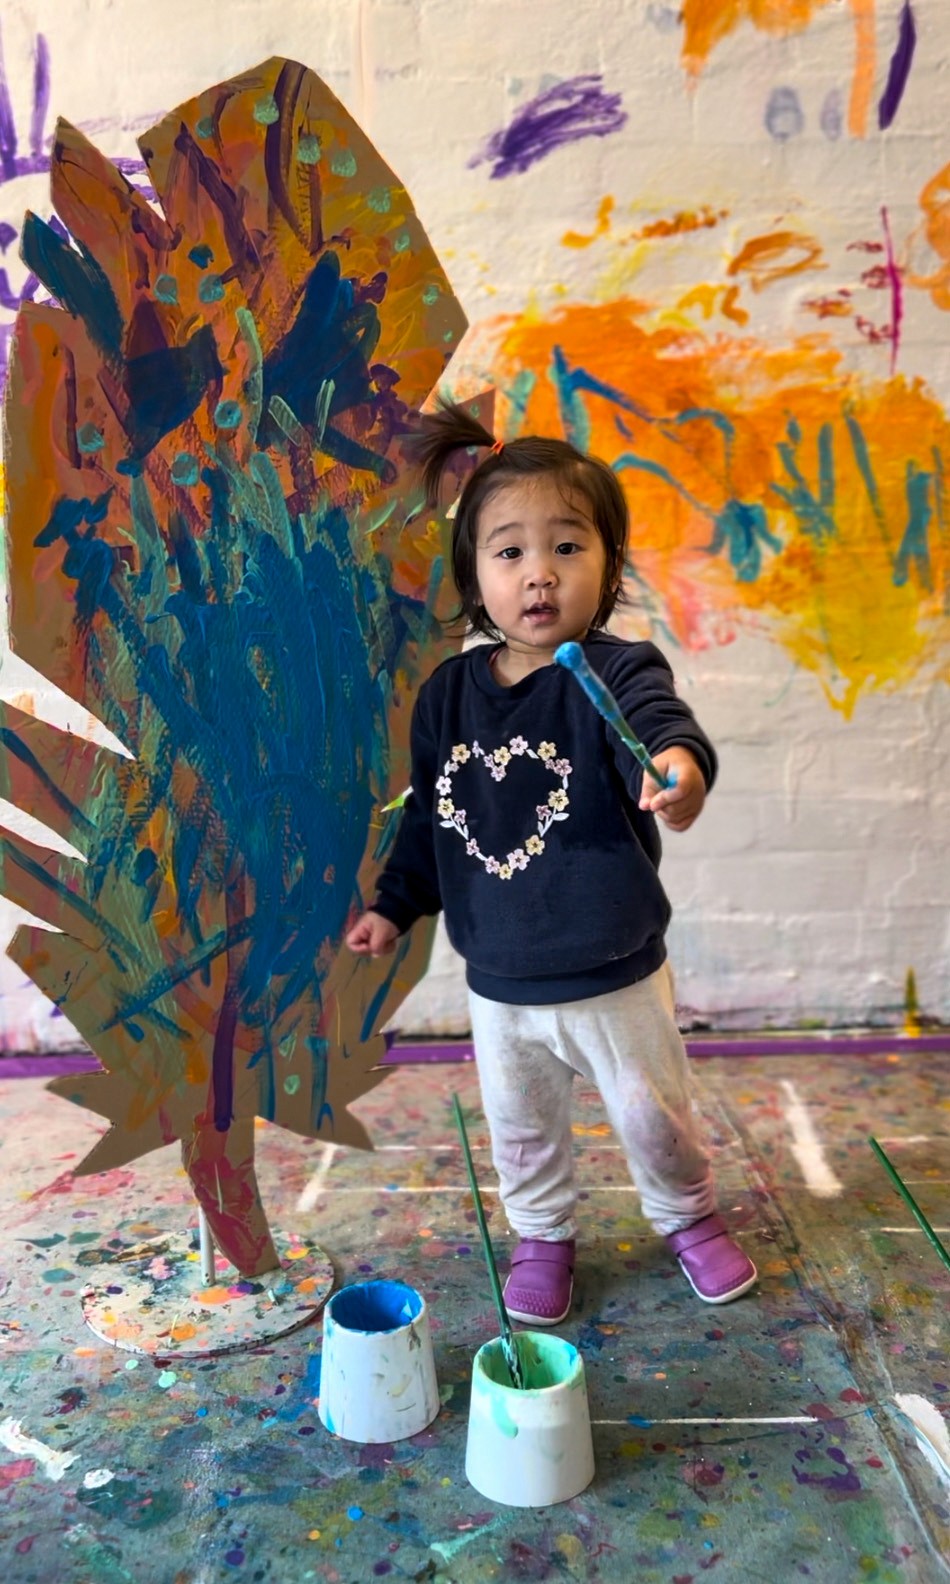
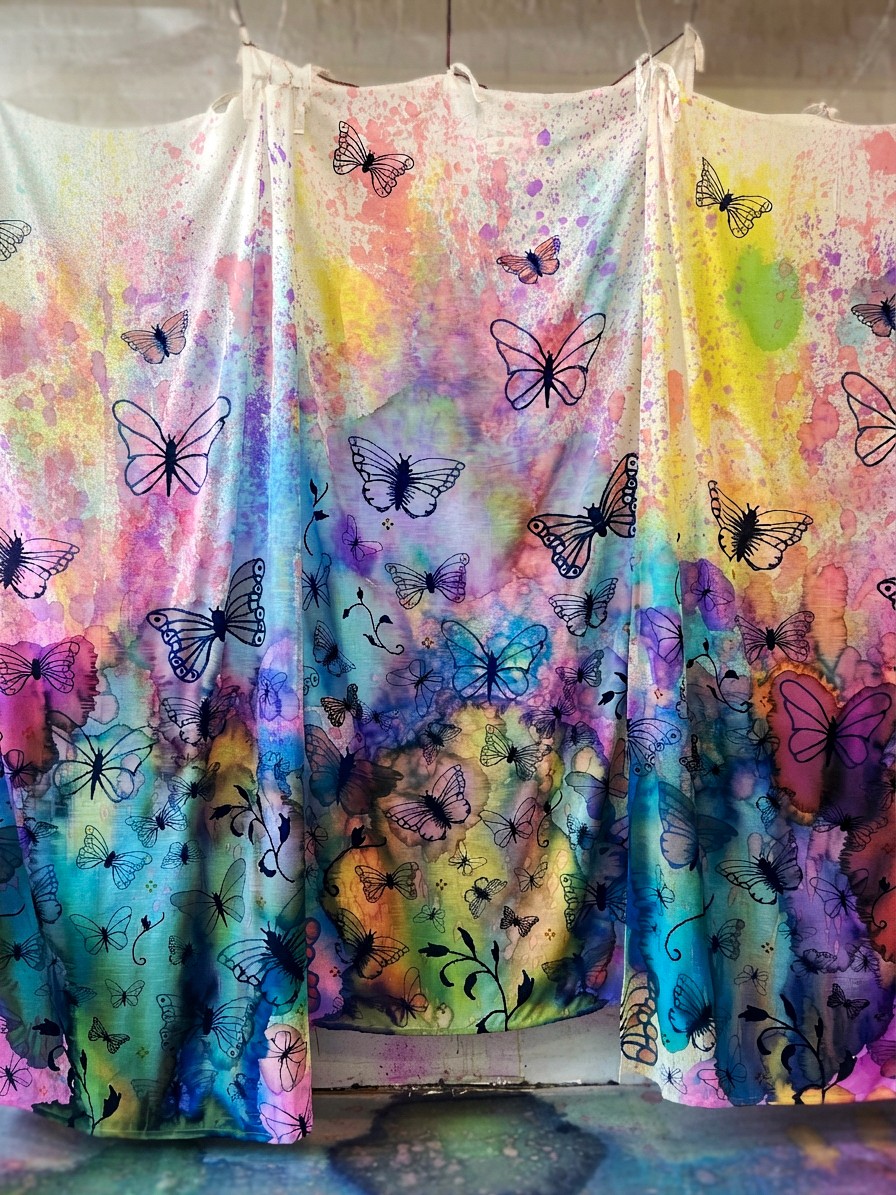
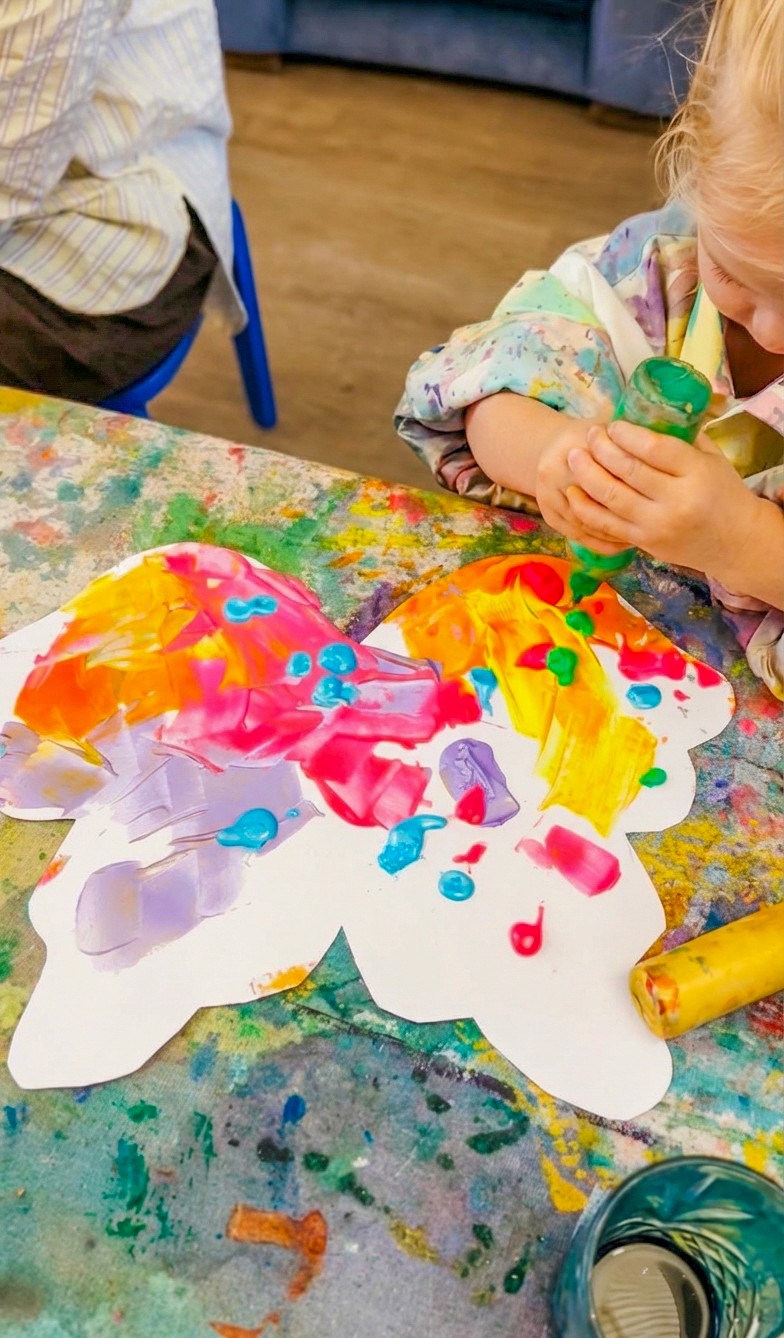
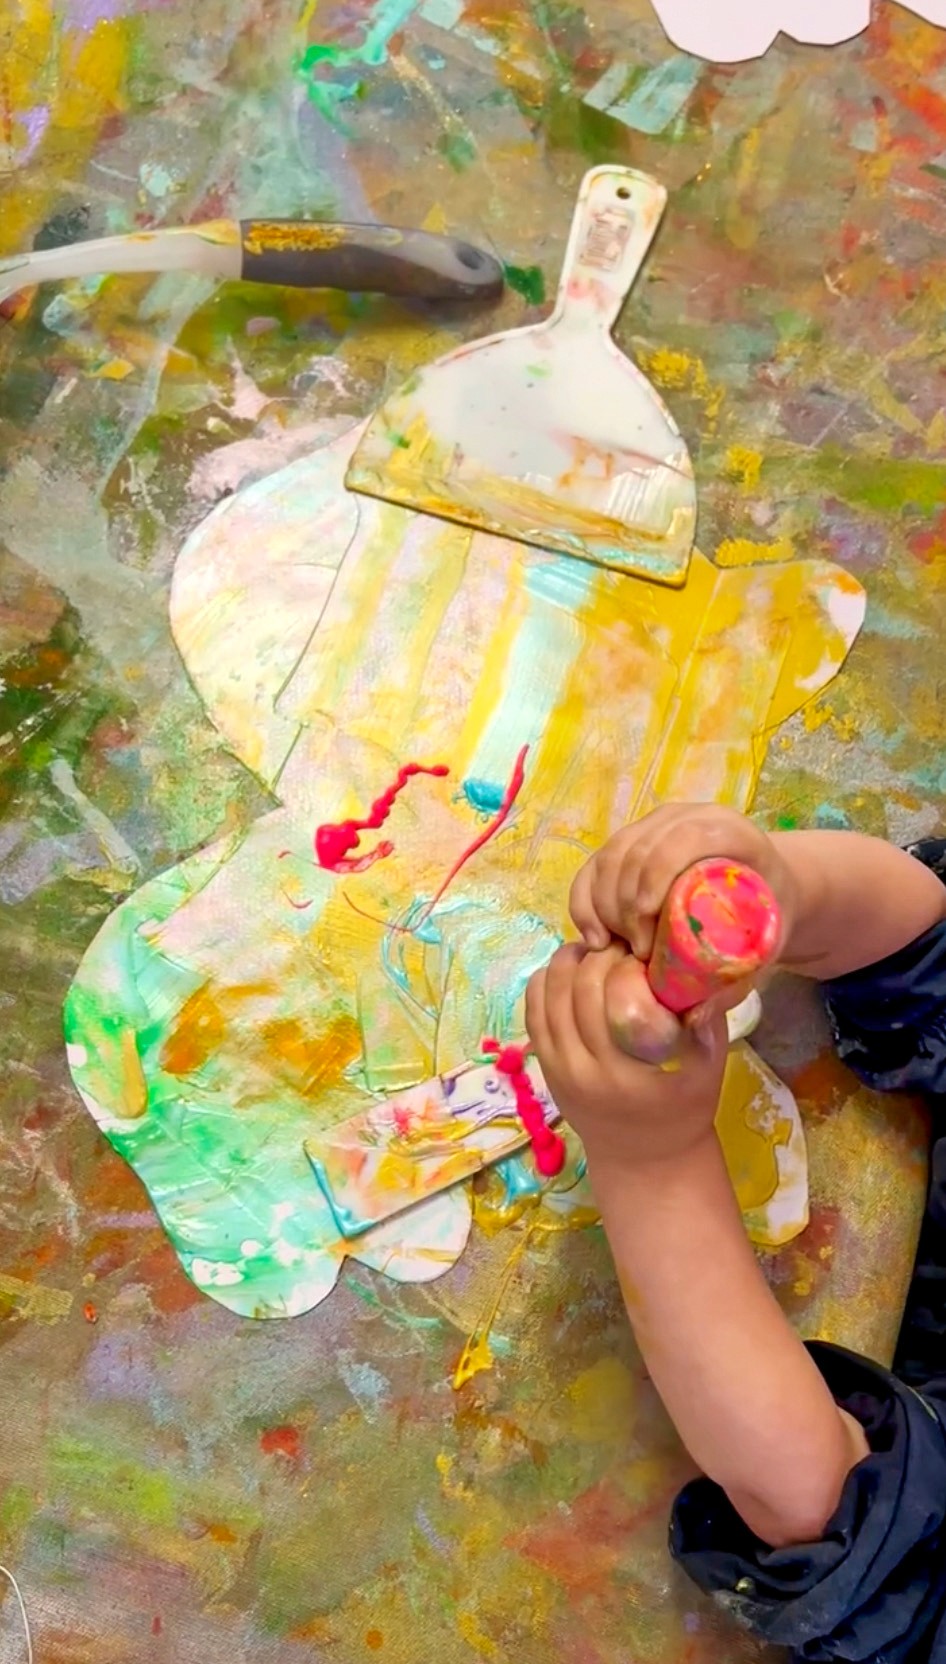
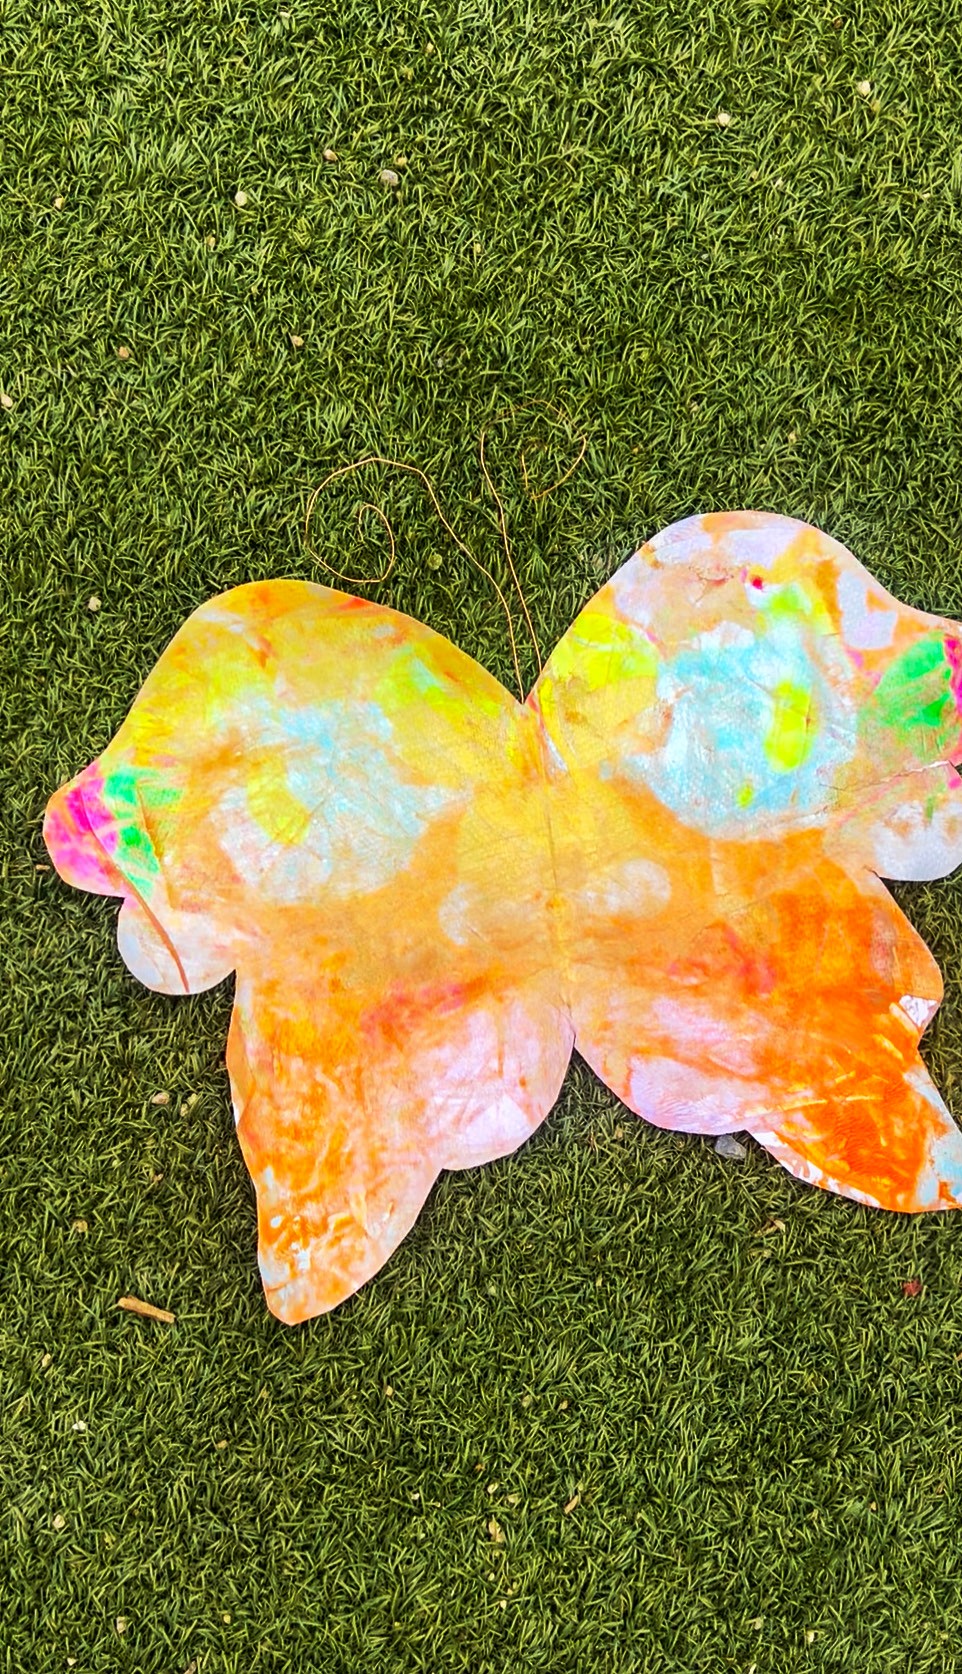
Paint scraping is a process that kids (and adults) absolutely love because it feels like you're breaking the rules a little. Instead of carefully painting with a brush, you're squeezing and scraping. Paired with butterfly wing shapes, the results are stunning; big, bold, bright, and incredibly satisfying!
Cut large butterfly wing shapes from thick paper or cardstock, 180gsm or above works best so it holds up to the paint. You can also use old business cards, pieces of cardboard, or squeegees from the hardware store as scraping tools.
I love using squeezy paints for this activity. The IKEA MÅLA bottles are amazing. They're gorgeously bright colours, refillable (so you just pop the tops off and add any poster or tempera paint you like), and the hole in the tip is really small so paint isn't going to stream out when little hands squeeze. They improve hand muscles and foster independence, which is a bonus. Plus, they're a great tool for talking about control and flow of paint.

The Making
Artists squeeze lines, blobs, and squiggles of paint onto their butterfly wing shape, then drag a scraper or old business card across the surface to spread and blend the colours. The colours mix and merge as the scraper moves, creating these incredible streaks and gradients that are different every single time.
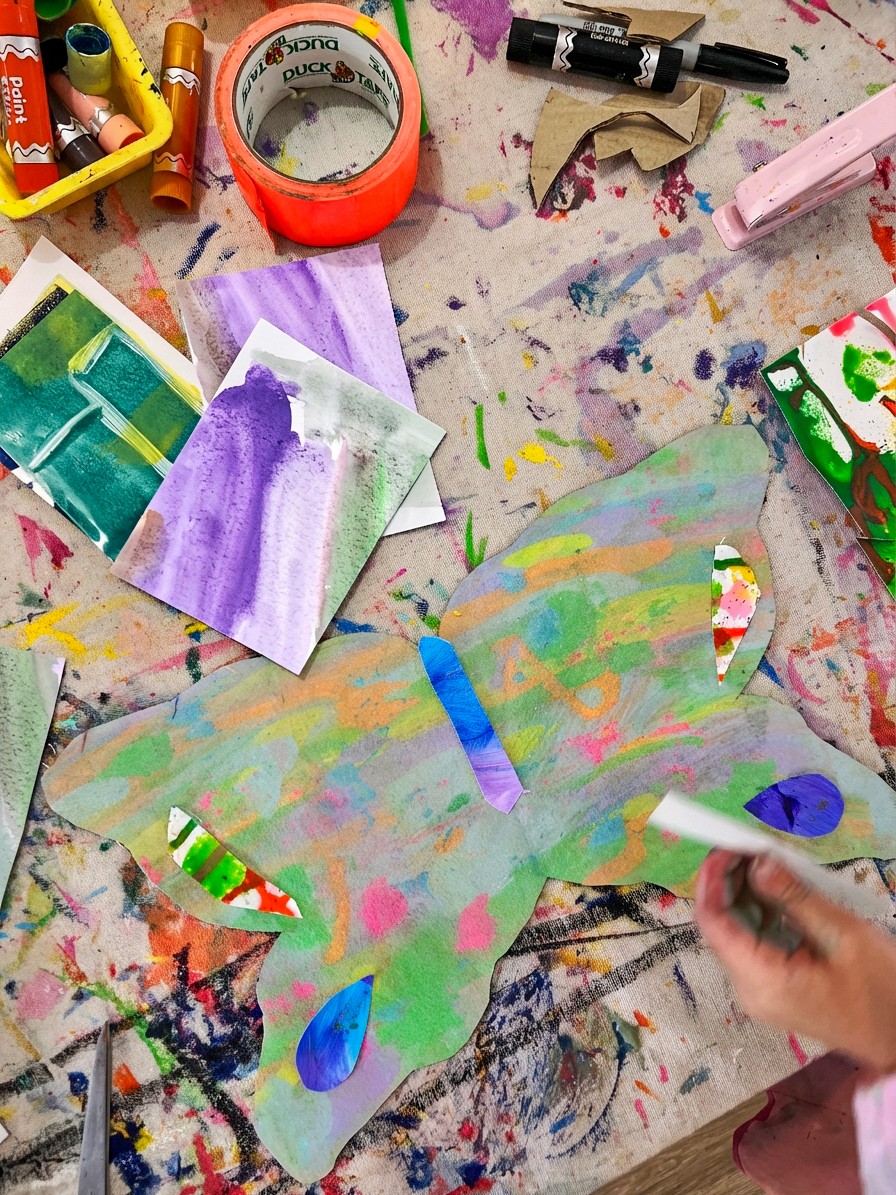
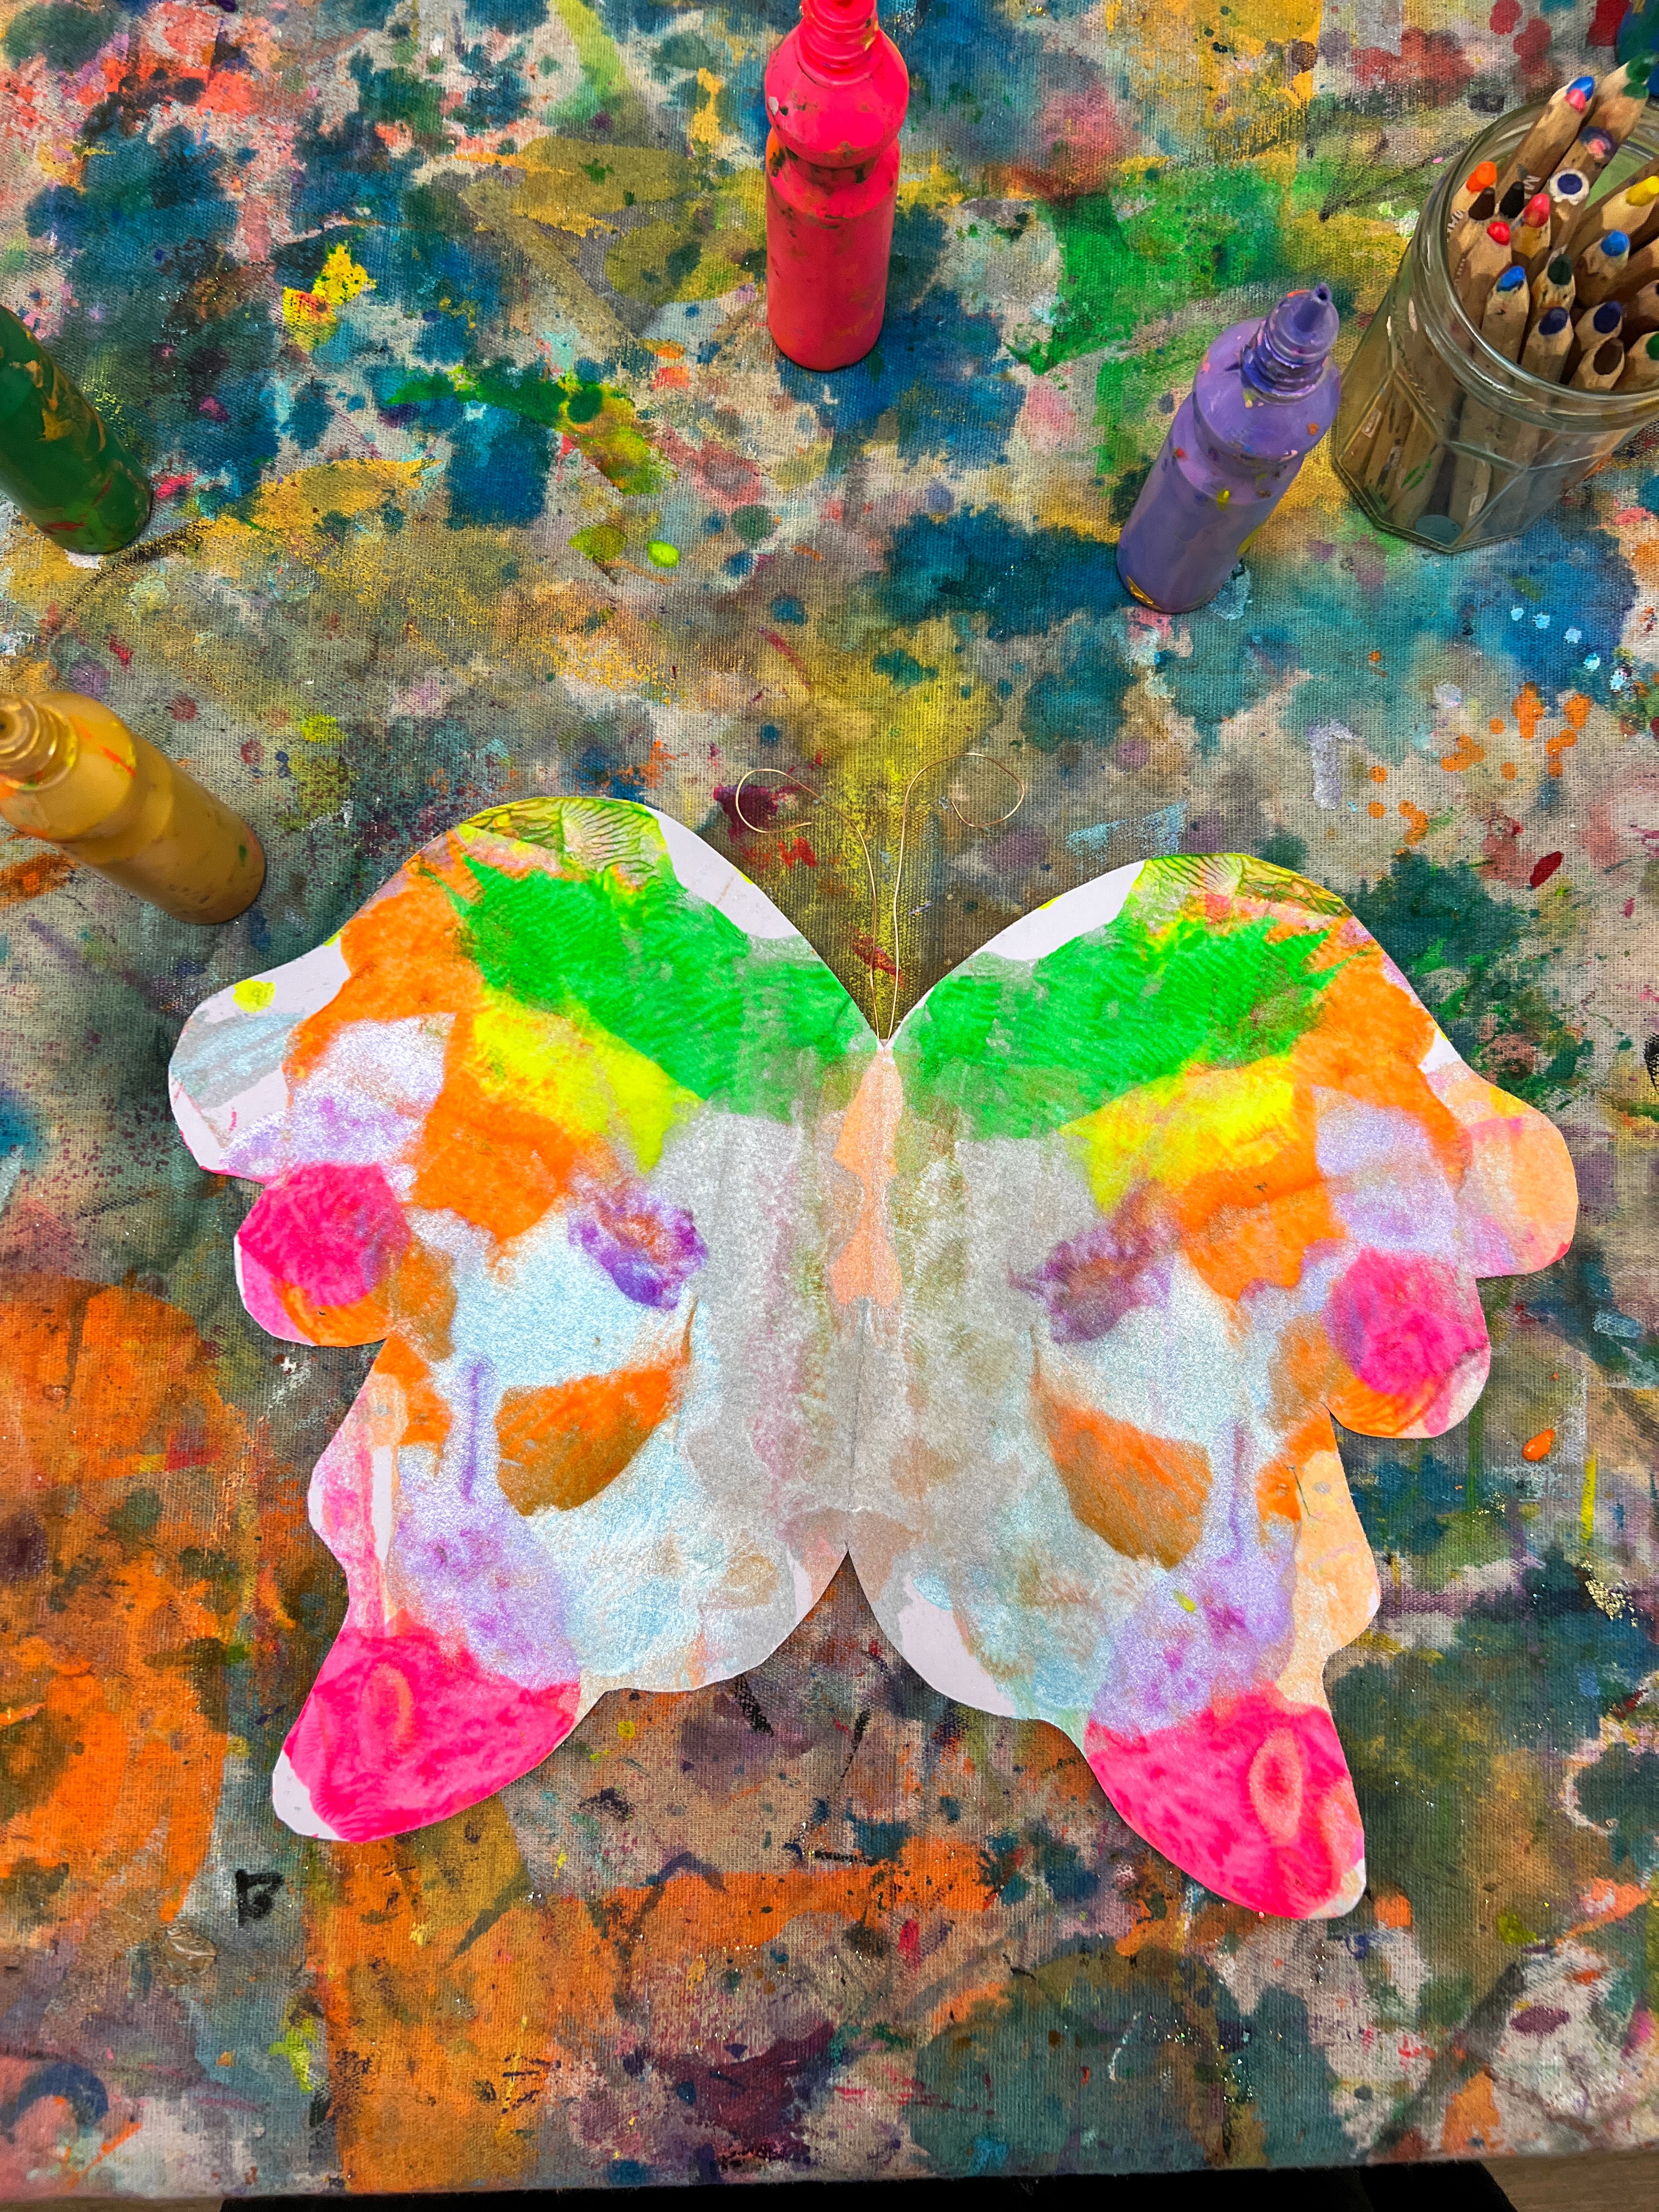
Try folding the paper in half and pressing to create a symmetrical print. This is a lovely moment to talk about symmetry, looking at images of real butterflies and noticing how the patterns mirror on each side. Open it up and the surprise is always wonderful!
Artists can also add collage materials (feathers, sequins, tissue paper) once the paint is dry, or layer multiple rounds of scraping for a really rich, textured surface. Look at images of butterflies, moths, and other winged insects for inspiration.

Variations
Use a fork, comb, or textured tool instead of a flat scraper for different effects.
Once dry, add string, elastic or ribbon to create wearable wings!

Materials
• Thick paper or cardstock (180gsm+) cut into large wing shapes
• Squeegees, paint scrapers, or old business cards for scraping
• Squeezy paint bottles (IKEA MÅLA bottles are brilliant)
• Poster or tempera paints in bright colours
• Collage materials for embellishing (feathers, sequins, tissue paper)
• Images of butterflies and winged insects for inspiration
• Optional: glitter, metallic paints for extra sparkle
Gallery

Back to Top
Paint Scraping Wings
Squeeze, smoosh, scrape, and reveal
Bookmark
Painting & Drawing
The Set Up
Paint scraping is a process that kids (and adults) absolutely love because it feels like you're breaking the rules a little. Instead of carefully painting with a brush, you're squeezing and scraping. Paired with butterfly wing shapes, the results are stunning; big, bold, bright, and incredibly satisfying!
Cut large butterfly wing shapes from thick paper or cardstock, 180gsm or above works best so it holds up to the paint. You can also use old business cards, pieces of cardboard, or squeegees from the hardware store as scraping tools.
I love using squeezy paints for this activity. The IKEA MÅLA bottles are amazing. They're gorgeously bright colours, refillable (so you just pop the tops off and add any poster or tempera paint you like), and the hole in the tip is really small so paint isn't going to stream out when little hands squeeze. They improve hand muscles and foster independence, which is a bonus. Plus, they're a great tool for talking about control and flow of paint.
The Making
Artists squeeze lines, blobs, and squiggles of paint onto their butterfly wing shape, then drag a scraper or old business card across the surface to spread and blend the colours. The colours mix and merge as the scraper moves, creating these incredible streaks and gradients that are different every single time.
Try folding the paper in half and pressing to create a symmetrical print. This is a lovely moment to talk about symmetry, looking at images of real butterflies and noticing how the patterns mirror on each side. Open it up and the surprise is always wonderful!
Artists can also add collage materials (feathers, sequins, tissue paper) once the paint is dry, or layer multiple rounds of scraping for a really rich, textured surface. Look at images of butterflies, moths, and other winged insects for inspiration.
Variations
Use a fork, comb, or textured tool instead of a flat scraper for different effects.
Once dry, add string, elastic or ribbon to create wearable wings!
Materials
• Thick paper or cardstock (180gsm+) cut into large wing shapes
• Squeegees, paint scrapers, or old business cards for scraping
• Squeezy paint bottles (IKEA MÅLA bottles are brilliant)
• Poster or tempera paints in bright colours
• Collage materials for embellishing (feathers, sequins, tissue paper)
• Images of butterflies and winged insects for inspiration
• Optional: glitter, metallic paints for extra sparkle
Gallery
Back to Top
